
Recipes for chili can vary greatly from one family to the next. Our neighborhood’s annual chili party is always fun with all the variety and sampling from as many pots as we can! Personally I have two recipes that my family absolutely loves; a fabulous white chicken chili, and the red Hearty Garden Chili in this post. This particular chili is very chunky and filling, with beans, lots of ground beef, vegetables, and overall substance. It is wonderfully flavorful and nutritious, and spicy too (about medium), although the heat can easily be adjusted or omitted.
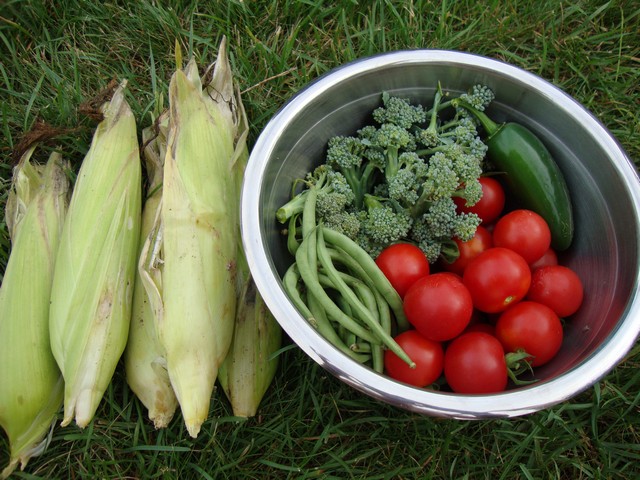
Since I have a vegetable garden during the summer, I’ve been able to use my own homegrown tomatoes and peppers for this recipe. But if you don’t have access to homegrown tomatoes, you can use store-bought canned tomatoes as well.
Though I have made some changes and added extra ingredients to personalize and create my own family recipe, the original recipe was shared with me by my sister-in-law. Thank you, Kelly!!! We both have made some changes over the years, and Kelly too, has started adding her own, homegrown tomatoes. We both agree it adds so much flavor! It really is hard not to have a second helping of this awesome stuff!
Toward the bottom of this post you’ll first find the recipe with standard American measurements, then with metric measurements. If you try this recipe, please consider leaving a comment and star rating below; it would be very helpful for me as a blogger. Thanks in advance!
How to Make Hearty Garden Chili
Start by preparing vegetables: onions, garlic, celery, red bell pepper, and jalapeño peppers (can be omitted).
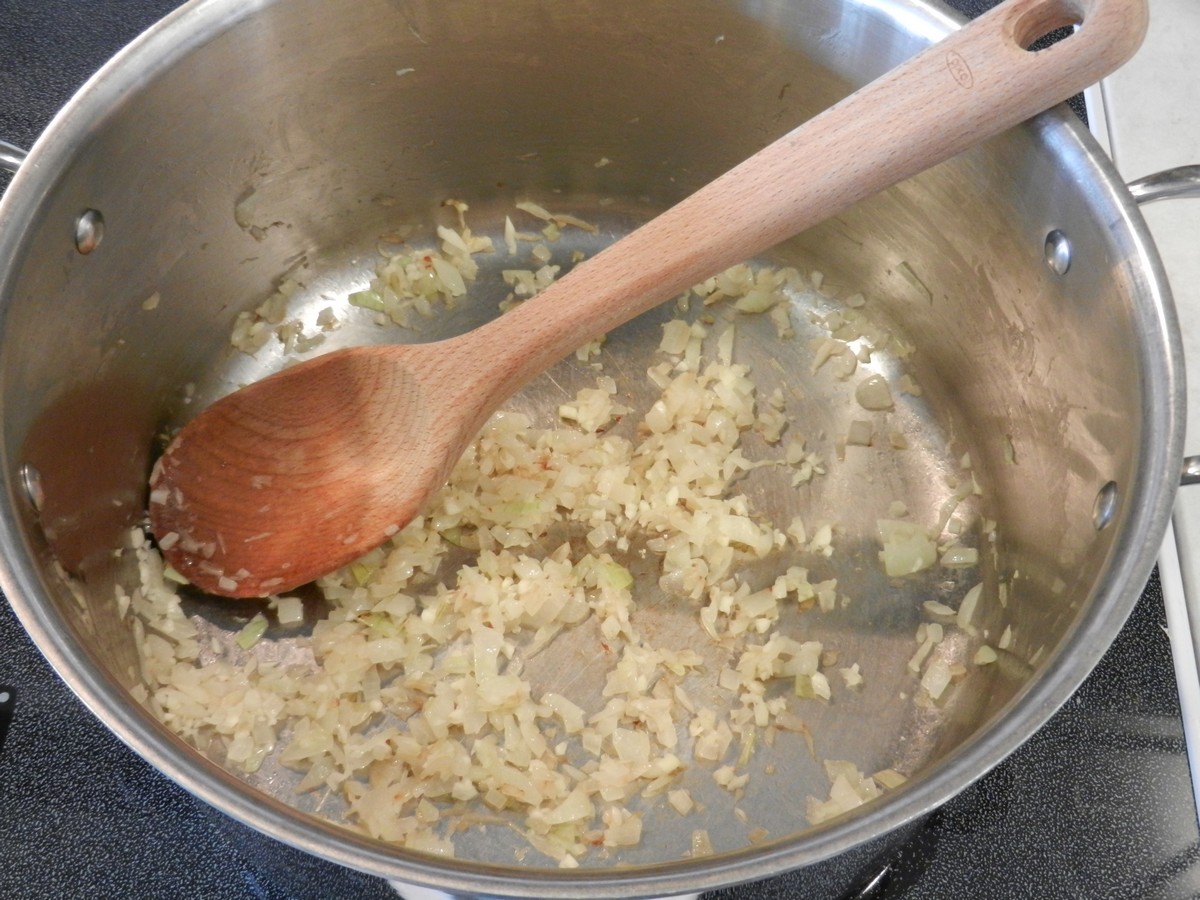
It is best to saute onions for a few minutes to sweeten them and take out the bite, as well as the garlic for a minute or two. Use a medium-large sized pot.
The celery should be sliced thin since it takes a long time to soften, or you can speed it up by sauteing first until somewhat tender. If so, it may work best to saute the celery first, adding onions after a bit, then garlic toward the end.
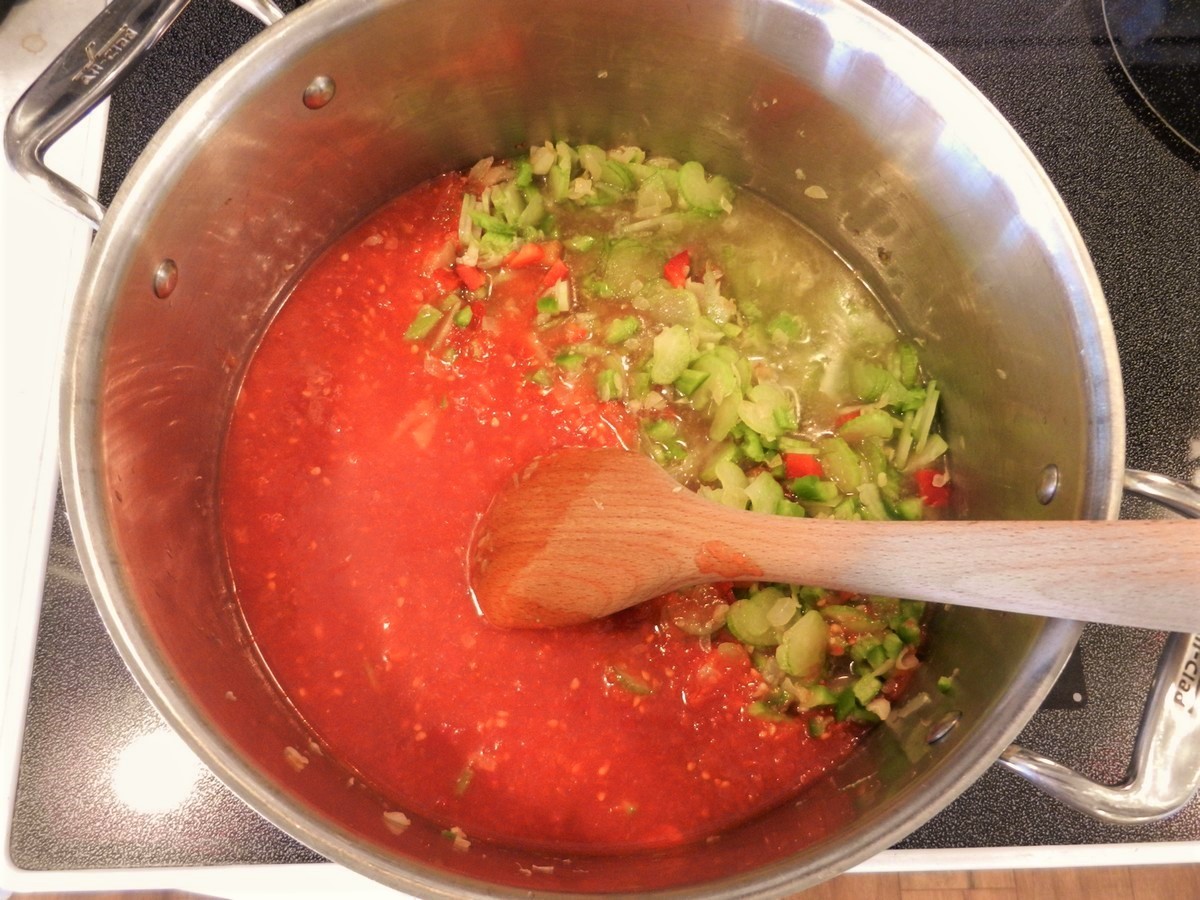
Then add the rest of the vegetables.
If you don’t like your chili spicy, just omit the jalapeño pepper and use a green bell / sweet pepper instead, in addition to the red one. You can use any color pepper you’d like, though, it doesn’t have to be red or green. Remove seeds and membranes.

Add crushed tomatoes (no salt added!!) and water.
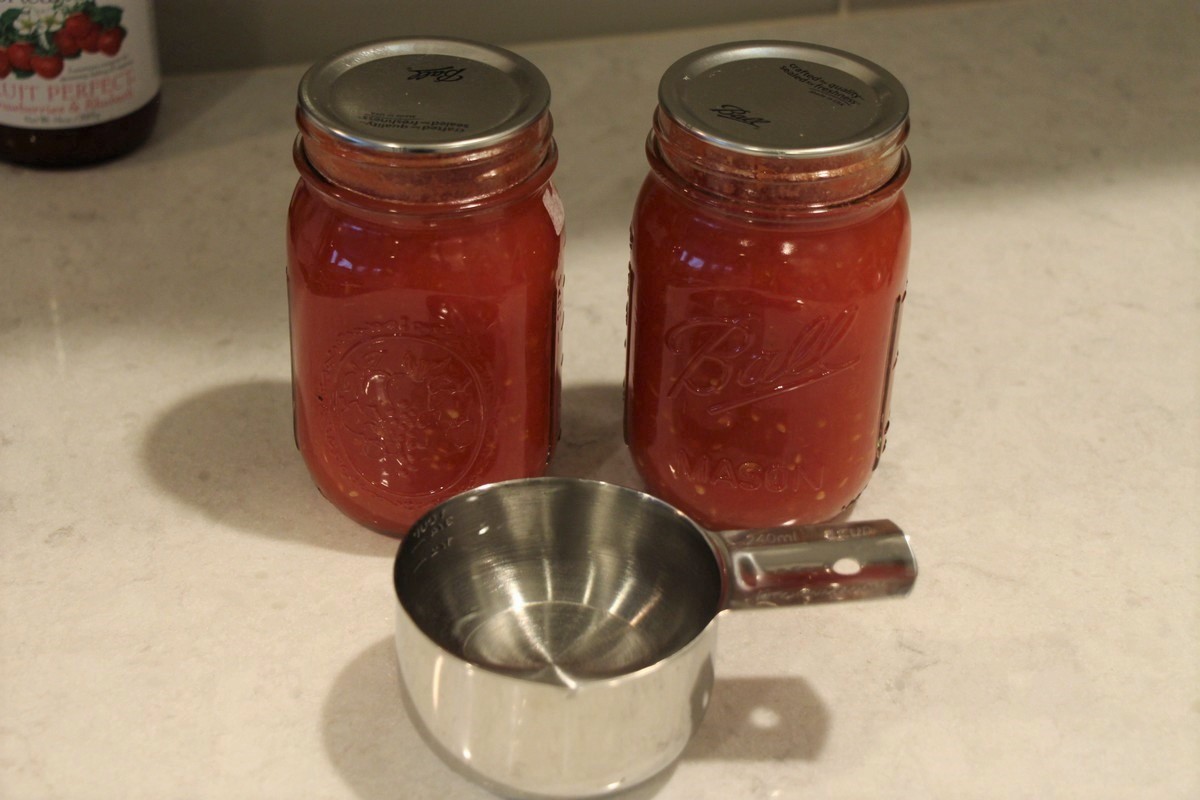
The cute stainless steel measuring cup in the picture below is one of my favorite little kitchen wonders! I have two sets and use them constantly. They’re a bit pricey, but extremely durable and will last a lifetime.
Bring to a boil.
Since I grow my own tomatoes during the summer, I crush and can them to use for my chili throughout winter. And I have to tell you, the flavor is amazing and really makes a difference in the chili! Vine ripe homegrown tomatoes from your own garden, and those purchased at local farmers markets in the summer, are so sweet and delicious!
You can also use a store bought can of crushed tomatoes; if so, the amount in one large can is typically 28 oz, so not quite 4 cups as called for in the recipe.* So you can add a little bit more water if you’d like to make up for it (1/2 cup if you want to be exact), or more crushed tomatoes. It’s not that big of a deal, you just don’t want the chili to be too thick.
*When canning at home, it is usually done in pints (2 cups) or quarts (4 cups), hence the 4 cups (plus a cup of water) in the ingredient list. It’s a convenience thing.
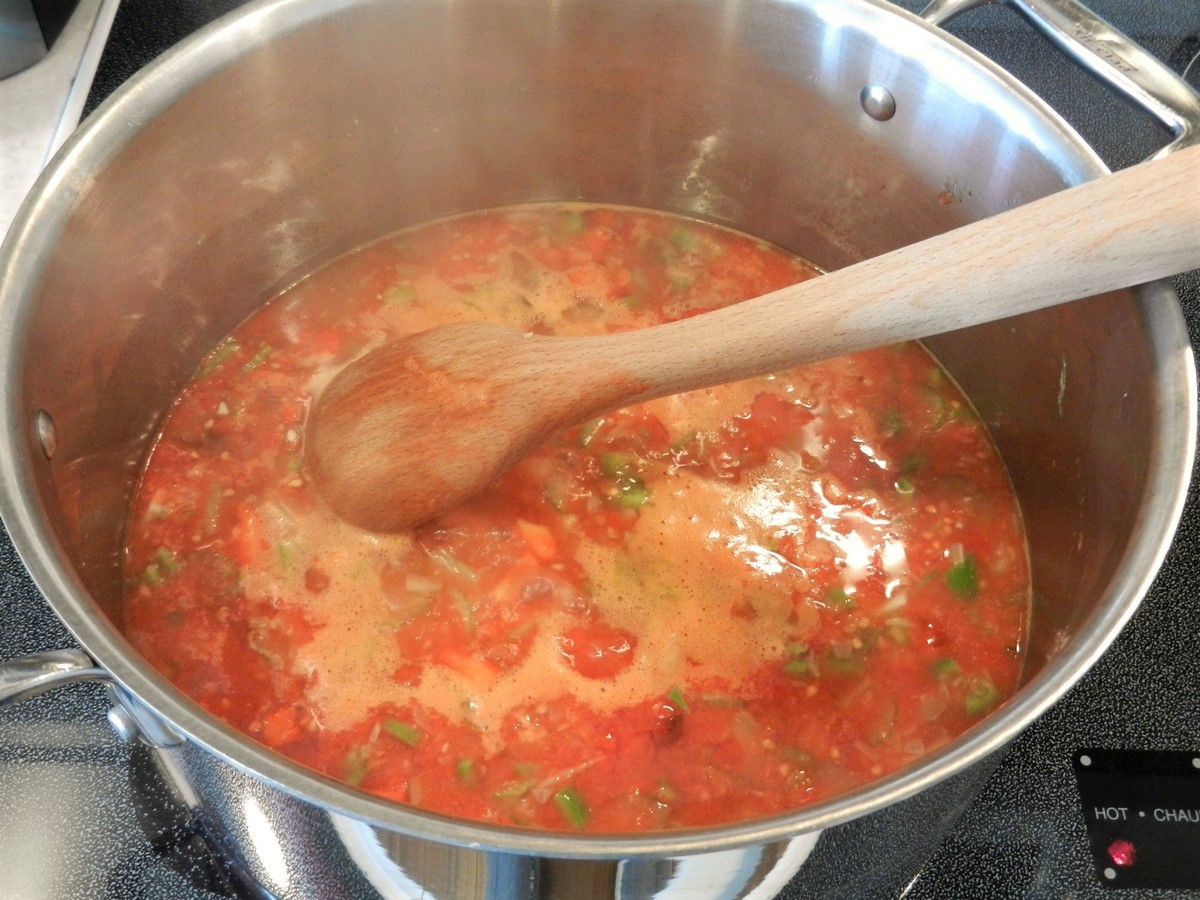
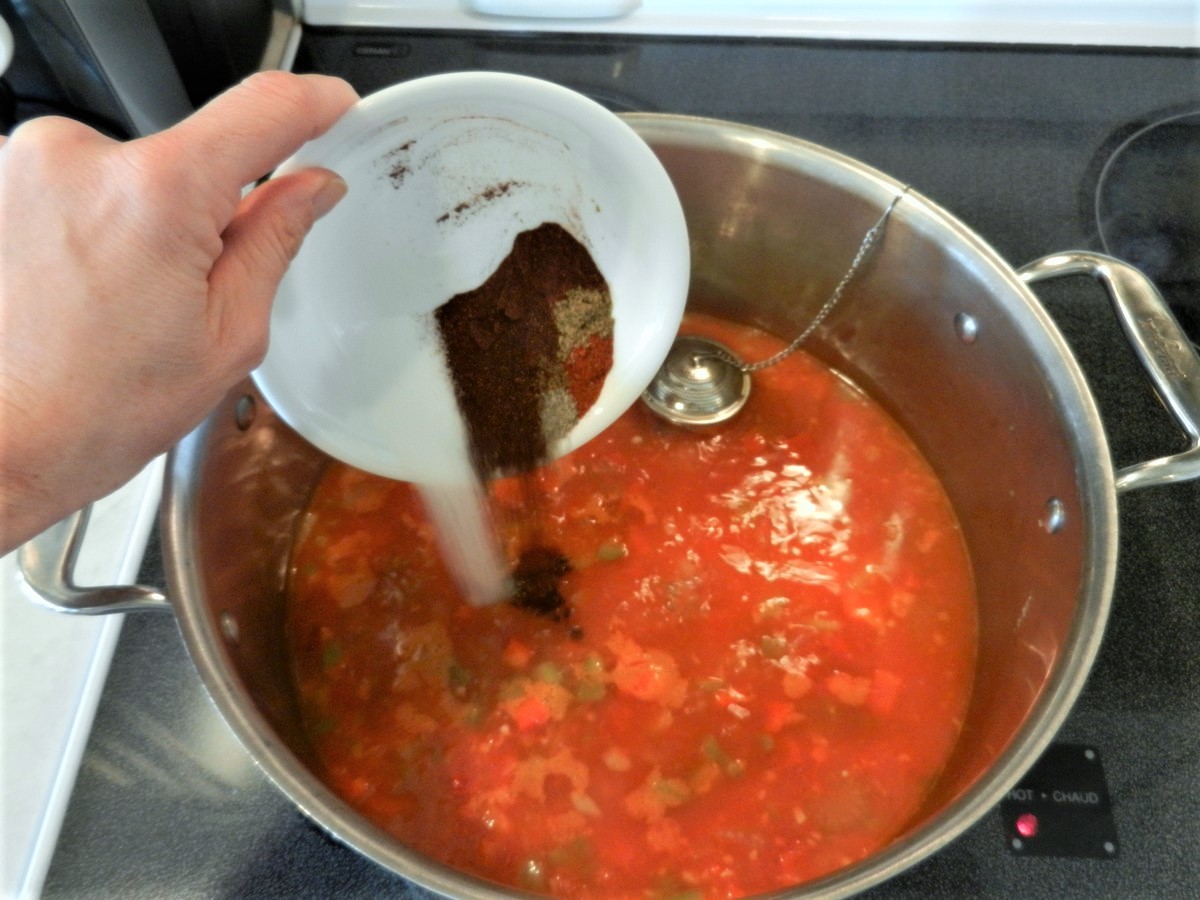
While waiting for the chili to boil, measure the spices. You can easily modify the heat level by adjusting the amount of cayenne pepper (same as red pepper, by the way).
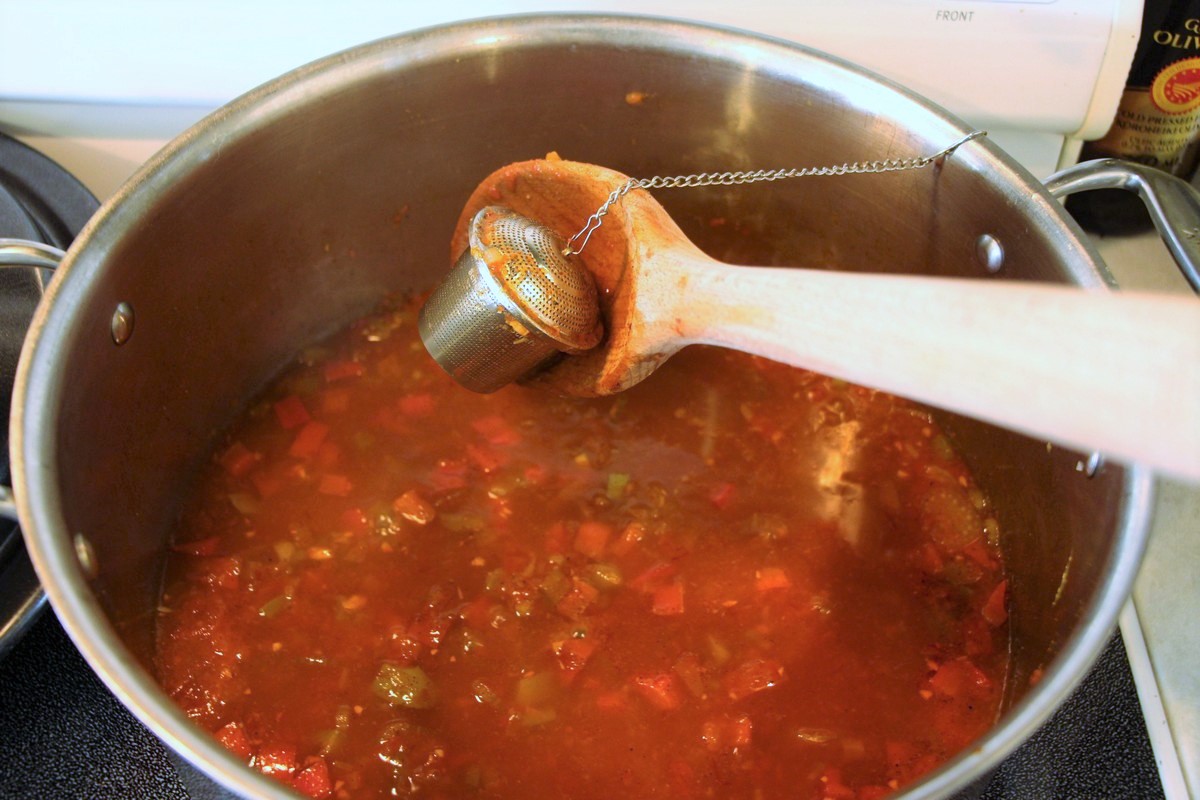
This recipe calls for whole cloves, which must be removed before serving. Since they will be hard to find among all the vegetable chunks, a tea strainer or other device to contain them is important. If you’re worried about adding the flavor of cloves, I’m here to tell you it’s no big deal. You’re not adding a lot, just a hint, but it’s just one more layer of all the yummy flavors in this chili!
If your bay leaves are broken into small pieces, you can add those to the strainer as well. Otherwise, add whole leaves directly to the chili and remove later. I broke mine up and put them in the strainer this time, so you won’t see them in the chili in these pictures.
I have recently added celery seeds to this recipe, simply because they are very good for you and help fight inflammation. If you don’t have celery seeds already, you can easily omit them. Don’t add more than the 1/4 teaspoon suggested as the flavor can become a bit pungent.
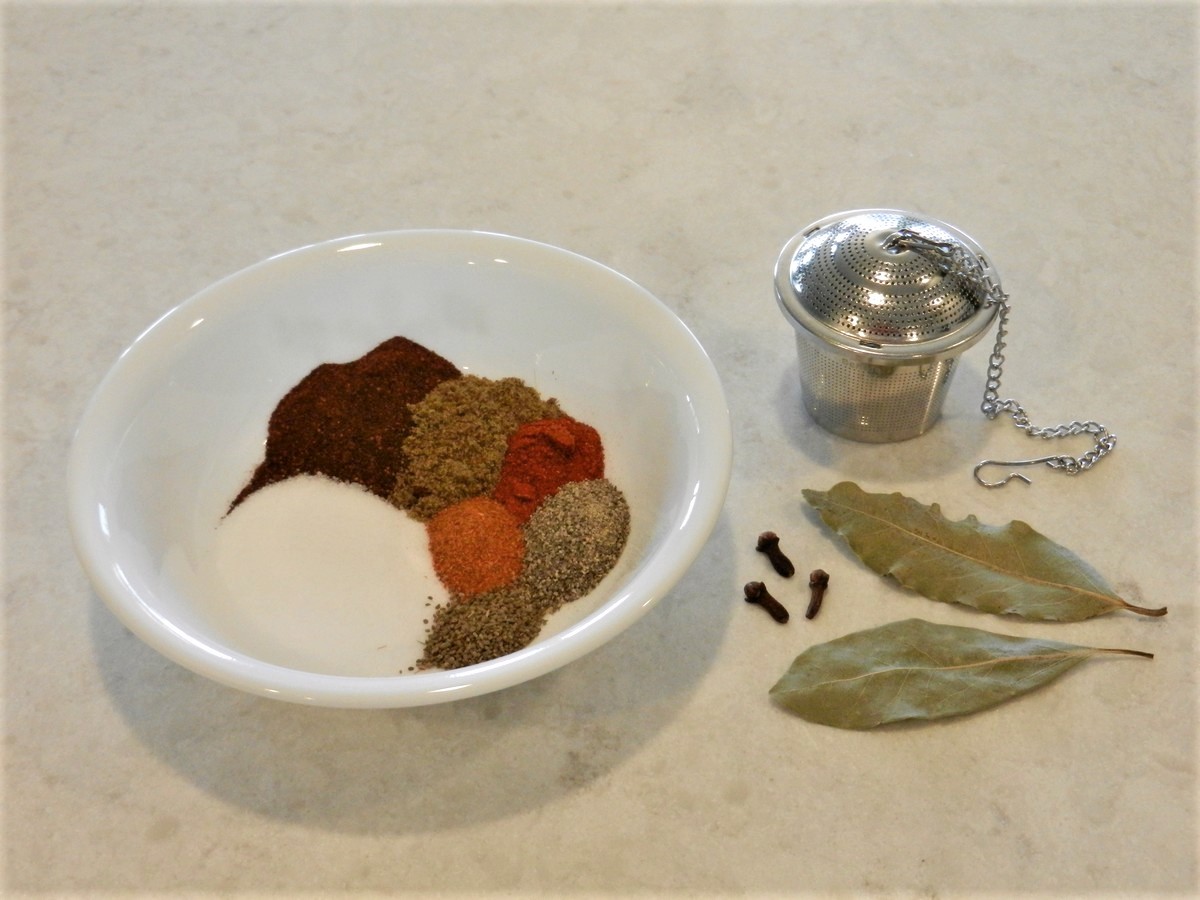
Add spices, bay leaves, and the tea strainer, and stir well.
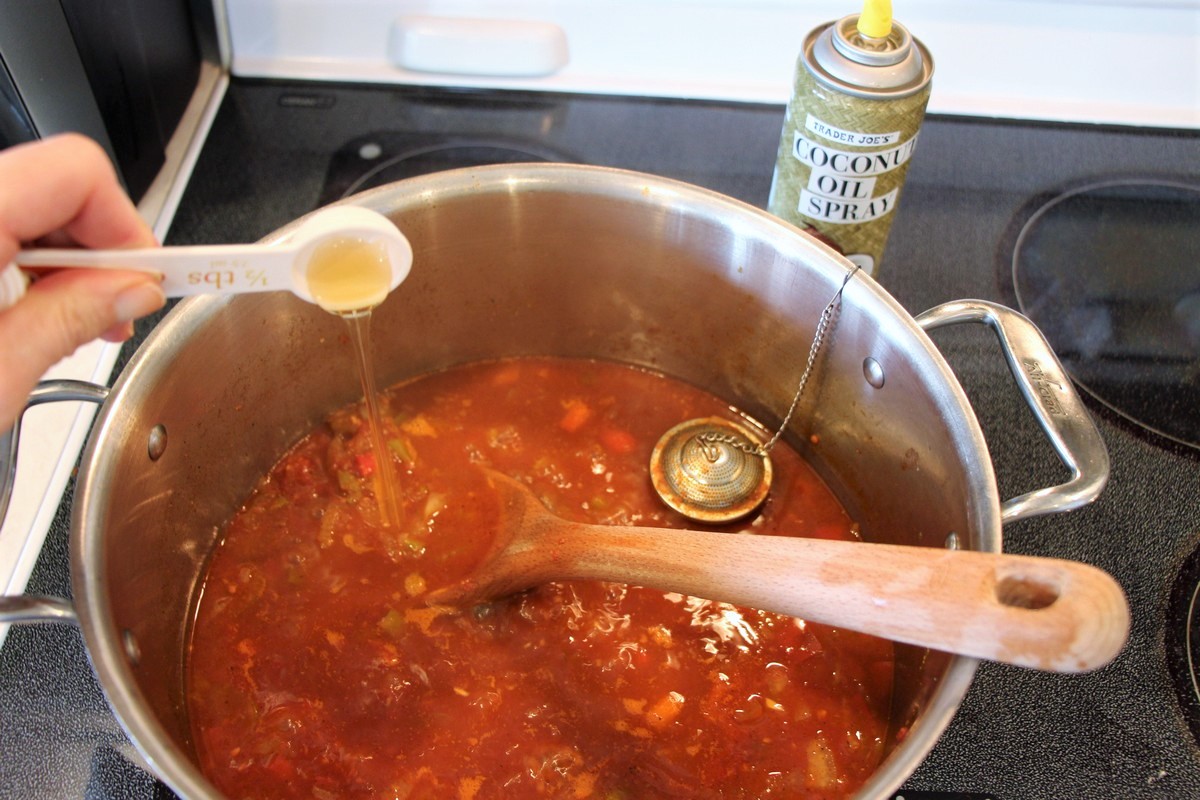
Also add honey. Tip: spray some cooking spray into the measuring spoon and the sticky honey will come out easily and cleanly.
The wooden spoon below is the largest of a set of three, from OXO. They are very sturdy and nice. I use them a lot, doing away with more plastics.
Cover and simmer on low heat for at least an hour, preferably two, until the celery is mostly tender and the spices have had a chance to release their flavors and mix thoroughly into the chili.
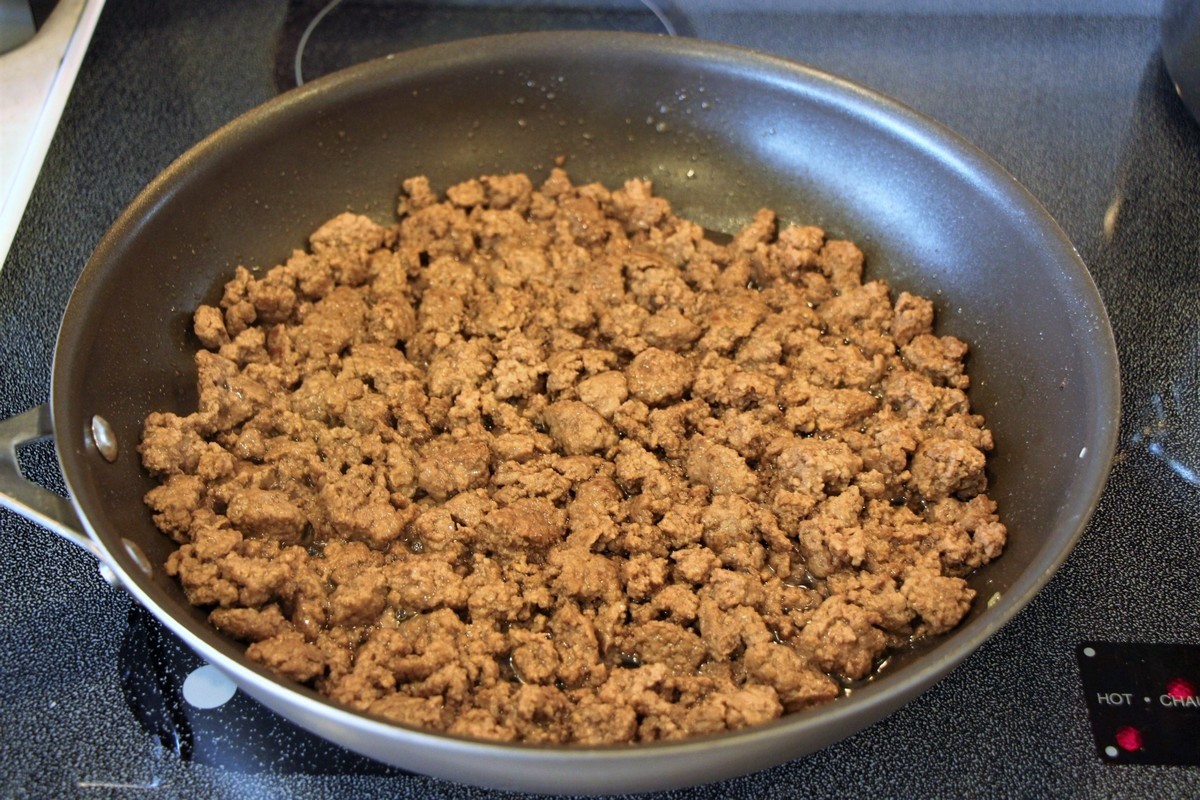
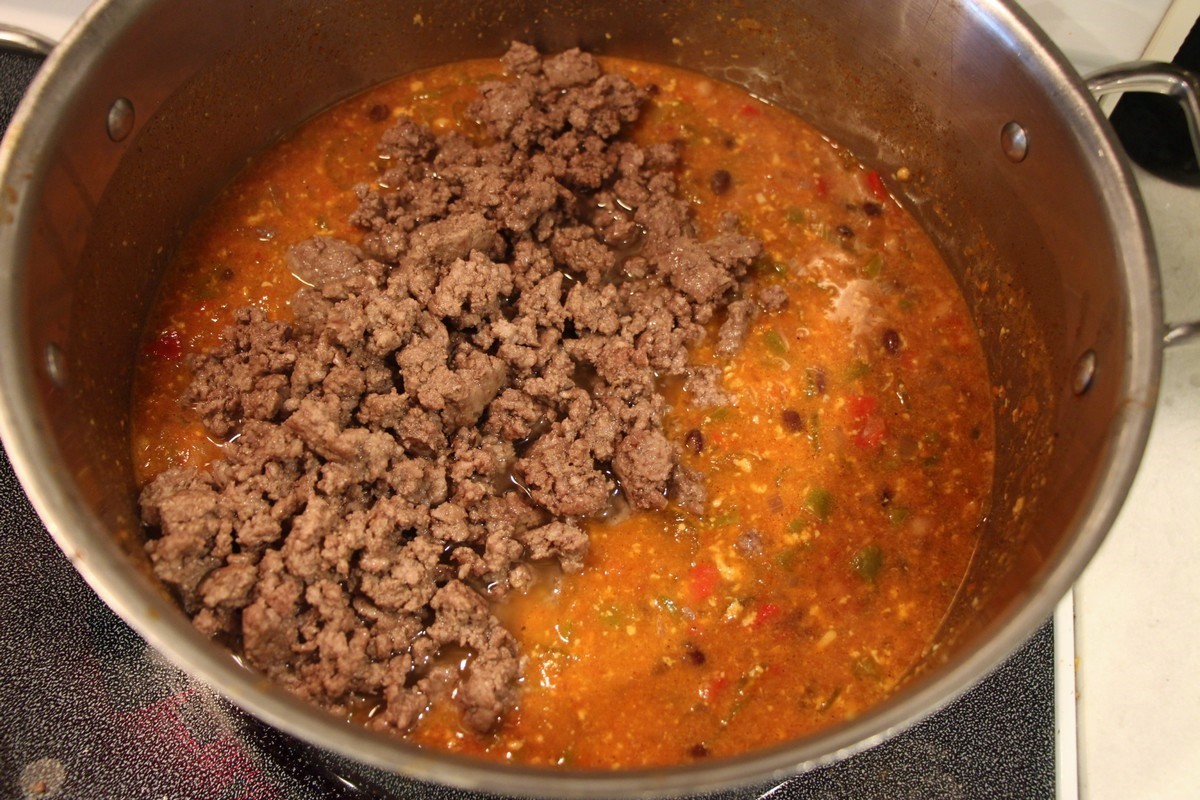
While the chili is simmering, brown the ground beef, cooking only until no longer pink so the meat won’t dry out. Save the drippings, don’t drain! Set aside, covered, to keep it moist. Don’t add the meat until the end since it’s already cooked, that way you’ll have chili with super juicy meat!
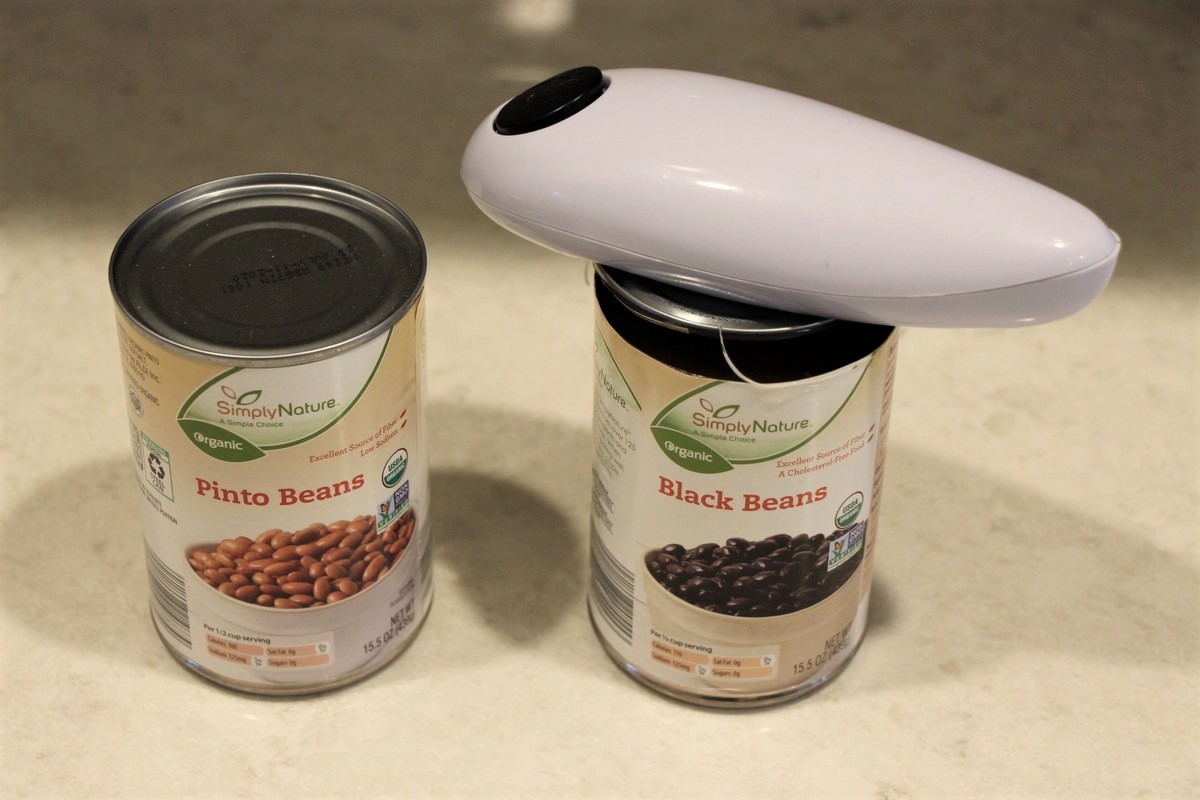
Also open the cans of beans; drain and rinse, and set aside. Canned beans are already cooked and will fall apart if you cook them longer than needed. The can opener below is battery operated and extremely useful for me now, with the arthritis I developed in my thumbs. It is small and works like a charm!
After the tomatoes and veggies have simmered for an hour or two, remove the tea strainer, letting it drip a bit.
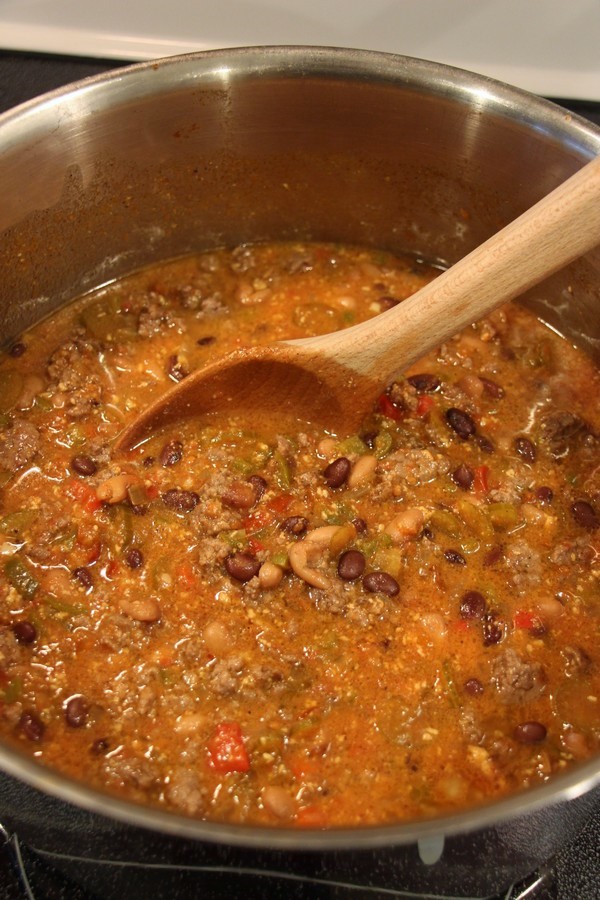
Add the beans and cheese, stir well to combine. Also add cream and ground beef.
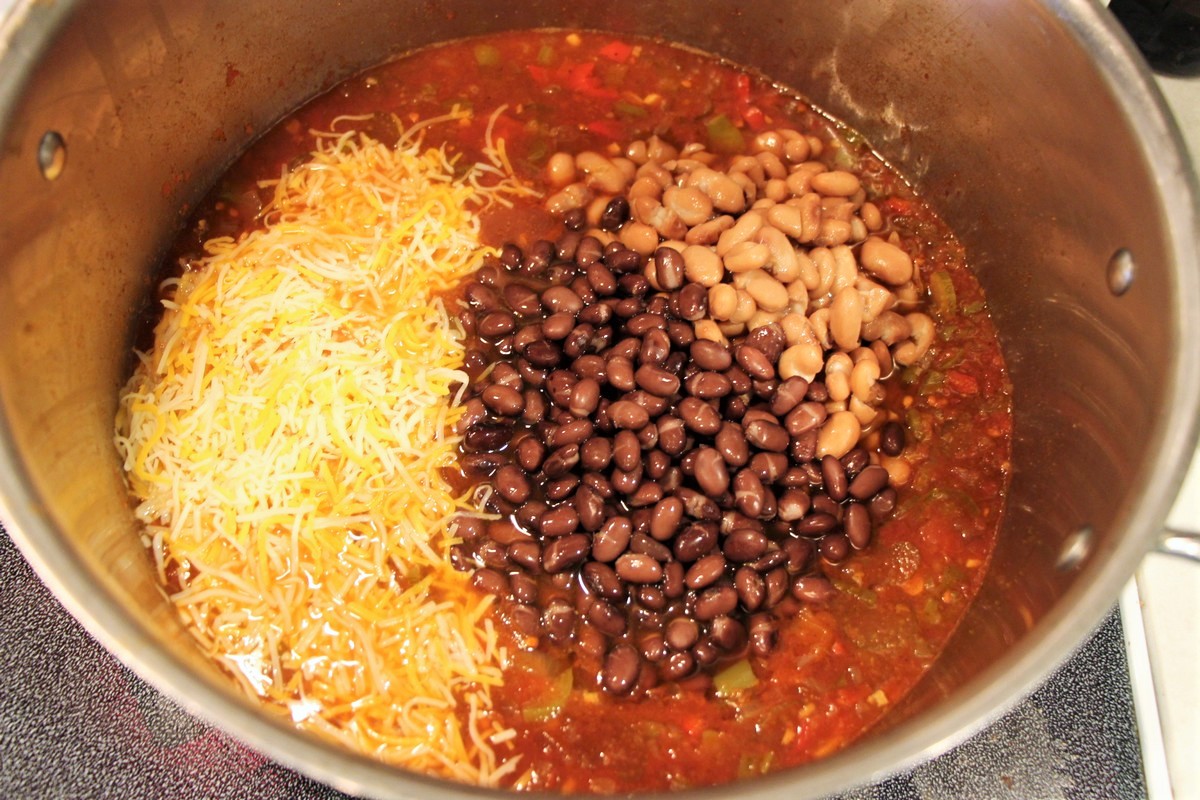
Add the beef drippings as well; they are extremely flavorful, containing both fat and broth. If you are uncomfortable with the idea of adding the drippings, you can omit them, though I’m afraid you’ll be missing out on delicious flavor! And personally I believe fat is an important part of our diets, but that’s a different discussion for a different time. Like I promised, this chunky red chili is very flavorful and hearty, as you can see!
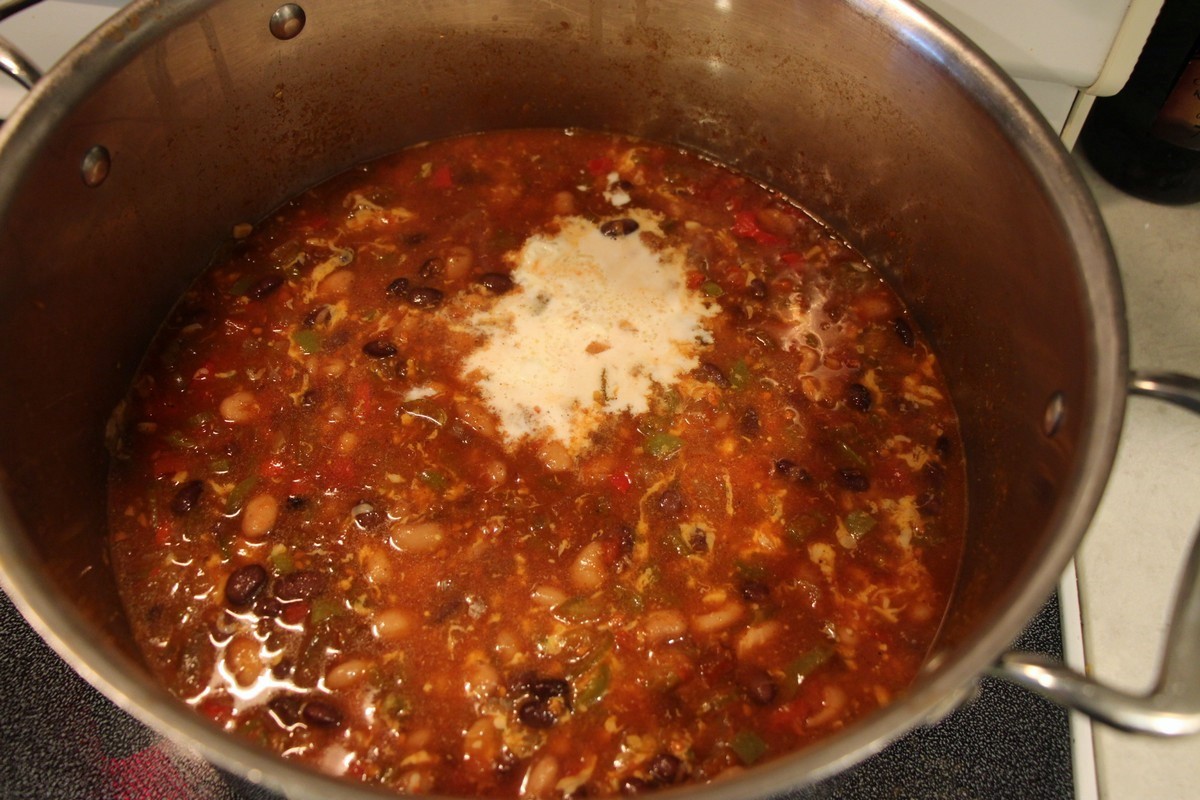
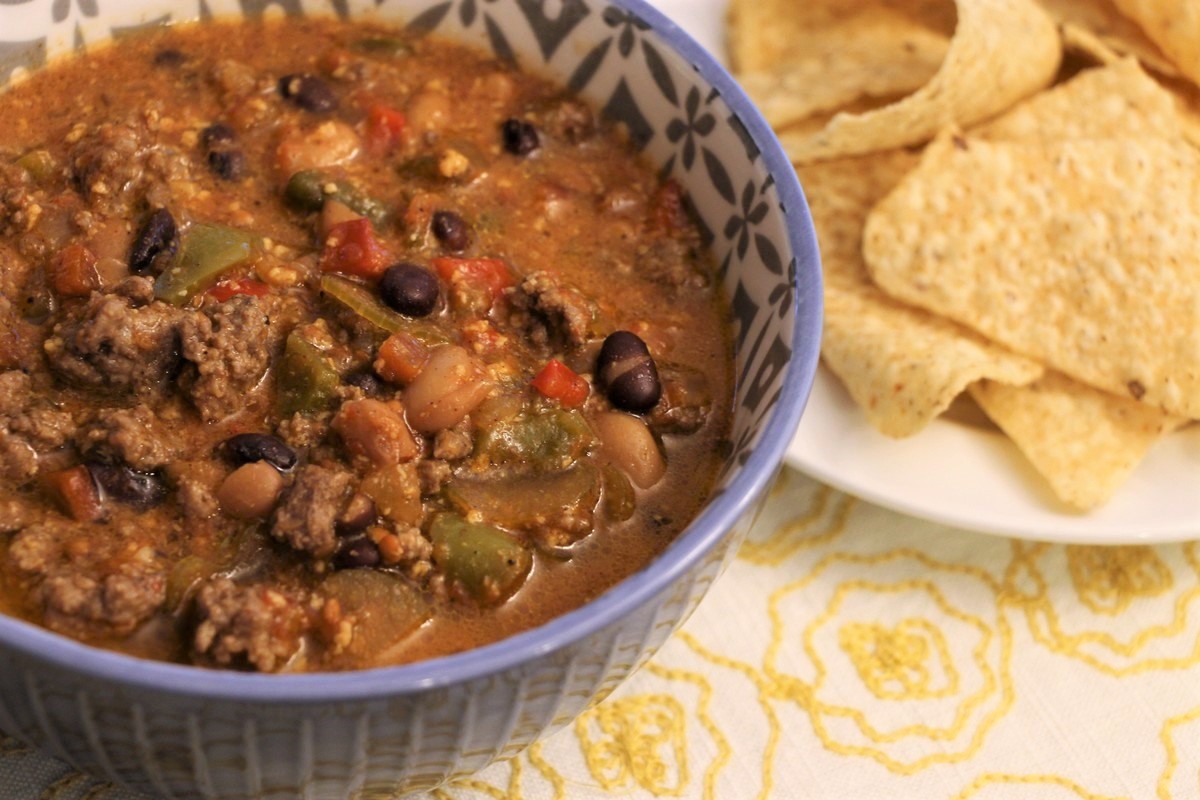
Stir well and heat until the cheese has completely melted and the chili is nice and hot. And you’re done! Serve with corn chips, sour cream, and extra cheese for toppings.
Delicious, scrumptious red garden chili; chunky and hearty, ready to warm you up on a cold winter day! With lots of vegetables and ground beef, this flavorful meal will fill you right up. I hope you’ll love this recipe as much as my family does! If you decide to try it, please consider leaving a star rating and a comment below as it would be extremely helpful. Thanks in advance!
- 1 medium onion, diced
- 3 garlic cloves, minced
- 2 large stalks celery, thinly sliced
- 1 red bell pepper, diced
- 6 jalapeño peppers, seeded, diced small. If you don't want your chili to be hot /spicy, use a green bell pepper instead.
- 4 cups crushed vine ripe tomatoes with juices, if available. Core the tomatoes and run through a food processor until no large chunks remain. (Or use a large 28 oz can of crushed tomatoes plus an extra ½ cup water)
- 1 cup water
- 3 whole cloves (or ¼ teaspoon ground cloves)
- 2 bay leaves
- 2½ teaspoons salt
- 2 teaspoons chili powder
- 1 teaspoon cumin
- ½ teaspoon pepper
- ½ teaspoon paprika
- ¼ teaspoon celery seeds (optional)
- ¼ teaspoon cayenne pepper (very spicy, can be omitted)
- ½ tablespoon honey
- 1½ lbs ground beef
- 1 can (15.5 oz) black beans
- 1 can (15.5 oz) pinto beans
- 1 cup shredded Colby jack cheese
- ¼ cup heavy cream
- Prepare all vegetables.
- In a medium-large sized pot, saute onions until glossy, then add garlic and saute for another minute or two.
- Add celery, peppers, and jalapeño peppers. If you want to cut back on cooking time, saute celery until somewhat softened, before adding onions and garlic.
- Add crushed tomatoes and water.
- Bring the pot to a boil.
- Put whole cloves in a tea strainer or other device to contain them. Bay leaves can also be added to strainer if desired. Add tea strainer with cloves to the pot, also add bay leaves, salt, chili powder, cumin, pepper, paprika, celery seeds, cayenne pepper, and honey. Stir well.
- Cover and simmer on low heat for 1-2 hours or until celery is mostly tender.
- Meanwhile, brown ground been until no longer pink, then immediately remove from heat and set aside, covered. Preferably, do not drain but keep the drippings.
- Drain beans and rinse, set aside.
- When chili is finished simmering and vegetables are tender, remove tea strainer and bay leaves.
- Add beans, cheese, heavy cream and meat plus drippings. Raise the heat to medium-high for a couple of minutes, stirring gently, until cheese has melted and chili is steaming.
- Serve with corn chips, sour cream, and shredded cheese.
- 1 medium onion, diced
- 3 garlic cloves, minced
- 2 large stalks celery, thinly sliced
- 1 red bell pepper, diced
- 6 jalapeño peppers, seeded, diced small. If you don't want your chili to be hot /spicy, use a green bell pepper instead.
- 1 liter crushed vine ripe tomatoes with juices, if available. Core the tomatoes and run through a food processor until no large chunks remain. (Or use 800 grams canned crushed tomatoes)
- 2½ deciliters water
- 3 whole cloves (or ¼ teaspoon ground cloves)
- 2 bay leaves
- 2½ teaspoons salt
- 2 teaspoons chili powder
- 1 teaspoon cumin
- ½ teaspoon pepper
- ½ teaspoon paprika
- ¼ teaspoon celery seed
- ¼ teaspoon cayenne pepper (very spicy, can be omitted)
- ½ tablespoon honey
- 750 grams ground beef
- 1 can (425 grams) black beans
- 1 can (425 grams) pinto beans (or any beans available, plain, not in sauce)
- 2½ deciliters shredded Colby jack cheese
- 4 Tablespoons heavy cream
- Prepare all vegetables.
- In a medium-large sized pot, saute onions until glossy, then add garlic and saute for another minute or two.
- Add celery, peppers, and jalapeño peppers. If you want to cut back on cooking time, saute celery until somewhat softened, before adding onions and garlic.
- Add crushed tomatoes and water.
- Bring the pot to a boil.
- Put whole cloves in a tea strainer or other device to contain them. Bay leaves can also be added to strainer if desired. Add tea strainer with cloves to the pot, also add bay leaves, salt, chili powder, cumin, pepper, paprika, celery seeds, cayenne pepper, and honey. Stir well.
- Cover and simmer on low heat for 1-2 hours or until celery is mostly tender.
- Meanwhile, brown ground been until no longer pink, then immediately remove from heat and set aside, covered. Preferably, do not drain but keep the drippings.
- Drain beans and rinse, set aside.
- When chili is finished simmering and vegetables are tender, remove tea strainer and bay leaves.
- Add beans, cheese, heavy cream and meat plus drippings. Raise the heat to medium-high for a couple of minutes, stirring gently, until cheese has melted and chili is steaming.
- Serve with corn chips, sour cream, and shredded cheese.


I have tasted Terese’s chili, & it is delicious! I am dairy-free, so Terese omitted the Cheese for me & I added some coconut milk to give it a creamy flavor. Thanks for sharing, Terese!
Thank you Kelly!! It’s always a pleasure cooking for you, and thanks again for sharing the original recipe!
This was very easy to follow and tasted absolutely great. I just might win the office chili contest this year.
Oh wonderful! I’m so glad to hear that! Thank you very much for your comment and star review!!
This is the great recipe! I like that it is clear and sipmle to cook. By the way, the taste is gorgeous. Thanks for the recipe!
You’re welcome, I’m glad you liked it!
You have a fresh vegetable garden but use canned beans? I don’t get it. Why not use dry beans and soak them overnight? Or leave the beans out and add them in when serving.?
I do have a vegetable garden, but I don’t grow all of my vegetables. I think that’s the case with a lot of people with vegetable gardens; they grow some of their own, but not absolutely everything. That would be an enormous undertaking and extremely time consuming, growing all of what you’d need for a year and then also preserve it at harvest time to last you until next year. I am simply not able to do that. I find canned beans for certain uses to be very convenient and time saving in a hectic life. Sometimes I soak and boil beans from dried, but definitely not always, and I do not feel bad about that at all. 🙂 Have a great summer!