Saving Money by Making Your Own Liquid Foam Soap Refill
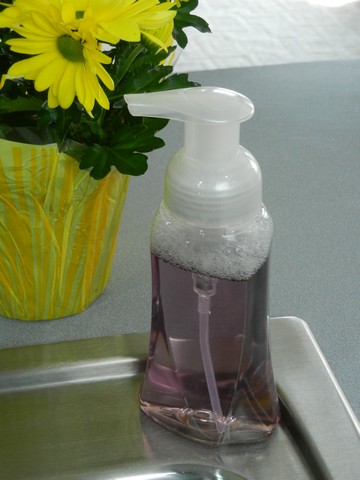
Foam soap dispensers are fun to use, but refills can be pricey; especially if you consider how cheap it is to make your own refills. That’s right, not only can you refill the inexpensive plastic bottles from Dial, Soft Soap, and other brands, but you can quickly and easily make your own and save a lot of money. In addition, you can color the refill to match your decor, if you so choose! It doesn’t take a crafty, creative, domestic person to do it. It is easier than making pancake batter from a box!
First off, I’ll explain what the advantage is to using foam rather than regular liquid hand soap: When you use foam, you use much less soap to get the same job done. Regular dispensers usually give you more soap per pump than you really need, while the foam uses diluted soap to give you fun foam to wash with. This is especially nice for families with young kids, as little hands need very little soap, yet a regular dispenser gives much more than needed, even for adult hands. Using foam saves you money right from the get-go, then in addition, you can save more money by making it yourself. It is also fun to use, also an advantage when you try to instill in kids that they need to wash after bathroom visits.
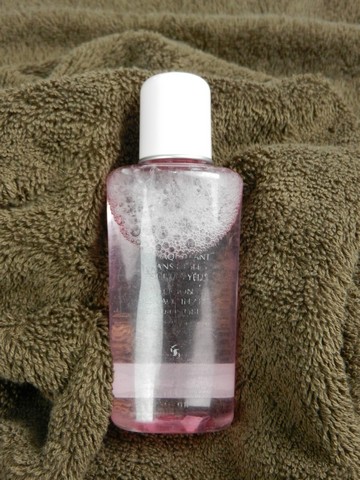
When making my own foam soap refill, I start by purchasing cheap, liquid soap of some kind. Just make sure you choose something transparent that doesn’t contain lotion, such as the one in this link. As far as I understand, lotion-containing soaps, or non-transparent soaps such as the one in this link, clog up the pump faster. You can use regular hand soap, or dish detergent. If you choose dish detergent, you may want to select something for sensitive skin since they generally are designed to break down fats and oils and could be drying for your skin. Or you can do what I do: I buy cheap shampoo. Shampoo works well and there are often a lot of different scents to choose from. I usually try to get something with a lighter color, since I often like to add my own dyes. Sometimes I’ll just leave it as is without adding colorants, and the color will then be very faint, though that can look pretty too. Whatever you prefer.
NOTE: Since I wrote this post, I have become aware that many soaps, shampoos, and lotions contain a long list of ingredients that may be bad for you. See this post, Trader Joe’s; Better for Your Health? for more information and to find alternatives that may work very well for making foam soap refills.. Some people use Castile Soap, although just like dish soap, it could be a bit drying for hands. It is a fabulous cleaner, though, and very pure!
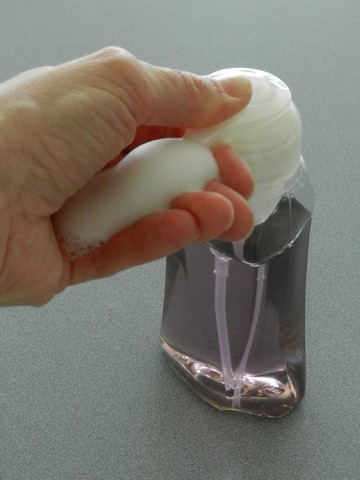
Making this foam soap refill can be extremely quick and easy by simply filling the foam dispenser your choice with 1/4 or so of liquid, transparent soap, and the rest with water. Stir it up with the handle of a spoon or whatever you can fit in there, or put put the top on and gently tip the bottle over until mixed, and you’re done. If you want to add color, you can drip in a tiny bit of food coloring, but since the color tends to be very concentrated, I prefer to dilute it and play around with colors before adding.
Here’s what I do when adding color:
These are the ingredients and supplies I use, plus water: Transparent hand soap or shampoo, medium and small stirring bowls, spoon, food coloring, measuring cup, a foam soap dispenser to reuse (not a regular dispenser; it must be one intended for foam, such as the one in this link or this type), newspaper to protect my work area, and storage container for leftover soap refill (I love this kind from Rubbermaid, and also purchased more for storage of my fabulous Cold-Brewed Coffee Concentrate!! WooHoo!!)
Note: Scented soaps can, and often will, leave a scent residue in plastic containers, and can be difficult or impossible to remove. This won’t matter for the soap dispenser, but don’t store extras in a container you will later want to use for food.
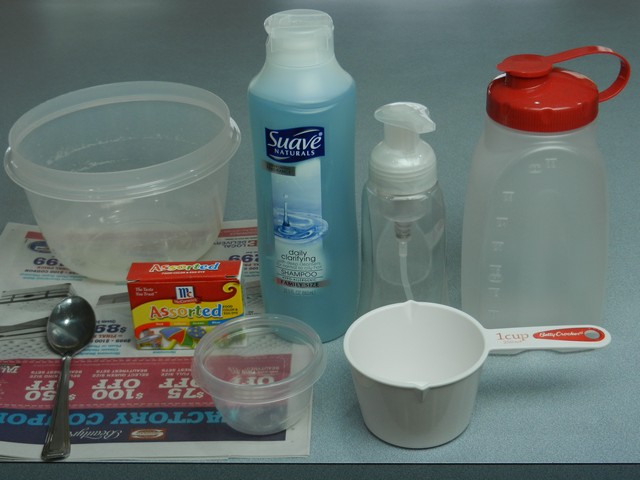
Measure up approximately 1 part soap to 3 parts water, and gently stir until mixed.
I used a 1-cup measuring cup this time (which is also nice to use when pouring the mix into dispenser and storage container), though usually I just wing it. It doesn’t matter too much, but approximately 1 part soap to 3 parts water works pretty well and generally gives it the same thickness that you’d get from the store. You can dilute even more if you’d like, especially if you have kids who go overboard with the pump; tiny hands need less soap than big hands, and grown-ups can always take a second pump if they need one. It’s another way you can save money. The foam will be a little thinner if you dilute more, but still works.
Soap and water mixed up:
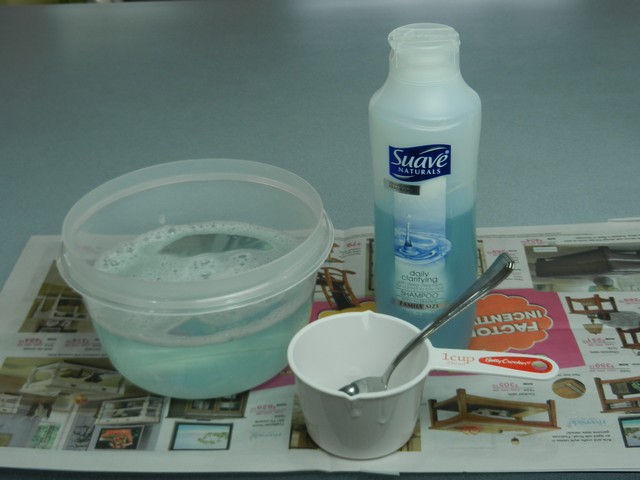
At this point you can either fill up your dispenser, or you can add dye to mix up your own color. This is a time when you should get some newspaper or other material to protect your work area, as dyes can really stain counter tops and other surfaces. Ask me how I know! I’ll tell you right now that if you do get a drop of it on a surface you didn’t want to stain, wash it off with soapy water immediately!! You may want to keep an old rag nearby just in case, and of course, you’ll already have soapy water on hand!
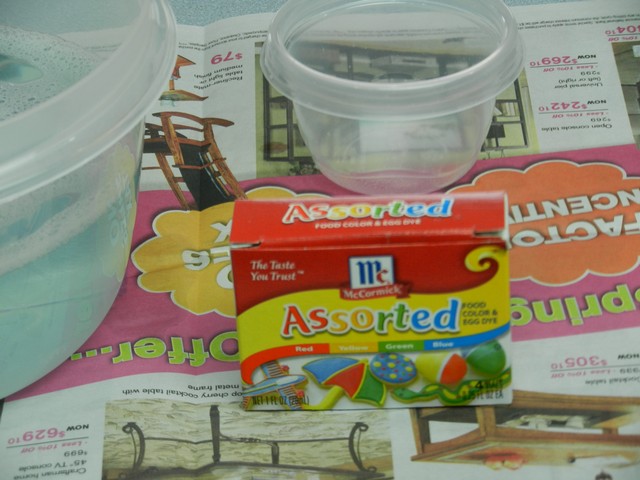
I purchased a box of food coloring from WalMart, but it should be relatively easy to get a hold of at other stores as well, or you can get it at Amazon.com: Food Coloring This box contains red, blue, green, and yellow. You can mix these together to create new colors, such as red and blue to get purple, or red and yellow to get orange. Here’s a link to help you mix a few different colors: Making New Colors with Food Coloring
I have only tried the liquid dye, not the gels for this purpose. I don’t know how gels would work, but hey, you could always try it and leave me a comment to let us all know.
Anyway, this is where the tiny plastic cup comes in handy. Clear ones allows you to see the color better. I pour some water into the little container, maybe 1/3 c or so. Then I mix in a drop at a time of the dye. The reason I mix it into water first and not directly into the soap refill, is that these colorants are extremely strong. So if you mix up your color in water, you can use a spoon to add a little at a time into your soap refill, until you get the right shade, preventing you from accidentally adding too much.
Here’s the deep purple color I mixed up in my little cup. It looks almost black in this picture. It took only two drops of red and one drop of blue to get this shade, but of course the original color of your soap will play a role in the final outcome as well.
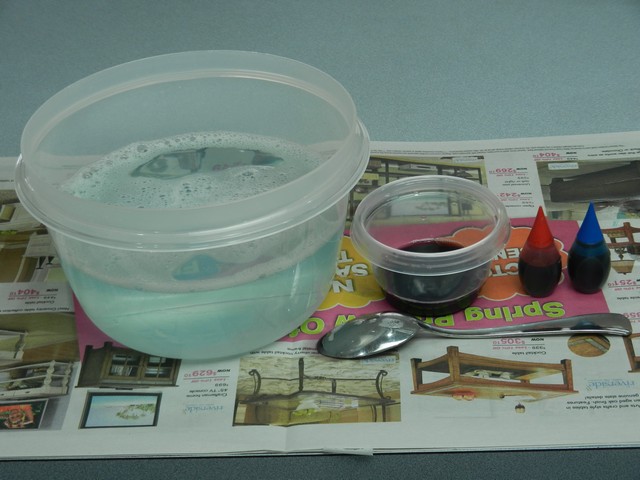
Pour a small spoonful of water-diluted dye at a time into the foam soap refill mixture, until you get the color you want. If the surface that the soap dispenser will be kept on has a deep color, you may want to go light on the soap color, as it tends to look much darker against an already dark surface, and the color may not show up very well.
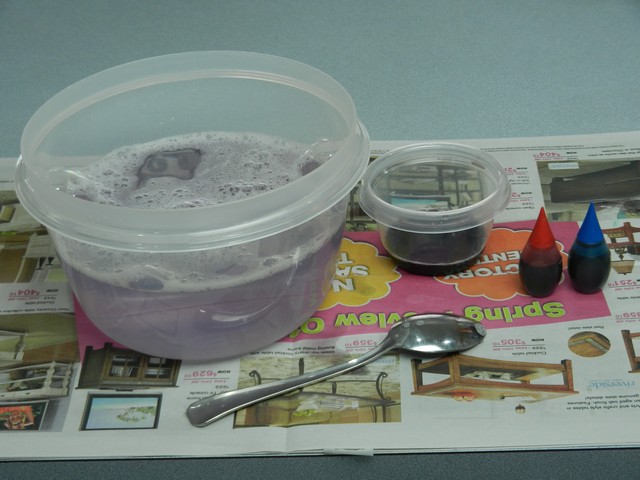
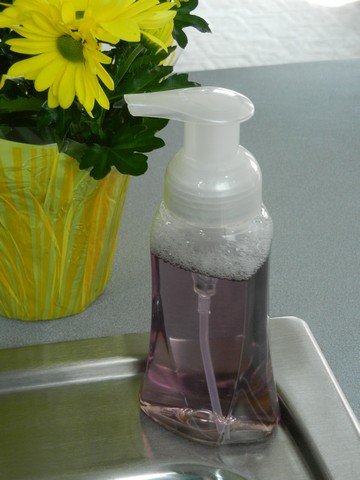
Adding a little more, then testing to see what it will look like in the bottle on the surface it will be sitting on when it’s done.
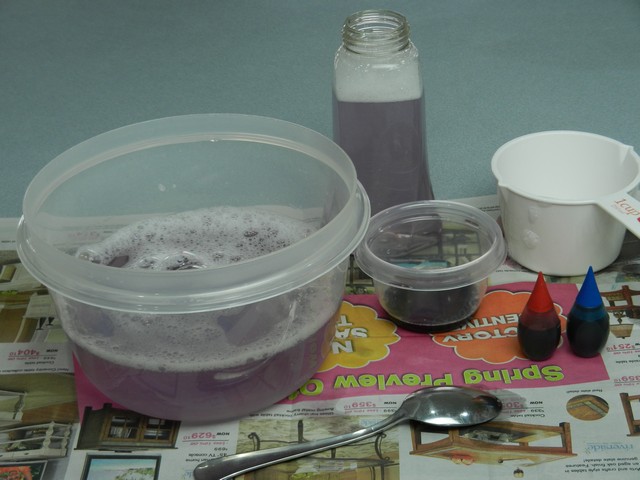
When I’m satisfied with the color, I put on the pump, test it to see that the soap has the thickness I like, then pour the leftovers into a storage container to refill later.
For your information, the pumps will often clog up after several months of refilling, but I experienced the same thing with an expensive bottle that was designed to be reused. TWICE! So I figure I’ll stick to the cheap ones, and buy a new one when the old one hits the dust. In the meantime, I’ve saved money by making my own refills, while having fun with colors and foam.
My dispenser originally had a label on it that I peeled off, then removed glue residue using GooGone. I just think these bottles look better without the label. A clean look that goes with any decor, with no distracting advertisement. But that’s just me. I’m a label peeler…
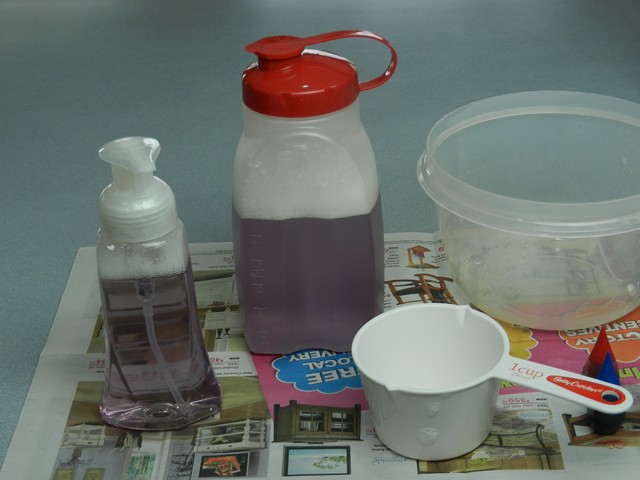
Testing to see that it ended up the way I wanted it, and it did. I now have my own, inexpensive liquid foam soap refill, and I made it myself, quickly and easily! Talk about saving money!



How fun to read this. It speaks to my concerns about the environment.
Some liquid soap is so thick it just falls off your hands into the sink before you can even rub it into a lather. Foam just gets you to your goal a lot faster. Such a smart idea. Lets face it. If we can minimize by 75% the amount of soap we wash down our drains, we ultimately will have less contaminates in the water we drink.
Yes, I should have added that it helps our environment! 😉 Thanks for the reminder, how very true! Some pumps give out this huge, thick gob, then you have tiny little toddler hands learning, who really only need a tenth of that, if even.
These contaminants don’t reach our drinking water. Take a science class.
Comment edited. We do welcome other opinions, but no name calling, please.
Not sure where you get your information, but yes, a large amount of untreated and barely treated water ends up in our waterways. Where I live near the Puget Sound untreated sewage (including these chemicals) is pumped directly into the ocean, several hundred feet under the surface, so people don’t notice. My Oceanography professor told me as much.
Here’s some links:
https://thetyee.ca/News/2015/01/26/Victoria-Raw-Sewage-Dumping/
http://www.theglobeandmail.com/news/british-columbia/victoria-sewer-dispute-hits-the-fan-as-washington-state-urges-bc-intervene/article19131685/
http://www.pugetsoundkeeper.org/aboutpugetsound/pollution/
Thank you for the links!
Saving money while saving the environment… that’s a win-win situation for everyone!
My plan is to use just a little bit to get my hands nice and clean.
“A little dab will do ya!”
That’s right, it really doesn’t take much!
One other suggestion: ALWAYS wet your hands before using any kind of soap. It makes things work better saves soap and the environment.
Thanks for that comment, a good idea for sure!
Thank you do much for posting this; it WORKS!!!
Great advice! I have been using this method for about 3 years and it works really well. I got into this when my bathroom sink trap plugged up and I had to clean it out. I will not happen now.
To mix it, I use a clear plastic, round bottle and I mark it off and I fill with soap to the first line and then with water to the second line.
I go about 3.5 to 1 and I got this from a reusable bottle that came from Pampered Chef.
I use this for hand and dish soap, shower gel and clear shampoo.
That’s awesome! And using shower gel is a great idea! I agree that it is very easy to mix it right in the bottle, that’s how I used to do it as well (though I didn’t mark the bottle, just poured in 1/4 of the bottle w/ soap, the rest with water, then mixed.) These days I like to add color to the solution, so that adds a couple of steps.
This recipe looks great – I’m excited to try it! One thing I might add is a ribbon bow around the plastic dispenser bottle or a piece of tied homespun fabric just to make it look a little prettier in the bathroom (think holiday ribbon during the seasons, birthday ribbon if it’s someone in your family’s special day, etc)! Thanks for sharing this recipe!
I didn’t even consider making my own foam soap so I always buy the replacements. This will help save so much money, thanks so much.
Yay! Glad to hear it!
Thanks so much for posting this. I was stressing about finding a way to refill the soap dispenser in the bathroom my daughter uses. The soap I bought isn’t available in refills at my local store, so I had to buy another pump. Now, thanks to your recipe, I used her body wash to make some soap to fill the dispenser and it works great! Thank you again for sharing this. You have saved our family SO much money.
I’m so excited to hear that! Yay!!
This is amazing! I’ve been lugging around a cheap bottle of shampoo with me as I move from apartment to apartment for three years now. I switched to expensive salon shampoo a while back but I just can’t bear to throw out my old stuff. Now I can make it into hand soap! Ahh cheap bottle of shampoo. This is your fate. I knew I kept you around for something. Thanks so much for posting this!
There are ‘cheap’ drugstore shampoos that perform as well or better than the expensive salon products. Suave, as a matter of fact, is an inexpensive ‘quality’ product that is recommended over many salon shampoos. (Source: Paula’s Choice/Beautipedia Reviews).
Thanks for posting this Therese…I had googled ‘replacement foam soap’ looking for a source to replenish my bottle and found your site.
(my salon vs. drugstore comment – for hair as opposed to hand soap!)
Thank you for your input on that! 🙂
Almost all hair and body wash products have Parbens ..Sulfates..Sodium lauryl sulfate…& Phthalates …the side effects of these ingredients is very scary so be savy while you go frugal.
I’ve been doing this for years, first with a Pampered Chef bottle for 10 years until it broke, and now with a clear Dial foaming hand soap bottle reused a million times. We even use the same cheap shampoo! I’ve recently switched to using the kids’ store brand clear/yellow baby wash – that way I can wash their faces or get off my mascara without stinging eyes. (Yes, I still use facial cleanser for my whole face after – baby wash feels drying – but it’s so much faster than getting out the goopy remover!)
I also use concentrated dish liquid in the Dawn Direct Foam dish soap dispenser the exact same way as this in the kitchen. So convenient when you have to pre-wash or hand wash dishes. Or for a little dab on a rag for wiping down splatters on the stove. Works for washing hands, too, in the kitchen.
thanks for the recipe. we just ran out of expensive foamy soap from bath and body works and i’m not going there anytime soon, i have everything i need to make it so i’m going to do that now. i’ll let you know how it turns out.
Yes, please share! I hope you’ll love it! It is so easy and inexpensive to do it at home. 😀 And of course, you can do it without adding colors, so then you can just fill a bit (like 1/4th) of soap directly into the bottle, fill the rest w/ water and stir with a fork or spoon. Quick and easy. Playing around with colors can be fun though.
How can I tell if there is too much water or too much soap. Sometimes it gets too bubblely.
Well, if it’s too watery, the foam won’t seem to work very well, it just kind of melts away in your hands while you wash and you won’t feel like you got enough. If it’s too soapy, it will be very thick foam that seems like you got more than you really needed. But there is no real right or wrong, it’s all what you prefer. I find that if I mix approximately 1 part soap to 4 parts water, it’s about right for how I like it. I rarely measure, I just do a bit of soap to quite a bit of water. 😉 You get the feel pretty quickly. You can always add more water or more soap to get it the way you want it.
Thank you!!! I was not getting the 1:6 ratio thing!! 1 part water to 6 soap or vice versa, so this was very helpful!!!! & yrs after your original post, you are still helping people!!
You are very welcome! Glad I could help!
I experimented with measuring so I could do it the same way every time. Originally I just eyeballed it, but it didn’t always turn out right, and I couldn’t always tell if the problem was too much water OR too much soap. I end up using 1:12 ratio of soap:water usually, but can definitely add more soap up to 1:6 ratio. I know this is less soap than described above but it’s what has worked for me. I also reuse the plastic dispenser from the store from when the original contents were gone.
That’s one of the great things about this soap; you can use how much or little you like, whatever works better for you. There is nothing magical about a correct amount, just get the hands slippery enough that the germs and dirt slides off when rinsing. 🙂 Thanks for your comments and insight!
I use distilled water to dilute since I fear that my home’s hard water clogs up the pump quickly. I’ve been doing this for a few years and use the large bottles of liquid hand soap refill. I mix up the diluted soap and store in an old empty refill bottle so when one of the many soap dispensers in the house runs out, I just squirt into the dispenser and done! I only have to mix this up once a month or so…. and I’ve discovered that what works well for our foaming dispenser is only between about 1:12 to 1:6 ratio of soap to water.
I also love doing this because my little ones sometimes open up a dispenser and pour the whole thing out! It’s less messy AND wastes less soap when filled with the diluted foaming solution; also, I think their hands get rinsed more thoroughly (and with less water!) when they don’t have a ton of the goopy liquid concentrate to wash off their hands at each wash.
I had a bunch of refill liquid hand soap around so I did this as well. I saved the empty 64 oz bottles to use the prediluted foaming hand soap so, like you, I only have to do it about once a month.
I am the foaming soap maker in the family and have experimented with several ingredients. I found that putting about ½ oz. of glycerin USP in the solution helps lubricate the pump reducing the clogging problem. The glycerin also helps reduce the harshness of the soap and is completely safe…it is even used as a sweetener in the food industry. (http://en.wikipedia.org/wiki/Glycerin). Glycerin is often the main ingredient in lotions.
I also use a foaming dish detergent (Dawn) at the kitchen sink for small jobs. A little foam charges the sponge and definitely reduces the waste of using detergent directly on the sponge or dish cloth.
A 2-3 parts water to 1 part glycerin makes a great after-shower lotion to reduce wintertime dry skin. There is no odor/fragrance unless you ladies want to add a drop of essential oil. The best part is the price is way below using commercial bath lotions with all those additives.
Most drug stores have glycerin USP and even hobby stores usually carry it for soap making.
Wow! That’s a lot of very useful information! Thank you very much for sharing your insight! And for those who may not know, 1/2 fl.oz is the same as 1 Tbsp. I actually already have glycerine on hand, and I’ve used it straight before on dry patches of skin that was hard to heal. It has worked wonders for me. I love your ideas!
Another use for glycerin…If the kids are blowing bubbles (soap and water) outside add some glycerin to the mixture and the bubbles will be much stronger, or less fragile! You can blow much bigger bubbles without them popping! Remember those giant bubbles that were popular years ago? The secret as glycerin in the soap and water mixture
That’s nice to know! I always thought you just needed a stronger concentration of soap, so that’s interesting to hear! Thank you for sharing your insight!
Like this idea. My little grandsons like bubbles but they do not generate well. It is not worth the effort to try when every 2 or 3 times you get bubbles.
Appreciate the input.
We just downsized and moved into a condo that has a shower dispenser. I need help making shampoo and conditioner that will dispense-purchasing environmentally approved is too expensive. I normally use shampoo and conditioner (Head and Shoulders) but they wouldn’t dispense. Help!
I’m sorry, I don’t know. I don’t have any experience with these dispensers. Maybe do a search to see what others use, or you may just have try a few different brands. Maybe one that isn’t so thick?
May God richly bless this website.
Thank you very much, and may God bless you as well!
I find that the the dispensers I get stop pumping well after a few refills any suggestions? they are not clogged they just lose their spring back so to speak
Yes, I know what you mean. You may not have seen it, but I made a mention of that in the 3rd little paragraph from the bottom of the post. My dispensers usually last about a half a year or so, so if yours stop working after only a month or two, there may be a problem with the soap or the type of dispensers you use (dollar store ones may not work properly…?) Just make sure you use soap that is transparent, not necessarily without color, but that you can see through, and that doesn’t contain lotion. There are some links to examples in the post. I hope you figure it out!
Mine usually stop working when I don’t get the soap diluted enough (as well as just giving up through old age). Never been able to fix it, once it stops working. I’m going to try the glycerin addition suggested above, as well as making sure I get the soap diluted enough.
Thank you for your insights on this! Let us know if it seems like the glycerin helps.
I don’t know if it okay to mention other websites, but I found a fix for the poorly working foam soap dispensers. I have tried it, and it it worked well. I should mention that I have dispensers that are a step up from the prefilled dispensers sold in grocery stores (purchased from an internet outlet.) I haven’t tried this on the prefilled dispensers.
http://www.thediysecrets.com/how-to-unclog-your-foam-pump-bottle/
Ron
Thank you for the information! If it’s helpful info and not a way to solicit, I’m fine with links. This link is definitely worth looking at. I tried it with one of my pumps, but I only have the cheap prefilled ones and I was not able to pull it apart. So it won’t work for my pumps, but I’m sure it will be helpful for others who have the kind you can pull apart. Great tips, thank you!
Please add me to your emailing list! Love the info you have shared. Thanks!
Thank you! I do not currently have an email list, but you can follow me via my pinterest account; just click the follow me on pinterest button on the top right, or use this link: https://www.pinterest.com/countrybasket/
THANK YOU!
My child and I enjoyed making and using this foam soap!
Wonderful! I’m glad you had fun with it! Thanks for commenting!
i was just sitting in my bathroom looking at my two almost empty soap dispensers in dispair. one was a foam one and the other was just regular soap… and I had the idea of mixing them but first I googled it to get the right amount of mix/parts and I found this page! I turned 2 practically empty soap dispensers into one full soap dispenser… and I still have some regular hand soap left! This is going to make hand soap last a long time!
Skip the stupid food coloring. You want to wash your hands so they can be clean not full of chemicals. Just idiotic. And you don’t need all those containers. Just put the soap in the soap dispenser, add water, agitate, Done!
Is it necessary or kind to use words like “stupid” and “idiotic”? You can state a difference of opinion without being rude or insulting, especially to someone who is providing helpful information for free. I notice that you have an image of Jesus for your emoji; I don’t think he’d approve.
Thank you for your support, Shauna! 🙂
Wow Sandra…that post of yours sounds like you are very angry with the helpful post! No need for you to be the mean girl here…we all just want to share helpful ideas & we know they may not be for everyone. I do hope in the 11 months since your post you are feeling kinder and less angry.
I am thankful for the great post about making our own foam wash!
Thank you Rita! 🙂 Have a wonderful day!
Ohh! I would like to try this at home. Thank you so much for sharing!
does anybody know where i can buy a cheap glass soap dispenser as the plastic ones i try refill never last.
I was wondering if I can make my own refill but until I’ve read somewhere that: watering down regular soap will change the pH of the soap, and mold and bacteria will grow, thus making the soap unsafe after several days. Does anybody know any truth to that? Thanks.
That’s a very good question, and definitely something to think about. I have never had a problem myself, but I do remember back when I used to make my own baby wipes, that if I added cold water to the mix, they would start smelling funny after a few days. Almost a little musty. But whenever I used hot tap water, that would not happen, even after a month. I suppose you could try using hot tap water just in case and see what you think, but like I said, I have never had a problem with funny smell or seen anything weird growing in there, no odd changes. It just looks normal, and I make enough at a time to last me a couple of months. I would think that if there was an over growth of anything bad, that there would be a change to it of some sort. There will always be some germs in soaps, which washes off when you rinse your hands, but there obviously should not be an over growth of pathological microbes. I hope this helps!
I kept looking everywhere online and got mixed opinions, scientists were saying it’s a bad idea, but the rest of us don’t seem to have a problem with it . I guess no one has been killed or harmed so far by using watered down soap, so I’m gonna give it a try and water down my shower gel into a Bath & Body Work Foam dispenser. Thanks for the post and response Terese!
You’re welcome, and thank you for your thoughts on this! I appreciate you sharing!
I’ve been doing this for 10 years or so, and I’ve never had a problem of any kind. No one has ever mentioned getting sick after visiting me, so we all seem to be okay. I’d check to see who the scientists who say not to do it are working for.
Good point, who are these scientists working for??? Is it in their personal interest to have us purchase finished refill instead of making our own?
If you were worried about stuff growing in the water, use distilled water instead. That should avoid any mold or bacteria. The foaming hand soap refills that are sold in the store are just diluted hand soap. So what’s the difference if you dilute it vs. at the factory?
a great post i was able to teach my kids arts and crafts by making our own
Liquid Hand Soap and also teach them to be water wise a win win
I prefer to boil the water to kill all the bacteria before adding the soap. I also use a little citric acid in the mix to prevent possible bacterial contamination.
Good idea if you’re concerned about bacterial growth. Personally I am not concerned unless I smell funky smells. What soap does, is to make a surface slippery plus breaks up fat / oil particles, so that when you scrub and then rinse, the impurities are rinsed off; they slide off with the slippery soap. But it is important to rinse well. This is also the reason I find it unnecessary to use soaps with added antibacterial chemicals; it isn’t good for you in my opinion, and really shouldn’t be necessary. Just scrub scrub, rinse rinse.
My friend told me a while ago about refilling the nice foam bottles of soap I had. She said I just needed that foam dispenser top.
It did not work for me, as the soaps were so thick, they only clogged up.
I guess she did not know, water was also needed, to make it light and foamy.
Thank-you so very much….I am delighted!
I could not keep my kids in that foamy soap, but now they can use away at it.
I’m so glad I could help you, thank you for commenting to let me know!
I only learned of this when purchasing a “Foaming Hand Sanitizer” for the bottle ($1.)
Since I always boil my water anyway, not a problem. For the person who worries about germs, I am going to use the “Foaming Hand Sanitizer” as part of the water! I don’t want to waste it, lol.
Again, thanks for all the information Terese – the only question now is how much water to how much soap. I think I will start with 50-50 as I am not trying to save my soap.
BTW, I had to purchase Hibiclens for my DH and decided to mix a little into my regular Soft Soap – was shocked when it thinned out my Soft Soap and it now foams!! So I was ready to find your posting!
Generally speaking, to make foaming hand soap refill it tends to work the best if you use about 1 part soap to 4 part water, or so. If you use a whole lot of water the foam will be thinner, but it really isn’t necessary to use more soap than suggested. You just end up wasting a lot of soap unnecessarily without getting extra benefits. In addition, it is possible that very thick foam might cause the pump to clog faster. So I would say 1/4 soap max, preferably less. 🙂 I hope it works well for you!
Hi everyone! I’ve been having a problem with my Aveeno Foam dispenser, using my home made refill solution, the dispenser top does not want to POP up again, it stays down. And having to pull it up sorta defeats the purpose.
Has anyone had this experience and found a solution you can share? I sure would appreciate it.
All of the pumps seem to go after a while. But you could try to soak it in half/half vinegar water and see if that helps. Make sure to pump the vinegar water into the pump as well, and if possible get the entire pump into the solution. You could fill a bag with it and squeeze out the water, and keep it from floating up that way. Hope it helps! Let us know what you end up trying and how it goes.
Hi Terese
Came across your site looking for the formula for the foaming soap. I’ve been doing this for a few years and wondered if there were different ways to make this, and see there is.
I saw the way you use for removing labels and you can save money by just using cooking oil to soak the label and remove it from the container. Always works great for me.
Love your site! Thanks for sharing.
Thank you! And good to know, I’ll try removing labels using oil next time. Nice to try something mild instead of harsh chemicals. Thanks for your comment and handy tip, I appreciate it!
Very nice article. Getting the right consistency is very tricky unless you have a nice article like this one. I failed at many attempts to shave bars of soap and make my own foaming recipe. It was always too thick for foaming.
If you need cheap bottles for dispensing this recipe I have very cheap bottles here.
https://www.amazon.com/dp/B01N2UCEUO
Thank you,
Daniel
Great idea I noticed you used suave I used Castile soap it’s extremely gentle we use to use Castile soup in the enama’s we gave in the hospital you just can’t get a milder soap. Yes I was a nurse we also gave it to patients who didn’t have shampoo.
Thank you for the suggestion! Since I wrote this post I have started using soaps from Trader Joe’s that have better ingredients and better for you, and I actually did try Castile soap as I use this for cleaning. I found it to be too drying for me, but I know there are others too, who use Castile. You reminded me that I need to find time to edit this post regarding using better products for your skin. Thank you for commenting and for your input, it is most appreciated!
You can buy empty foam soap dispensers on Amazon for cheap. I just bought a 4 pack for $10.99. So if the pump thing stops working for whatever reason you can just buy new ones. At that price, it’s very economical. I’m sold on foaming soap!
The reason a pump head will stop working foaming or not is that the check valve right above the tube fails. It stops ‘checking’ so when you pump the stuff in to tube just go up and down. Some pumps use very small metal check balls an others use larger plastic check balls. The ones that use the plastic check balls last longer usually than the ones with the metal check balls unless you get one that use stainless otherwise the ball corroded over time and stops sealing.
Thanks for explaining! I suppose they aren’t built to last a life time. But they’re inexpensive enough that it’s not a big deal to purchase another one when that happens. Your explanation makes sense, it’s nice to know what’s actually happening.