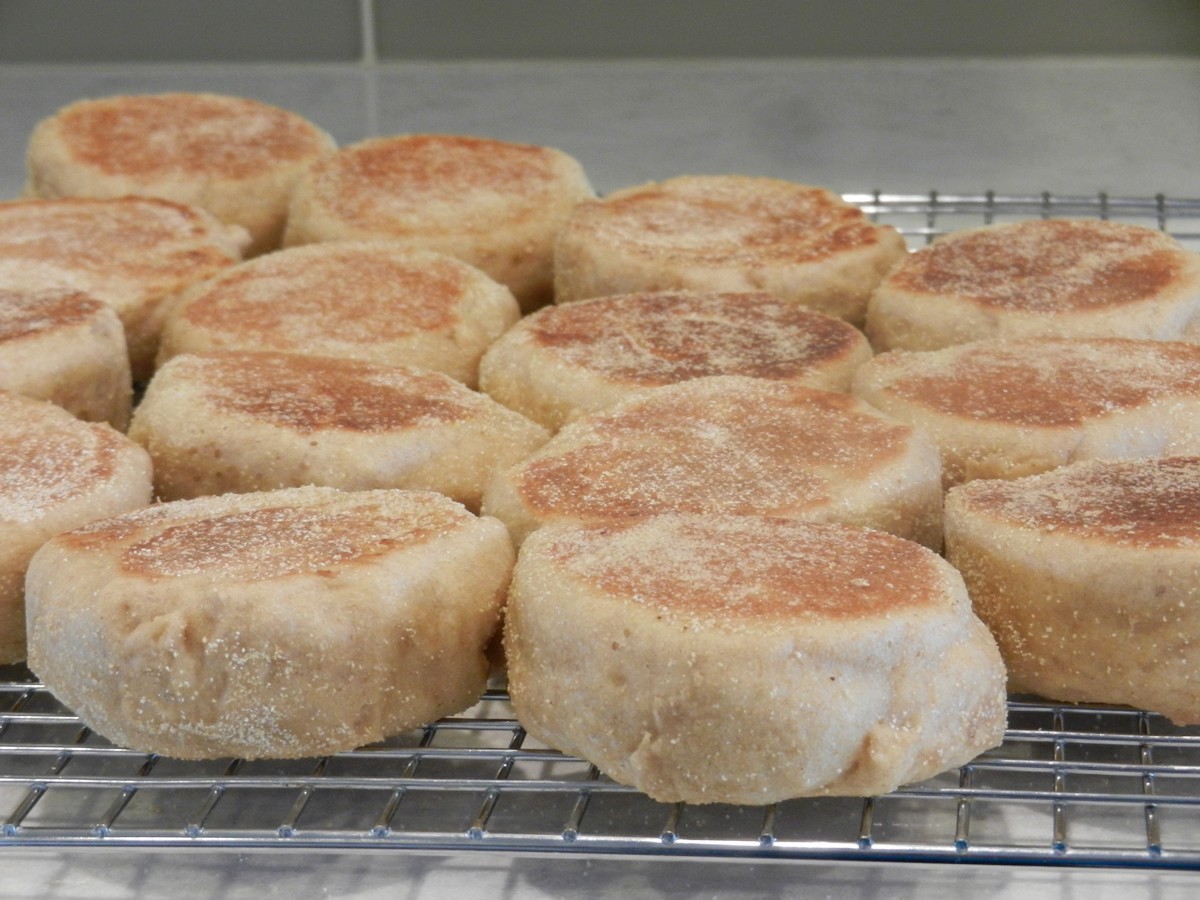
In this blog post I will share a delicious English muffins recipe that can be white or whole wheat. It was very much inspired by Alton Brown’s recipe, but I simplified some of the steps in the directions to make them easier to make, and I also switched out some of the ingredients to make them less processed. So in the end they are better for you and taste fantastic! I have received so many compliments on them! They are tender and wonderful with the correct texture and looks of English muffins, the way they should be. You’ll probably never want to go back to store brands again after you get a taste of the English muffins you can make yourself at home! Alton Brown has nailed it on several points and they bake perfectly on a griddle with cornmeal, like he suggested.
Some of the changes I made was to use butter instead of shortening and real milk in place of powdered milk. In addition I discovered white whole wheat flour, and I’m so glad I did! There are different varieties of whole wheat grain just like there are different types of apples. White whole wheat is lighter in color, texture, and flavor than the traditionally used red wheat, and it tastes more refined, almost “white”. Yet it contains the same amount of nutrients and fiber as “regular” whole wheat. Since the texture is so light, you can get away with using mostly whole wheat with the health benefits that come along. But you can also make them white if you prefer.
Yeast -Important things you need to know:
Baker’s yeast is a type of fungi and is a group of living micro organisms. When added to dough, they work by eating carbs and expelling CO2 gas into the dough. Tons of tiny bubbles form that grow larger and larger the longer the dough rests. During baking, the yeast is killed and the gas production stops, but the bubbles remain. The result is fluffy bread. This fermentation process also helps with texture and flavor.
If you skip the yeast, use yeast that is too old, or kill it by using liquid that is too hot, the dough will not rise and the result is a flat, dense bread product. You don’t want that.
Yeast must be fairly fresh to work well, but keeps very nicely in the freezer, even 6 months! It will stay loose and powdered in the freezer, it will not freeze into a solid lump. When removing from the freezer to use it, immediately take what you need and quickly return the rest to the freezer to avoid condensation and possible spoilage. I just read that the amount needed should come to room temperature before using, which was news to me so I’ve always used it straight and it has still worked just fine for me.
When baking with yeast, the temperature of the liquids you add to the dough is very important. Not too hot, not too cold, just very comfortable. They are living little organisms and they like warmth and comfort just as much as we do. Cold temperatures make yeast fall asleep and slow way down, and hot temperatures will flat out kill it. Think of it like caring for babies; keep ’em warm and comfy. When the temperature is right, the yeast will thrive and make the dough rise.
How to Make English Muffins
Pour white and whole wheat flour into a large mixing bowl and stir in the salt. Make sure it is well mixed together. Set it aside so it’s ready. A metal or glass bowl is helpful for later when you want to set it in a warm place, but plastic is OK.

White flour can be used, but white whole wheat flour works very well and it tastes almost like white flour. It doesn’t have that rough texture and flavor of “regular” whole wheat, but it is still flavorful and makes for very healthy, tasty breads!

Now melt the butter in a medium sized pot.

Add the milk and sugar, then heat for just a minute or two while constantly stirring and checking until the milk feels really nice and comfortably warm to the touch. With clean hands, insert a whole finger, not just the tip, to get a good feel for it. It should feel like nice, warm bath water. It is VERY important that the milk is not hot in any way! If you cannot keep your finger inside the milk for several seconds, then it is too hot and will kill the yeast.
This is probably THE most important source of the problems people have with their yeast breads: not understanding the concept of yeast being living organisms that will die in high heat and not work well in cold temperatures. Also allowing time for the dough to rise.


When the milk is warm, add dry yeast and whisk well until smooth. This European style whisk is really nice, reaches everywhere and makes whisking so much easier! I have three whisks similar to the one in this link.

With the pot away from the heat, let sit for several minutes to proof the yeast. This is not necessary if you know that the yeast is fresh, but it is a way to check to make sure that the yeast is alive and well. It will develop a layer of “cream” or foam on top of the milk, which indicates that the yeast is working.

It is hard to see in this picture, but there is a foam layer on top. That’s good!

Pour the warm milk and yeast mixture into the flour. Stir well until everything is well combined, working it into a sticky dough. The large spoon from this OXO set works very well and is strong enough to handle heavy dough.


Cover the bowl loosely (to let the CO2 gas that forms, escape) and set it somewhere warm so that the yeast can get to work and make the dough rise. The dough should roughly double in size, which will take a full half hour or a little bit longer. Keep it away from cold and drafts.
Using a stainless steel or glass mixing bowl is helpful as these materials lead heat better than plastic. I like to fill my sink with warm water to get the dough feeling nice and cozy. Just make sure not to let the bowl float since it might tip over when the dough expands and the weight shifts.

While waiting for the dough to rise, set out the equipment needed to bake the English muffins. You’ll need a griddle (a dry frying pan will work as well, but you can fit a lot more on a griddle), several English muffin rings (see below), a lid (I use a cookie sheet), cooking spray, a rack, a large scoop, spoon, small amount of butter or oil, small bowl of cornmeal, a spatula, and a small pot holder.

The griddle I use is a large Presto and it works really well. The scoop is an OXO spring handle scoop, size large, 2 1/4 inch, and is the perfect size for this use. I use eight rings for my English muffins that I made from pineapple cans. See the paragraph below. You can use more than eight, but remember that the more you try to make in one sitting, the harder it is to work fast enough for them all to cook evenly and at the same time. Eight is perfect for me.
The perfect molds for English muffins can be obtained from simple cans. Where I live, small pineapple cans seem to be just the right size as they are short and a little bit wider than other small cans. Remove the top and bottom “lids”, then the rings that remain will work wonderfully! Just make sure that both “lids” look the same, with a proper rim around them just like the can to the right in the picture below. Many cans have a bottom lid that looks like the one to the left, and this type of lid is almost impossible to remove. You can also purchase English muffin rings at Amazon, but these aren’t as tall so the cover during baking may end up resting on top of the muffins instead of the rings.

Grease or spray the inside of the rings with cooking spray. It will last for a while but you may need to repeat after a few muffins. Also preheat the griddle to 300°F.

The dough has doubled in size and ready to go.


When the griddle is properly heated and you’re ready to start baking, drizzle cornmeal on the griddle inside the rings.

Use a large scoop and drop one scoopful of dough inside each ring. Try to work fairly quickly so they’ll all bake at the same time, evenly.

Dip a spoon in a little bit of butter or oil, then press down on the dough a little bit to make them somewhat uniform.

Then drizzle cornmeal on top of each. The cornmeal will give them such a nice texture! It’s a nice touch, thank you Alton Brown!

Cover the top to help them bake. Bake them around 4 -5 minutes on each side until golden brown, adjusting the temperature if needed. They will quickly rise again while they bake, so there is no need to have them rise a second time after scooping dough into the rings. Other yeast breads should rise one more time, but not these muffins when baking on a griddle.

When one side is done, use a small oven mitt plus a turner to flip the muffins. You can lift up the rings and flip only the muffins, then replace the rings, or you can flip the entire ring with muffin inside -whatever is easier.


Then cover them again and bake the other side as well, 4-5 more minutes. Adjust the temperature if needed. They should not take much more than 5 minutes per side.

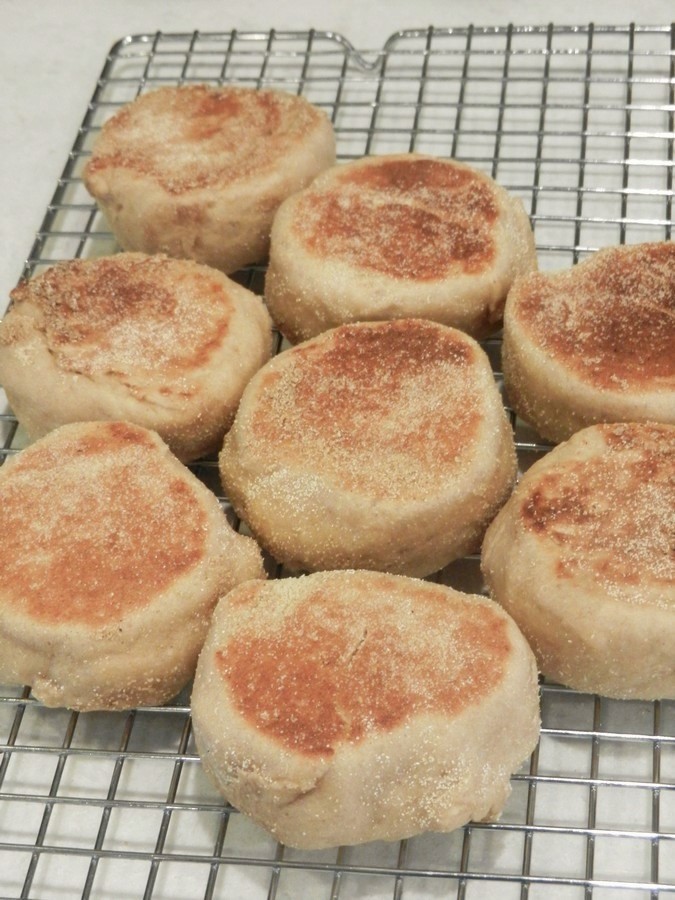
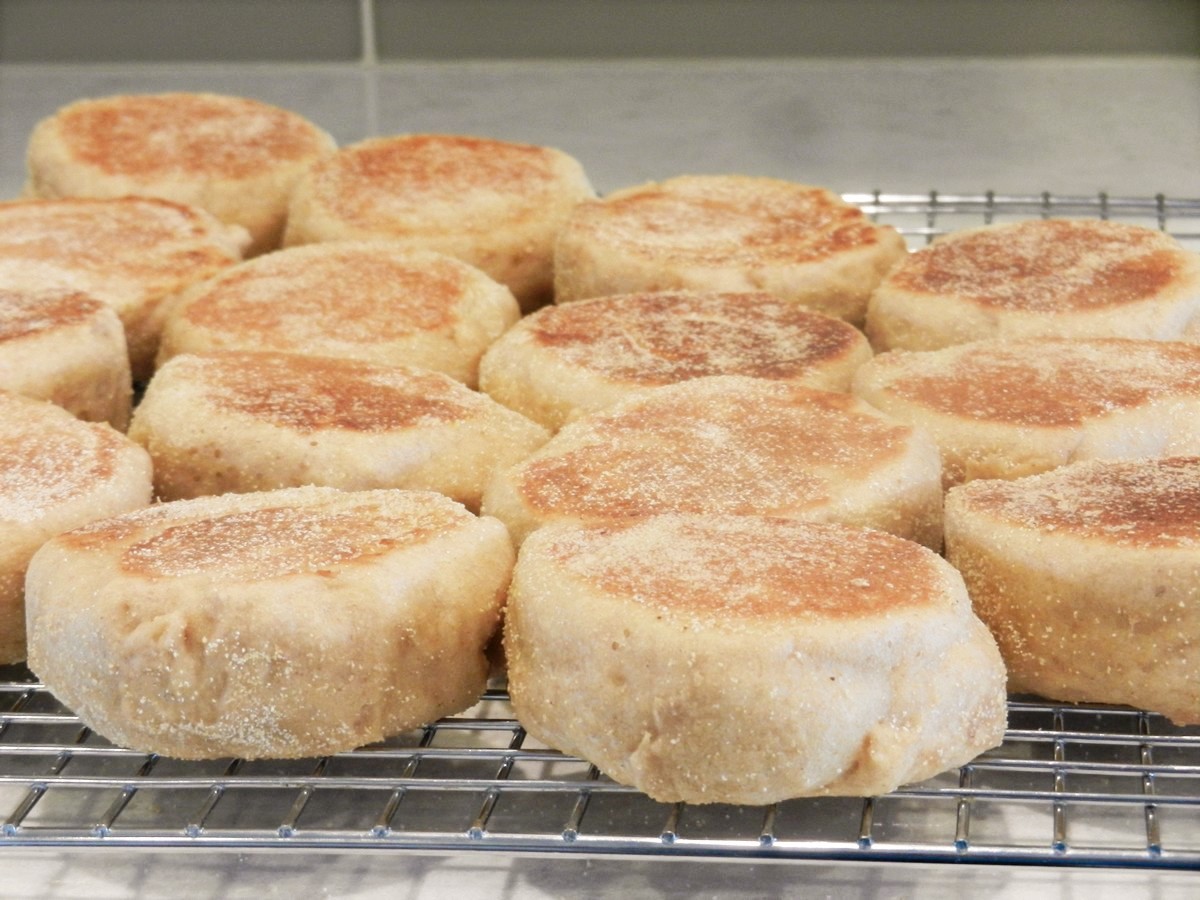
When done baking, remove the muffins and let them cool on a rack. But leave the rings on the griddle ready for the next batch: Drizzle the griddle with corn meal inside the rings and scoop more dough, then more cornmeal on top.

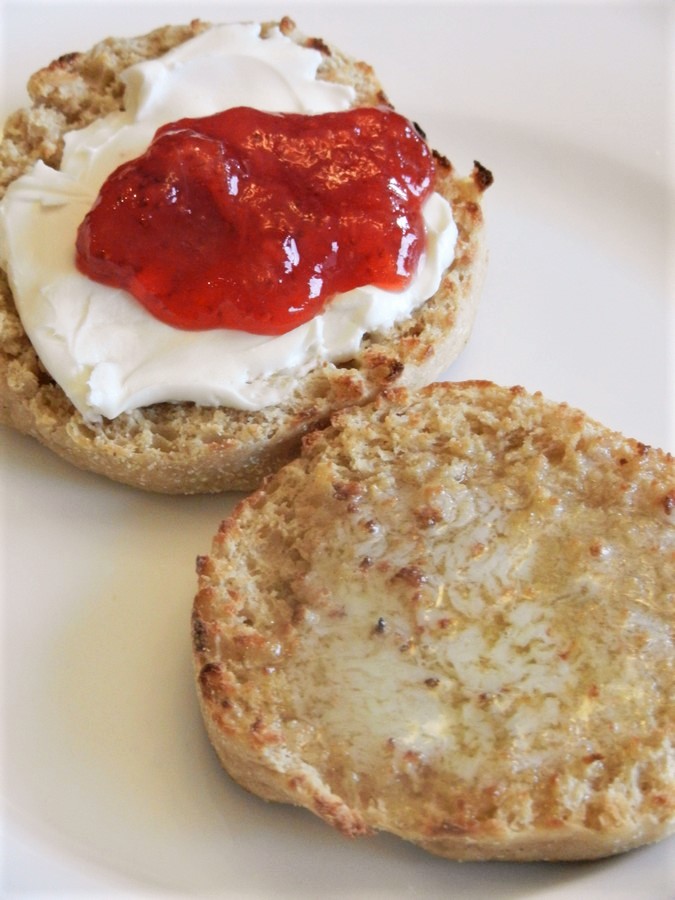
And here’s another nifty trick per Alton Brown: To cut English muffins, use a fork, not a knife. This helps to keep that nice texture inside looking like English muffins. So, insert a fork from the side all the way to the center, going all the way around the muffin. Then gently pull it apart but keeping the two halves together.


See the difference between them in the picture below? I cut one with a knife just so you can see the difference. The one to the left is a lot more appealing, with the correct texture. The one to the right still nicely illustrates what yeast does in breads, creating lots of little bubbles that make them nice and fluffy.

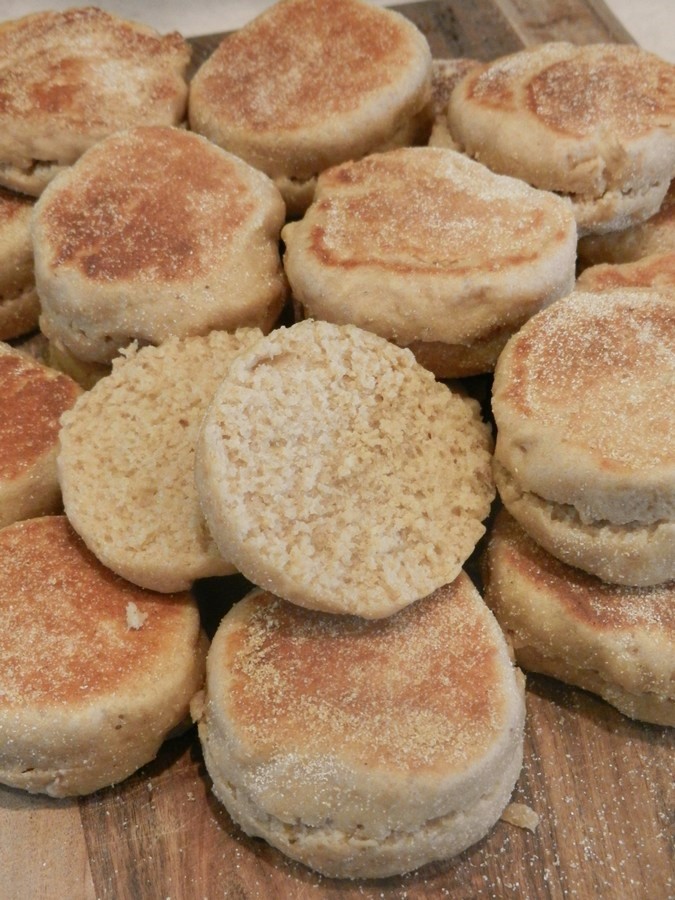
Cut up all of the muffins with a fork when they have cooled down, but keep the two halves together.
Anything not eaten that same day should be kept in the freezer. There are obviously no preservatives added, and bread products without preservatives go stale within a day. I always freeze mine as soon as they are cooled down and cut to keep them as fresh as possible. They can then be taken out one by one, thaw on the counter under plastic or in the microwave for a little bit, just long enough to be able to insert a knife to get them apart (they were pre-cut, remember?) Then pop them in the toaster and finish thawing at the same time.
I hope these pictures and directions have been helpful and inspiring and that you’ll want to give them a try yourself! If it seems like a lot of work, just scroll through the pictures a few times until you get familiar with what to do and the concept of keeping yeast alive and thriving. It really is quite easy once you understand how to make them, and they are the best English muffins ever!! Being whole wheat, they are also very good for you and so soft and tender! If you do try this recipe, I would love it if you left me a comment and star rating below as it is very helpful for me as a blogger! Thanks in advance, and Happy Baking!
- 1 cup all-purpose or white bread flour
- 3½ cups white whole wheat flour
- 2 teaspoons salt
- 2 tablespoons butter
- 2⅔ cups milk
- 2 tablespoons sugar
- 1 tablespoon dry yeast
- cornmeal
- Pour the white and white whole wheat flour into a large bowl that can allow the dough to expand while rising. Add the salt and mix well. Set aside.
- Melt butter in a small to medium sized pot.
- Add milk and sugar and heat for a minute or two while stirring and checking, until it reaches a comfortable, warm (not hot!!) temperature. The temperature should feel like really warm bath water or anywhere from 102-108° F or so.
- Add dry yeast, whisk until smooth.
- Let sit for 3-5 minutes or so to let the yeast proof. It should foam slightly on top.
- Pour the milk mixture into the flour and work the mass into a sticky dough, stirring until well mixed.
- Set the bowl in a warm place for the dough to rise. Cover loosely and let sit for approximately 30 minutes or a little bit more until doubled in size. You can set it in a sink filled with warm water, but not so much that the bowl floats.
- While the dough is rising, prepare the equipment needed to cook the English muffins: a griddle or frying pan, cookie sheet or other cover, English muffin rings, spatula, pot holder, small bowl of cornmeal, butter or oil, a large spring handle ice cream scoop, spoon, and a wire rack.
- Spray English muffin rings with cooking spray and preheat the griddle to 300° F.
- When the dough has doubled in size, stir to allow the air to escape.
- Set the English muffin rings on the dry griddle or frying pan; do not grease the griddle itself.
- When hot and ready to bake, sprinkle the griddle inside each ring with corn meal.
- Drop one large scoop of dough into each ring, then flatten just a little bit with a spoon dipped in butter or oil to make them more uniform on top.
- Sprinkle cornmeal on the tops of each muffin as well.
- Cover and bake for approximately 4-5 minutes until golden brown.
- Using a spatula and pot holder, flip the rings with muffins to bake the other side.
- Cover again and bake the other side for 4-5 minutes as well. Adjust the heat if needed.
- Remove to a wire rack to cool completely.
- Bake remaining muffins, always sprinkling cornmeal on the griddle inside rings and on top of dough. You should be able to bake several muffins per ring before needing to spray again.
- When muffins are cool, cut them by inserting a fork from the side all the way into the center, all the way around each muffin. Gently pull them apart. They should have an irregular surface on the inside halves. Keep the two halves together.
- Use the same day or freeze.


These are the BEST English muffins I’ve ever had!! I had the privilege of having Terese show me first hand how to make these and now I’m hooked! Everytime we run out we panic! I always make more than one batch of the larger recipe and freeze the rest!
Thank you so much, Kim! We did have a fun time baking, and it makes me so happy to know how much your family loves them! Thank you very much for your kind words and for leaving this comment for me!
“Just to say “thank you” We all enjoyed your delicious
food and the evening was everything we hoped it would be.
Thank you so much.“
Good to hear, thank you!
I just discovered your blog and I am so inspired! I can’t wait to try making these English muffins. Your directions are easy tonread and the pictures are great. I love the tip about cutting them with a fork. Thanks so much for putting this together! Can’t wait to explore your blog more.
You’re so welcome, I’m glad you like it! I’m excited you’re here!