If you wonder if you can handle growing vegetables on your own, you should try green beans! Growing green beans is easy and rewarding, and fun for both kids and adults! Also called snap beans or string beans, they can grow in pots or garden containers, or in-ground. You can fit them into small places as they really don’t need much space. Bush beans can also be planted close together as they will use each other for support, making staking unnecessary. They need some fertilizer and a bit of water, but these plants are not fussy. They are not infallible either, they just aren’t difficult plants. For these reasons they are an ideal vegetable for kids to grow or for adults who want to start out with something simple. The seeds are large, also making it easy for kids to handle and plant. With the pictures below I will take you right through it.
Did you know? Some helpful tips before we get started:
Although sometimes called string beans, most varieties of green beans nowadays do not have much of a string in them. It’s just an old name that sticks around, and in fact this unpleasant characteristic has been more or less “bred out” of them. I have tried several varieties myself and haven’t had a problem. These days they are usually referred to as snap beans due to the snap you’ll hear if you break a fresh bean.
Green bean plants do not tolerate any frost at all, so definitely do not seed until all danger of frost is past and the days are warming up somewhat.
The one little detail that can be a problem for beans is that they do not like to be transplanted. That doesn’t mean it cannot be done, but they much prefer to be planted directly into the place where they will be growing until harvest. Some crops are nice to start indoors early in the season to give them a head start, but green beans grow to maturity so quickly that it really isn’t necessary anyway. However, if your child grew a plant in a cup at school and brought it home, don’t throw it out! Just transplant it as gently as you absolutely can and it will probably make it. It will be so educational and fun to see it grow and produce real food!
Selecting Seeds:
When selecting seed packets, I do find that it saves to stay away from the very cheapest brands since these tend to be smaller, lower quality seeds. Pay just a little bit more and you’ll get better quality plants and beans in the end.
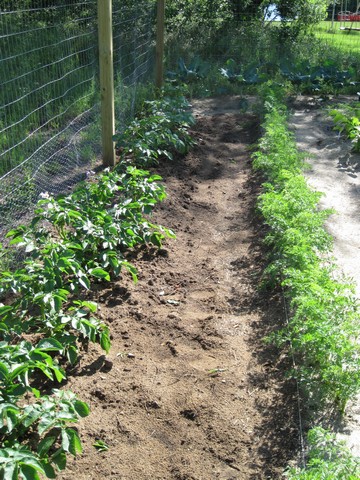
The most important factor to pay attention to when you go to purchase seeds is whether they are pole beans or bush beans. Pole beans produce long vines and need some sort of trellis to hold onto as they grow upward, while bush beans will remain small and compact and reach about a foot tall. The beans themselves will be the same, so it is the space you have that should determine what type of plant you will want to select. The pictures in this post show bush beans.
Then there are wax beans as well, which are yellow and easier to see when you pick them, and they look good mixed with green beans or in a salad. To me they taste the same as green beans. Otherwise green varieties are fairly similar to each other so I just grab what I find.
How to Seed and Grow Green Beans
Before you seed, it is a good idea to work some fertilizer into the ground. Green beans are light feeders, so one application will be enough. I usually put down some balanced fertilizer such as 10-10-10, otherwise you can also go a little lower on the first number (nitrogen) and use 5-10-10 or so. Just don’t use types that are high on nitrogen as it causes the plants to concentrate more on producing leaves than beans.
Since I seed beans directly into the ground in my vegetable garden, I plan out how wide I want the row to be before seeding. I want to be able to comfortably pick into the middle of the row from both sides, so 3-4 feet wide for me. These seeds are so easy to plant that I have overdone it in the past and planted too many. One year I was utterly overwhelmed dealing with such masses of plants and beans that I secretly hoped they would be attacked by something awful! So now I succession plant instead, which means I plant a few different sections two to three weeks apart, ensuring that beans keep coming all summer instead of all at once.
Below is a patch that I tilled by hand together with some fertilizer, then I lay the beans out and ready to poke into the ground. Using the width of my hand as a measurement, I put them down approximately 4 inches apart, sometimes a bit more. That’s about perfect! They will grow close together and use each other for support. I don’t measure too closely; it isn’t that big of a deal.
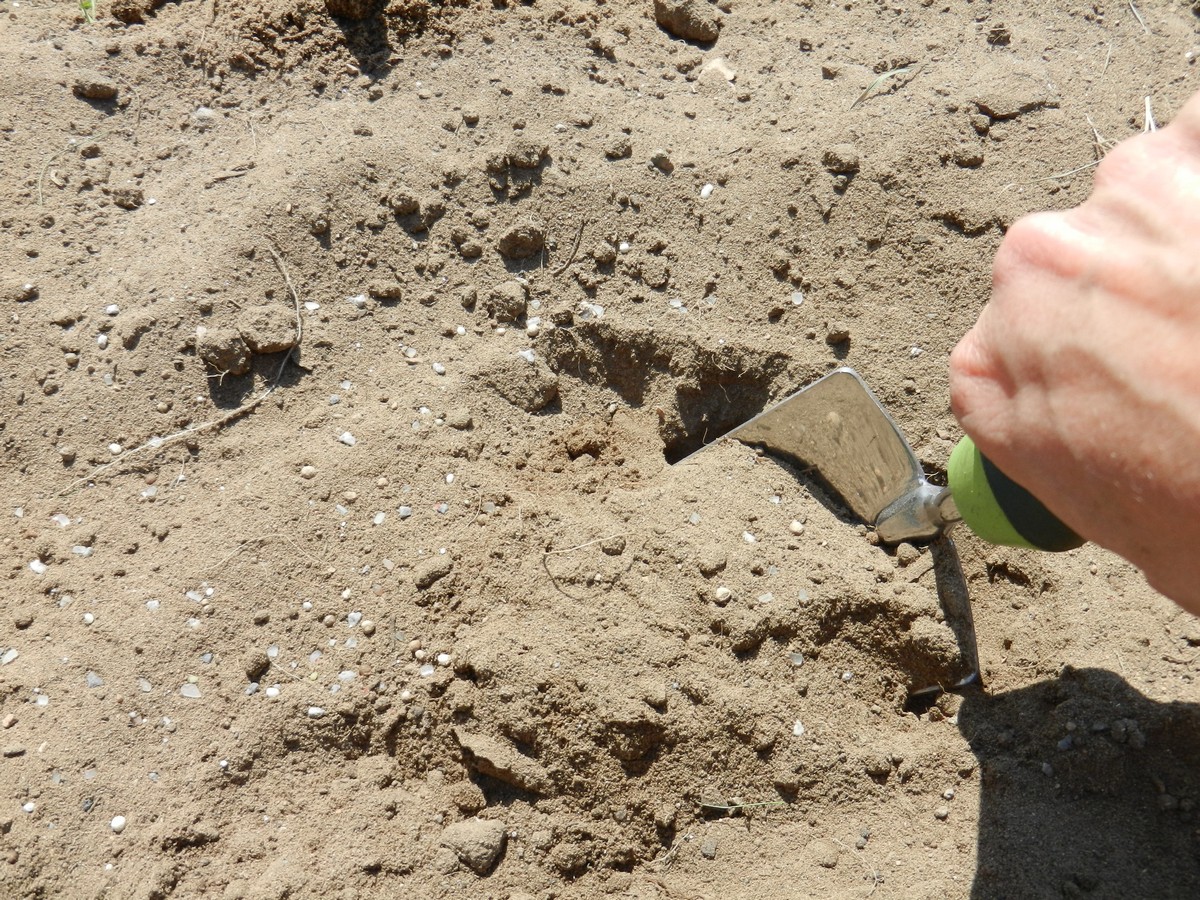

Large seeds such as green bean seeds like to be planted deeper than small seeds. One inch or so is great, and rather than measuring each hole I just poke them down with my finger until I think they’re about an inch down. Being that the soil has been tilled and loosened, it is a quick, easy, and fun job! Poke, poke, poke…. Bada bing bada boom, and it’s done!

Then I swipe the soil around until the holes are covered.

Once the seeds are in, I water well; slow and deep is best so that the soil stays moist deeper down.

After 4-5 days, sometimes a week, I usually see the first sprouts. Bean sprouts are large, thick, and sturdy from the get-go. They look like light green loops coming out of the soil. Sometimes you can see the dirt cracking right above where a sprout is about to emerge. Keep on watering often enough that the soil stays moist a few inches down. It can be dry on the surface as long as it is moist where the seeds and roots grow.

Below is the beginning of a little head of leaves ready to lift itself out of the ground!

These pictures are a bit blurry, but the leaves that you see are seed leaves; the very first set of leaves. Seed leaves often look different from the true leaves that come next.

A new set of true leaves will soon develop from the center, and the plants will quickly take off from here. The seed leaves will probably wither and fall off soon, and that’s OK as they by then have served their purpose in supplying the new seedlings with nutrition.

The true leaves come in right away and grow fairly large, and quite quickly. We’re talking days. The plant above sprouted only a couple of days ago and is probably close to two inches tall.

In the picture below I have put down a thick layer of grass clippings to serve as mulch. This helps keep the soil from drying out and also adds nutrition as it breaks down.
During the entire growing season, water regularly. Slow and deep, not just a splash on the leaves but down to the roots. To prevent disease, it is best to water early in the day so that the leaves have a chance to dry out before night.

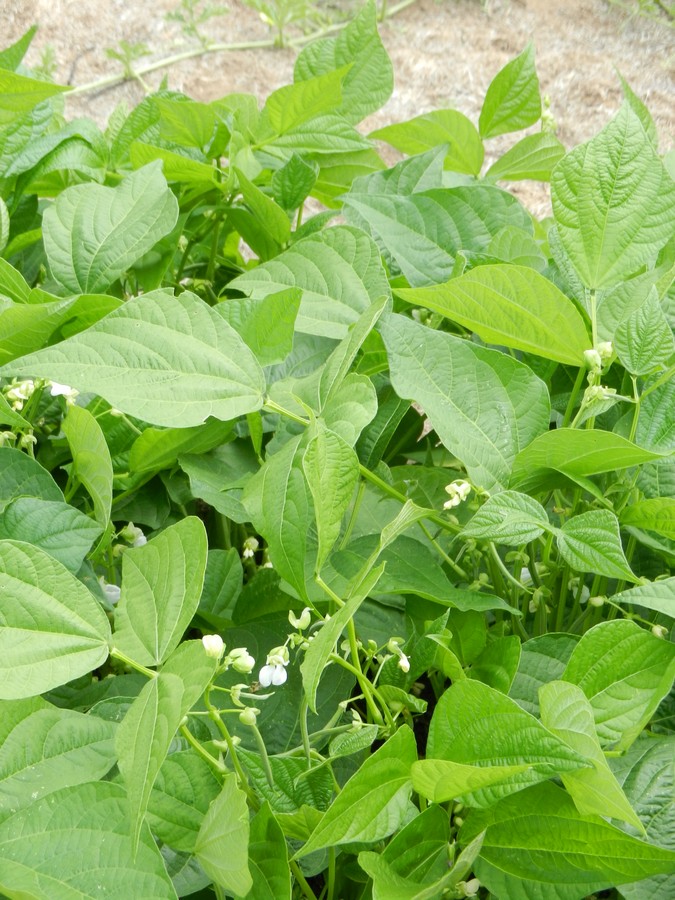
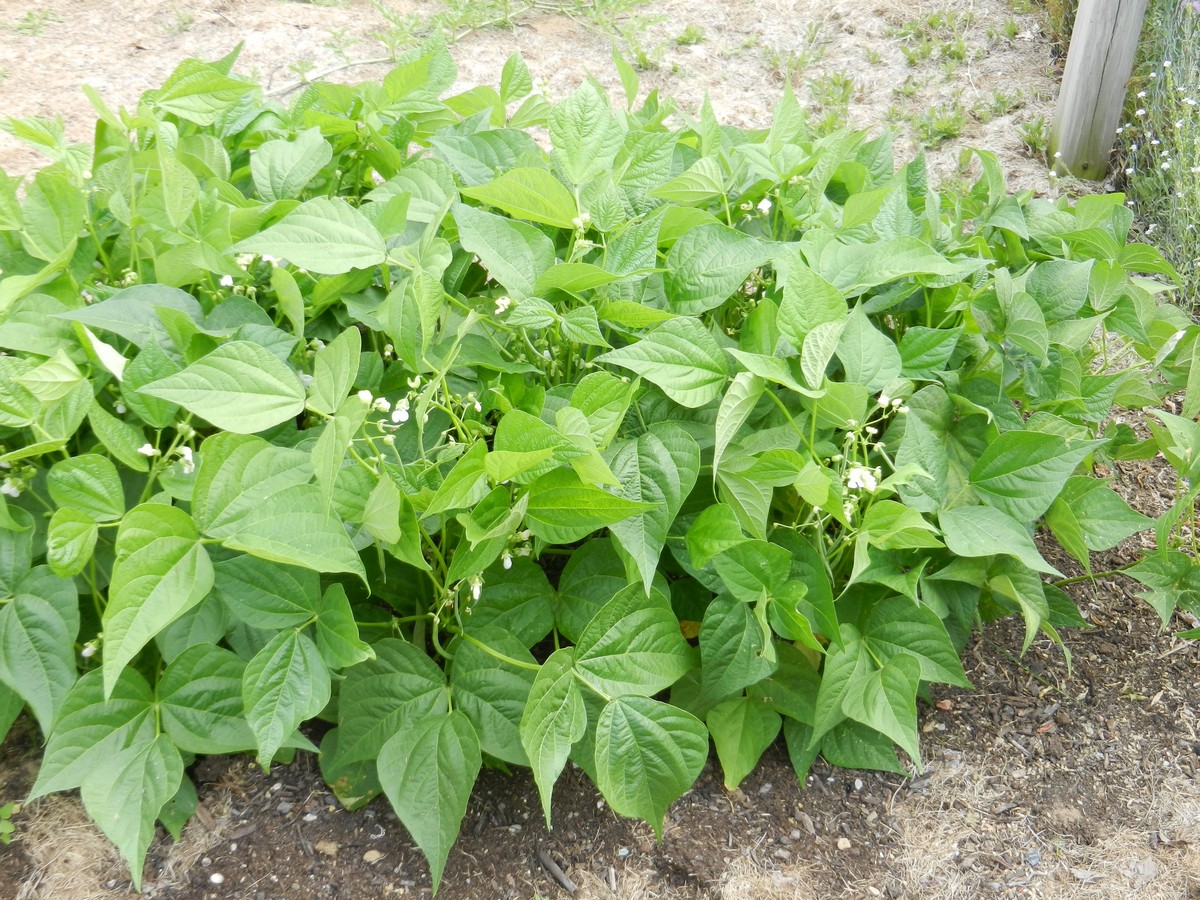
After a few weeks your plants will have grown to full maturity. They are full and lush, and supporting each other as they grow close together.
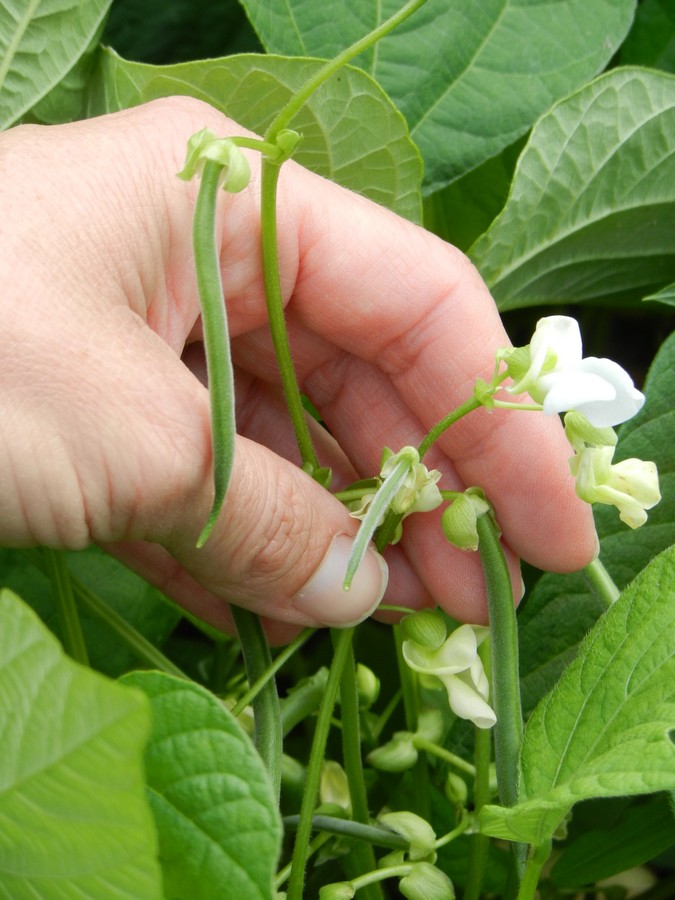
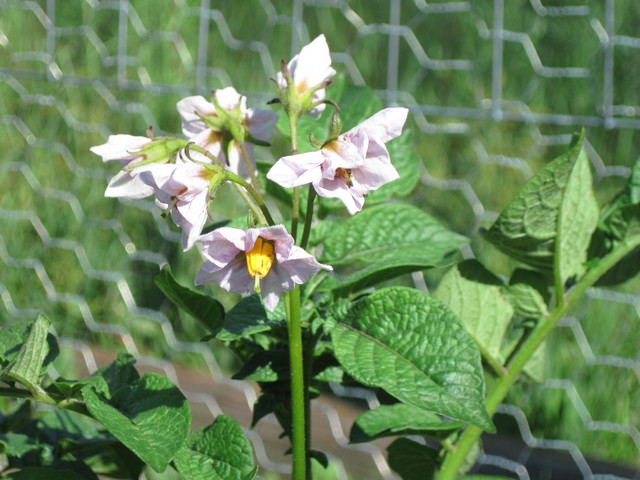
They will start producing dainty, white flowers, which means green beans are on their way! I find them quite beautiful!

These plants are in full bloom. As the flowers wither and the petals fall off, a skinny, green little straw will grow from the center of each one. That’s the beginning of a green bean. It will continue to grow until it’s several inches long and ready for harvest.

When and How to Harvest
Snap beans can be harvested at any time while they are young and tender. They can be as small and skinny as you want, although maybe not too small or you won’t get much out of them. Therefore, the ideal time to pick them seems to be when they are pencil thickness. If you wait much longer they get tough and seeds will start to form inside the bean pods.
Eventually, if left alone to grow, seeds inside the beans will grow large and mature, leaving the bean pods thick and bulging. At that point the plants, whose goals are to create seeds, will be happy with their efforts and call it good. You get nothing more out of them. So keep picking and the plants keep producing!
I usually pick every two days or so during the beginning of the harvest when the plants produce the most. There are clusters with long, straight beans and they just keep coming! It is so exciting and fun! Later they will slow down and the beans may not be as straight or long as before.
The plants below are almost ready for picking.

Harvesting tips:
*Beans are easy to pick and it does not matter where from the stem they break off. They can break off from the stem itself or at the very top of the bean, leaving a little knob still hanging. It’s fine either way.
*Green bean plants are tender with fairly shallow roots, so definitely hold onto the stems when you pick beans so you don’t end up pulling off entire sections of plants. I still do yank off stems from time to time but it helps to hold onto the plants a little bit. The beans come off pretty easily, so children can definitely help pick.
*Do not harvest while the plants are wet since you can spread disease while moving from one plant to the next.
*If you can, pick the beans early in the day before it gets really hot, although I often pick later too. But hot beans seem to go limp faster than cool ones.
*If the beans on the plants feel limp, give the soil around the plants a good watering as they may be drying out. Then wait for the leaves to dry and for the beans to crisp up before picking. Try to avoid top watering to keep leaves dry.
*If the weather allows and you have a lot of beans to pick, it may be a good idea to wear a long sleeve shirt (although I usually don’t). The leaves on snap bean plants are a little bit prickly; not so much that you feel them scratching you but enough that they can irritate your skin and leave you a bit itchy afterward. It goes away after an hour or two and I just ignore it. Kids may appreciate some covering for these reasons, though.
Storage
Snap beans store well for up to a week in the refrigerator if kept in a plastic bag or storage container. Do not wash them, just get them right in there as soon as possible before they go limp.
If you end up with more beans than you can eat, it is a good idea to store them in the freezer for later. But before you do, blanch them so they will keep better. Blanching is a boiling process used to preserve certain vegetables in the freezer. The purpose is to destroy enzymes that will cause vegetables to go bad and lose nutrition. To blanch beans, drop small batches at a time into boiling water, time it for three minutes on a full rolling boil, then quickly transfer to ice water. Time again for three minutes before draining, then freezing. I also give them a spin through my salad spinner before freezing in plastic bags. The beans will stick together once frozen but easily come apart if you give the bag a little whack against the counter top. Frozen vegetables will not be quite like fresh ones; they will still be great for cooking but they will have lost their snap.
Look at this big pile of green beans ready to be cut into smaller pieces and blanched for the freezer! Spacing two or three sections of bean plants a few weeks apart, I’ll have plants that keep on giving and we’ll be able to enjoy delicious, home grown beans all winter long!

Below are some pictures of a season ended. The plants are withered and completely finished. It’s time to clean up and prepare for winter.

Since the roots of green bean plants are fairly shallow, it is easy to pull them out of the ground, especially when they’re dead and not hanging on much anymore. Sometimes I’ll just yank them out, other times I’ll use a hoe or cultivating fork of some sort. It’s good to get rid of all this junk to make tilling easier, and it also helps prevent possible disease or insects from hiding or hibernating until the following season. If the plants were not diseased you can compost them.

Ready for my husband to till.

Seeding and growing green beans is fun, easy, and very rewarding! I hope the information and pictures in this post has helped show you what to do so in order to grow them yourself, whether in containers or in ground in a vegetable garden. I would love to hear from you in the comments below!
I love to grow vegetables in my home garden but didn’t know where to start. Thank for your tips. Very simple and easy to get started, I will follow your advices in my next year’s gardening projects!
I’m so glad you found my article helpful! Thank you for this nice comment!
Thank you very much for this article and photos Terese! I started some green beans indoors and they’re already flowering and they’re not even transplanted to the garden yet! So I will follow your advice and plant right out there next spring. Happy growing!
Deb
Wow! Hope you’ll have a great harvest with these eager ones! And you can probably get another set planted outside as soon as chance of frost is over, that way you’ll have a second crop going! 🙂
Thank you for all your tips. I am trying to start a garden so my family can eat healthier. Just getting started and you helped me quite a bit. Again, thank you!
That’s good to hear, I’m so glad I could help! I hope you’ll enjoy gardening and that you’ll have a fantastic harvest! Thank you for leaving me a comment, I appreciate it!
The pictures were a big help since this is my first time gardening. I didnt even know what to look for, but now I know the beans have come out. Have plenty flowers so I’m excited to reap a nice harvest.
That’s awesome!!! You’ll have lots of beans coming then! 🙂
Thank you! This was so informative and easy to follow. It’s my first time gardening and I needed help!
I’m glad you found my blog post helpful! I also hope you’ll enjoy gardening and that you’ll have lots of beans coming this summer! Have fun!
Hello I am in Need of some help with my garden!!! This is not new to me , but it is , as a kid me and my great grandmother would pick and plant , but tht was forever ago lol …. So me and my daughter made a little garden in our backyard and I planted green beans and cucumber and potatoes, my green bean plants are growing like weeds but I have yet had any spritz can you help me
Hi there! If you are referring to them not flowering or producing beans, it just takes a little while for that to happen. Once the plants become a good size they will soon flower, and at the center of each flower the beans will grow. I do know that one thing that can interfere with vegetable growth is nitrogen. If you apply a lot of nitrogen to plants that are supposed to produce “fruit” in addition to leaves, nitrogen can get in the way. An overload of nitrogen will cause a lot of plant / leaf growth, but at the expense of the fruit you are looking to get. For beans you want flowers, not just leaves. So the fertilizer needs to be more balanced and not just high in nitrogen and low on the other numbers. So those are two things to consider: whether they have been given enough time to produce (look at the seed packet what to expect) and whether they have been given too much nitrogen. I hope this helps!
Hi there,
The beans sprouted up quickly as you said, and even started to grow, but then in the course of one day, something selectively ate every leaf of every green bean seedling in my garden, leaving me with sticks. When I googled it, the search suggests a beetle ate the leaves…how can I prevent this?
Thank yoU!
Oh no, that’s so sad! It might depend on which beetle attacked your plants, but I have found Captain Jack’s (which contains spinosad) to be very helpful in protecting my plants against a variety of worms and beetles. This spray is supposed to be good for organic gardening. It is not a chemical but rather a bacteria that kills them. I only use it when I have to, and it has to be reapplied every two weeks and obviously to new growth as well. I hope your next crop does better!