How to Grow Carrots From Seed to Harvest. Tips & Pictures

Homegrown carrots are known for their sweet and flavorful taste. They also have a bit of a reputation for being hard to grow, but I have found that carrots are fairly easy if they have the right growing conditions. A little bit of information and preparation goes a long way. Being a hobby gardener only, and not a professional, I have personally grown carrots successfully for several years. I’ll show you what I do and give you some how-to tips that can make a big difference in getting them to germinate and grow properly. First some information to help you understand what carrots need in order to thrive in the home garden, then some practical pictures to show you exactly what to do: How to seed, germinate, grow, and harvest homegrown carrots.
Important factors to be aware of
Soil conditions
Carrots like sandy, well drained soil. They do not do well in clay, compact, rocky, or water logged soil. They like moisture, but not wet soil that will not drain. If your natural soil is not optimum for carrots, you could try a raised garden bed and prepare it with soil that will work better. Otherwise, gypsum may help improve clay based soil.
Before you sow, till or work the soil deep and well, down to a couple of inches below the debt of fully grown carrots. Remove rocks, twigs, roots etc. Carrots like loose soil with little / no debris hindering them. You may not be able to get rid of every little bit, so just get the worst of it. Then dig down some fertilizer (see more info below).
Fertilizers
Contrary to a lot of other vegetables, carrots do NOT like a lot of fertilizer! They actually do better in somewhat poor soils, so when it comes to fertilizers, less is more. They do like some nutrition for sure, so don’t avoid fertilizers, but use only half of the amount recommended on fertilizer packages. The best way to know how to fertilize your soil is by doing a soil analyzes at a garden center to figure out the nutrition status of your soil, and go by their recommendations. They cost around $15; bring a bag of about 2 cups worth of your soil, and it may take a week or two to get the result.
In general though, on fertilizer packages you’ll see three numbers in a row that stand for (consecutively) nitrogen-phosphorus-potassium. When I first seed, I often add a little bit of a general, balanced fertilizer such as 10-10-10. But if possible, go very low on nitrogen and more of the other two so you’ll have less green and more carrot. Example: 0-10-10 or 5-15-15. High nitrogen causes a lot of foliage and little to no root growth, which is fine for lettuces but not for root vegetables.
A good way to think about these numbers and and which part of the plant will be focused on, is “Up-Down-All Around”. So for carrots, you want Down and All-around, not so much Up. As a natural supplement every month or so you can add some fish emulsion or sea weed if you’d like (the one linked to has both), which they love! Bone meal is also great, and if adding some potash along with it, you have both phosphorus and potassium covered. Natural fertilizers often add a lot of beneficial trace nutrients as well.
Moisture
Carrot seeds need to stay moist in order to germinate; if they dry out, they will die pretty easily. Carrot seeds are supposedly hard to sprout, and I used to think they were just fussy in general. But for me it has always come down to watering. If I have not been able to keep them moist and they don’t sprout within two weeks, I just try again, no big deal. So far I’ve never had a season without a good carrot crop in the end.
I always succession seed (spacing out two or more sets a few weeks apart) in order keep the goodies coming all summer. When seeding during hot weather, I water at least twice a day, three times if possible. There are times when I delay seeding because I know I’ll be too busy to stay on top of it and there’s no use in even trying.
After sprouting I keep watering frequently but gently for another week or so, depending on weather and temperature, then once or twice a day until they start to really establish and grow. I have also been known to put out a sprinkler with a timer on it mid summer, which frees me up.
Throughout the growing season carrots should be watered regularly just like other crops. But since they grow deep into the ground, they prefer a small trickle over time so it can seep down deep rather than a big downpour that spreads out and evaporates. While also watering other crops, it has also worked well for me to go back and forth between them, allowing water to absorb before adding more.
Seeding Carrots
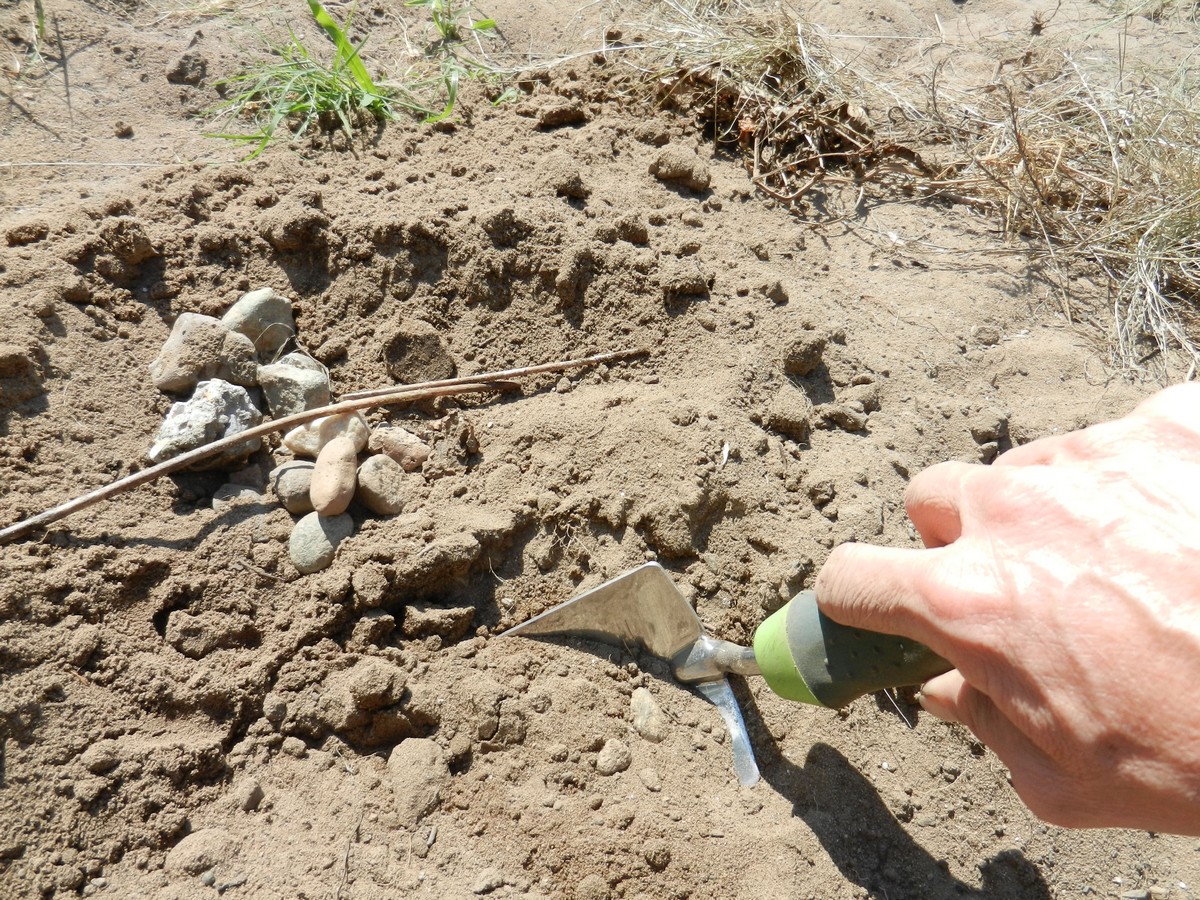
Before seeding I dig through the soil with a hand rake to get rid of any rocks, twigs, and other debris, and also to fluff up the soil. Afterwards I gently smooth out the top without packing it down, and mark the area to make sure nobody steps where they shouldn’t.
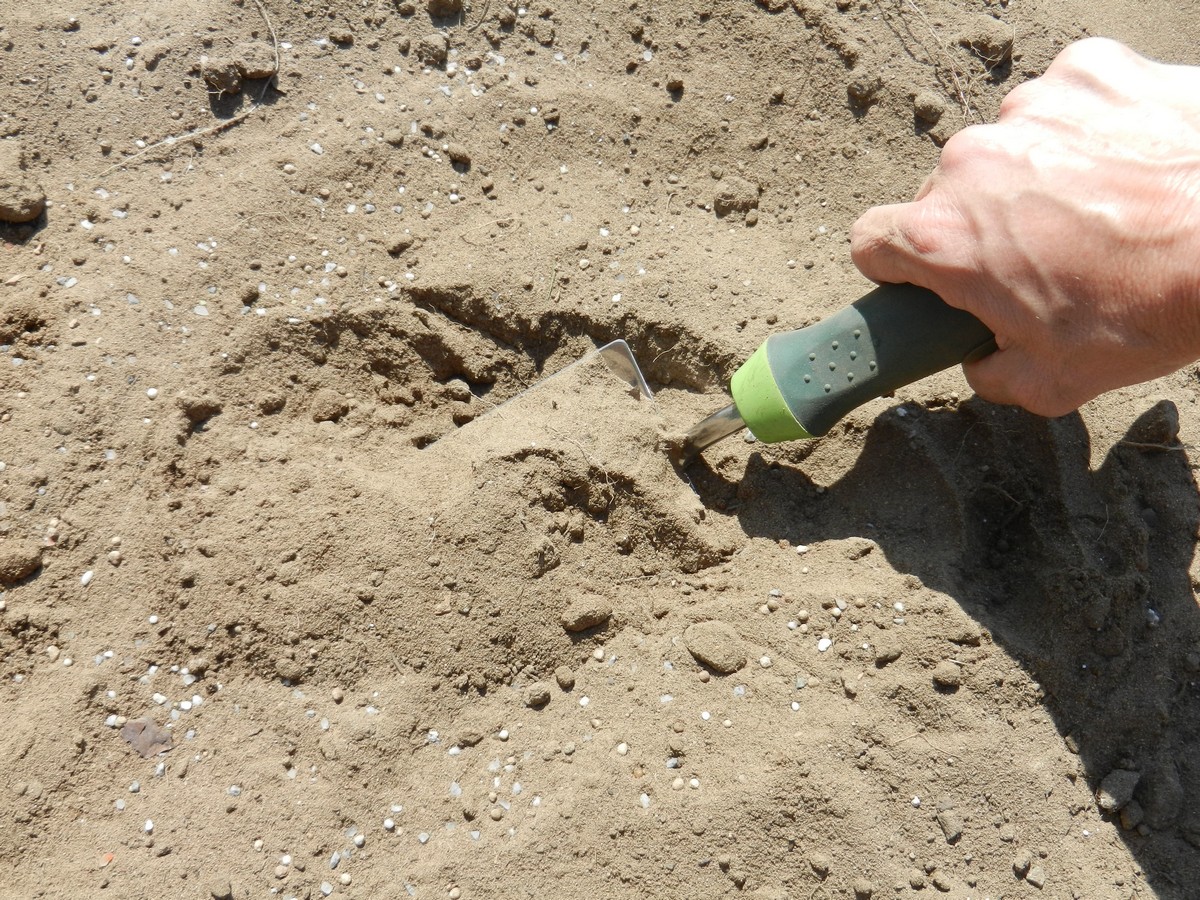
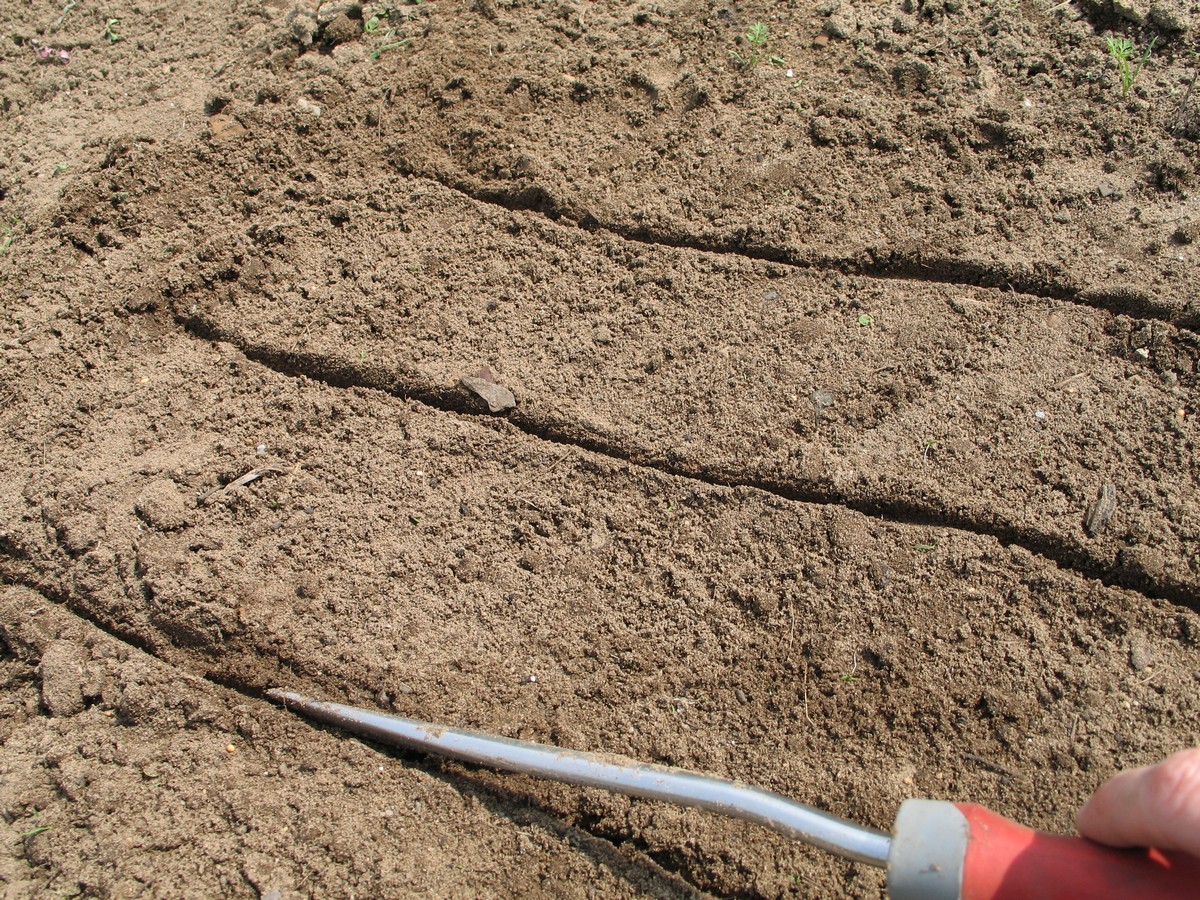
Then I mark lines for rows and make skinny grooves (1/4 inch or so) with my finger or my trusty weeding tool (similar to this one). Seed packets say to space rows a foot apart, but that’s not really necessary unless you have a ton of rows and plan to use machinery to harvest. I usually only have four rows close together at any given time to allow room for weeding and care, so for me five or six inches in between works really well.
The seeds are really tiny, so I pour some into the palm of my hand and pinch a few at a time with my fingertips, rubbing them together and sprinkle into each groove. I move my hand along the row so that they fall fairly evenly into the groove. It’s a good idea to seed them close together, even if they land on top of each other here and there. You’ll space them later. It just helps to ensure that you’ll have enough seedlings growing where you want them, in case some don’t sprout.
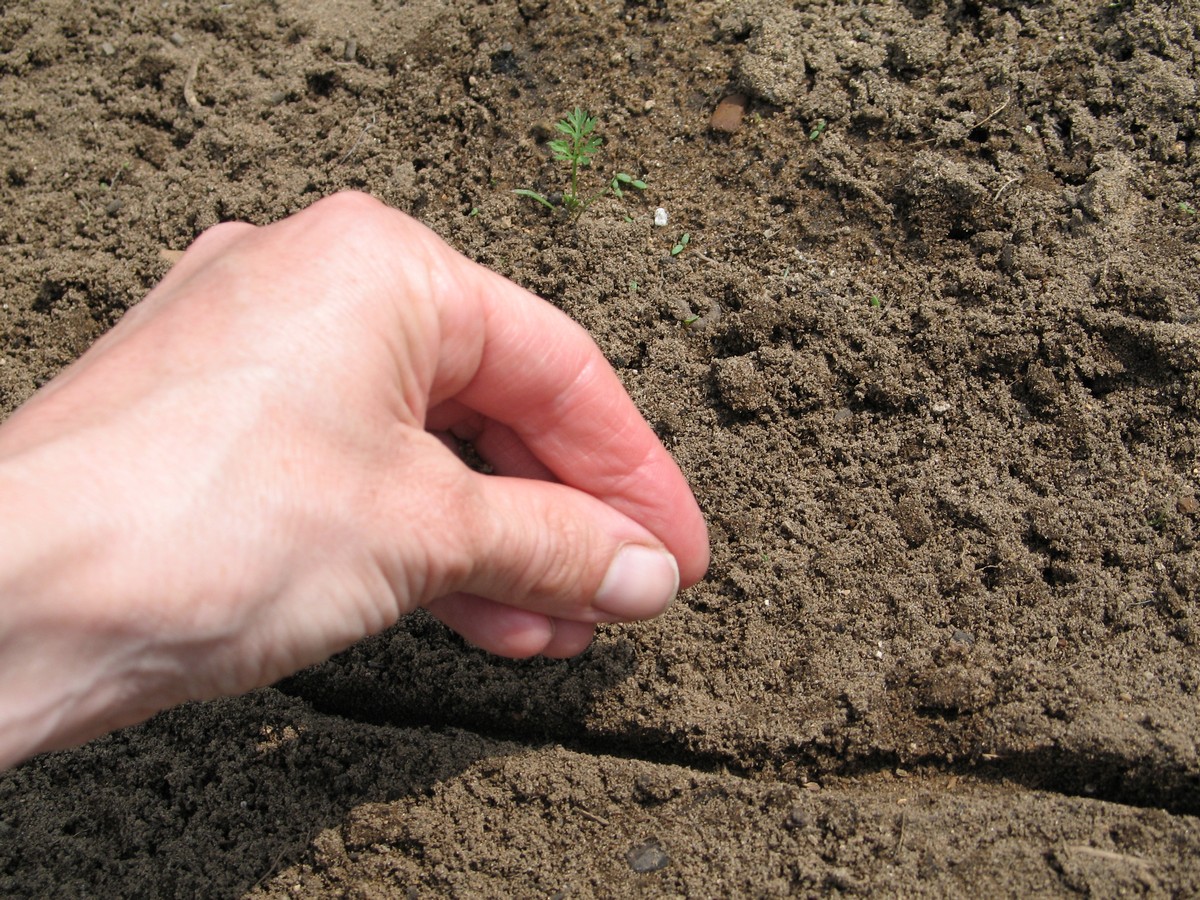
After my rows are seeded, I close up the space by pinching a little bit of dirt from either side of the groove, like in the next picture.
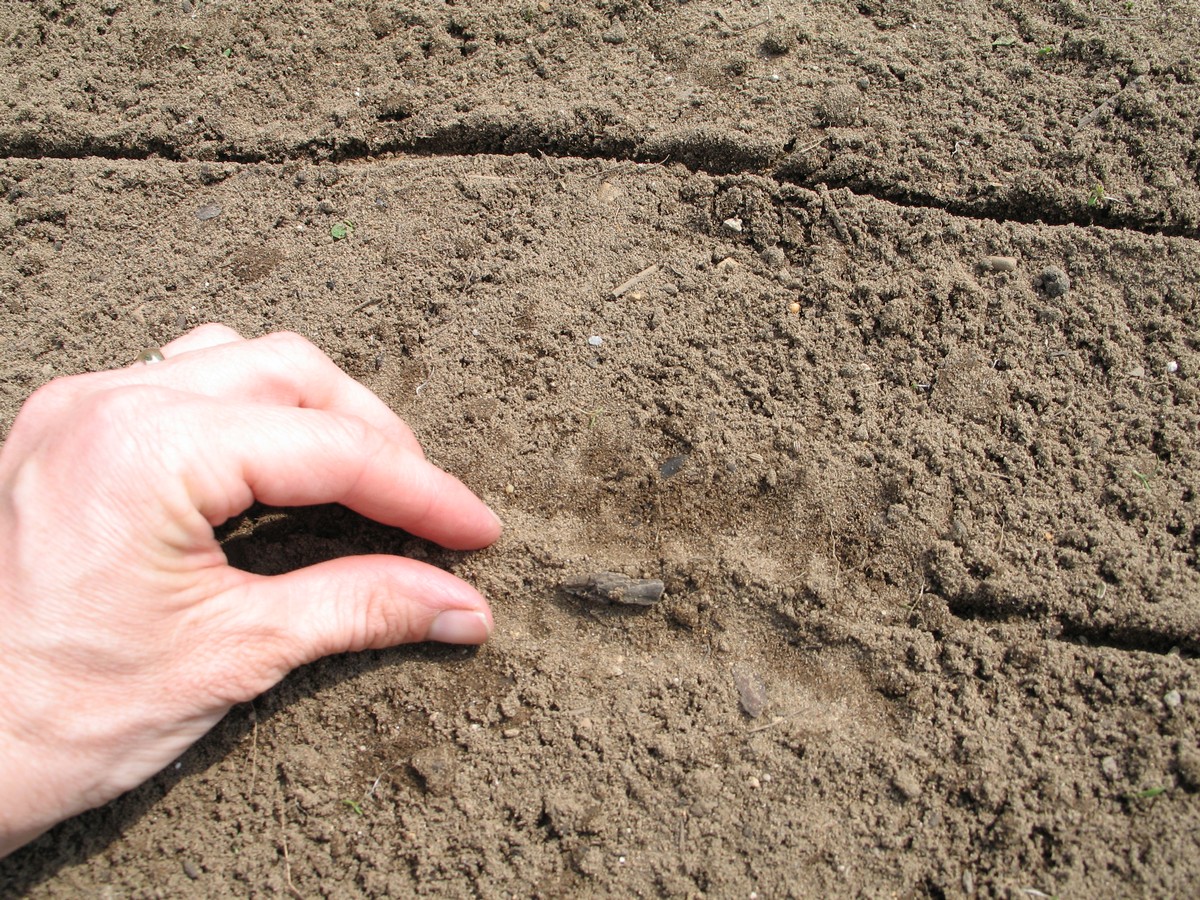
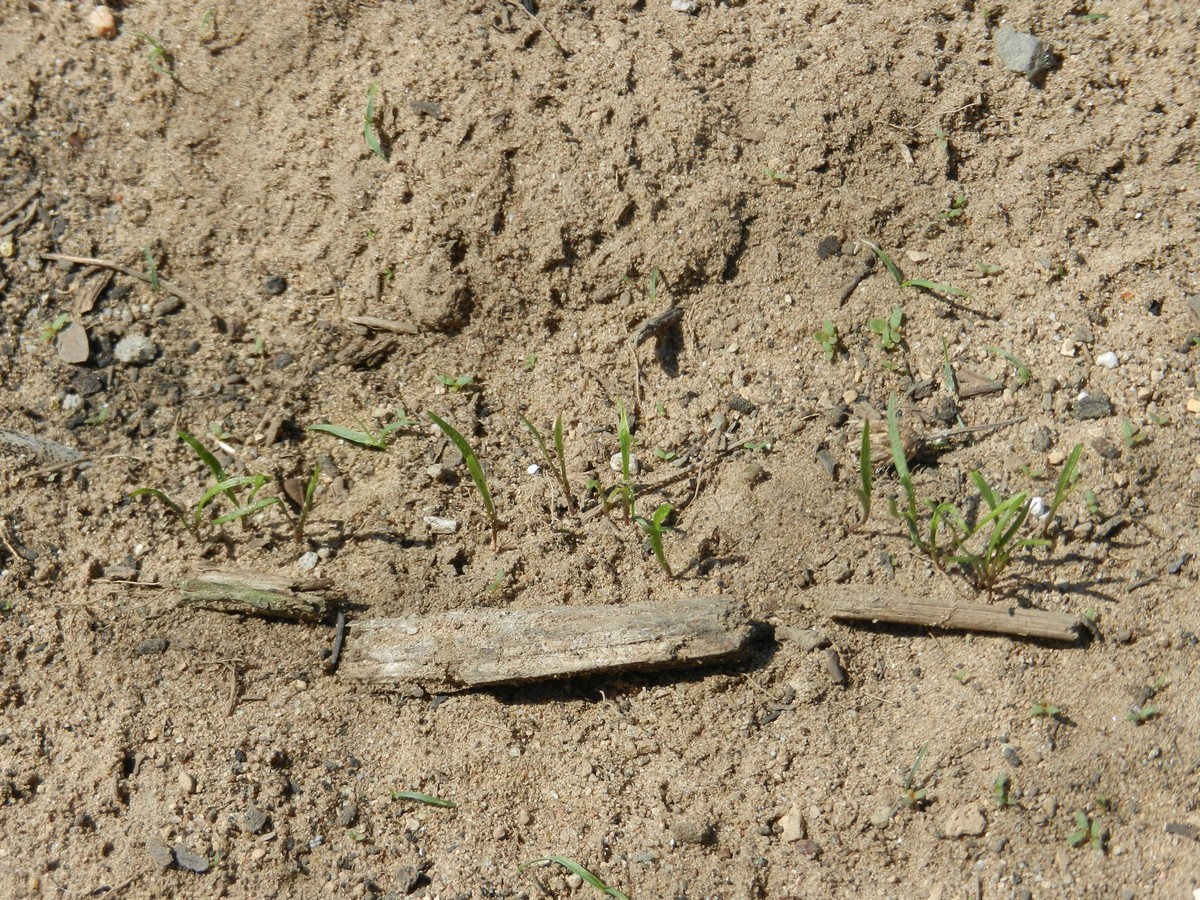
Or, if I get impatient, I’ll just sweep my hand over the rows to cover them. In the picture above and below you can also see seedlings from a different planting; some have developed second sets of leaves, while others have just sprouted and still have only two skinny grass-like leaves per plant. (There are also some tiny weeds here and there.) I had decided I didn’t plant enough the first time, so I was at it again.
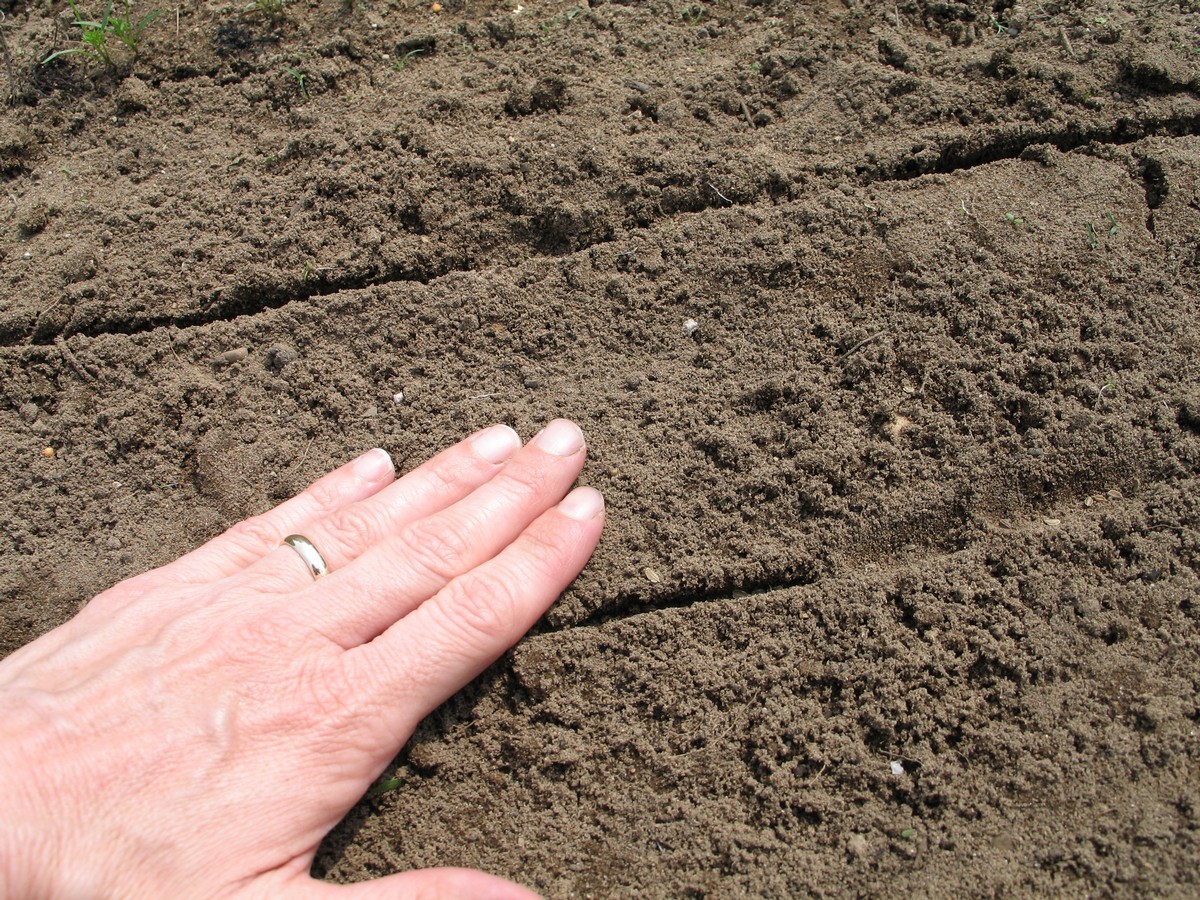
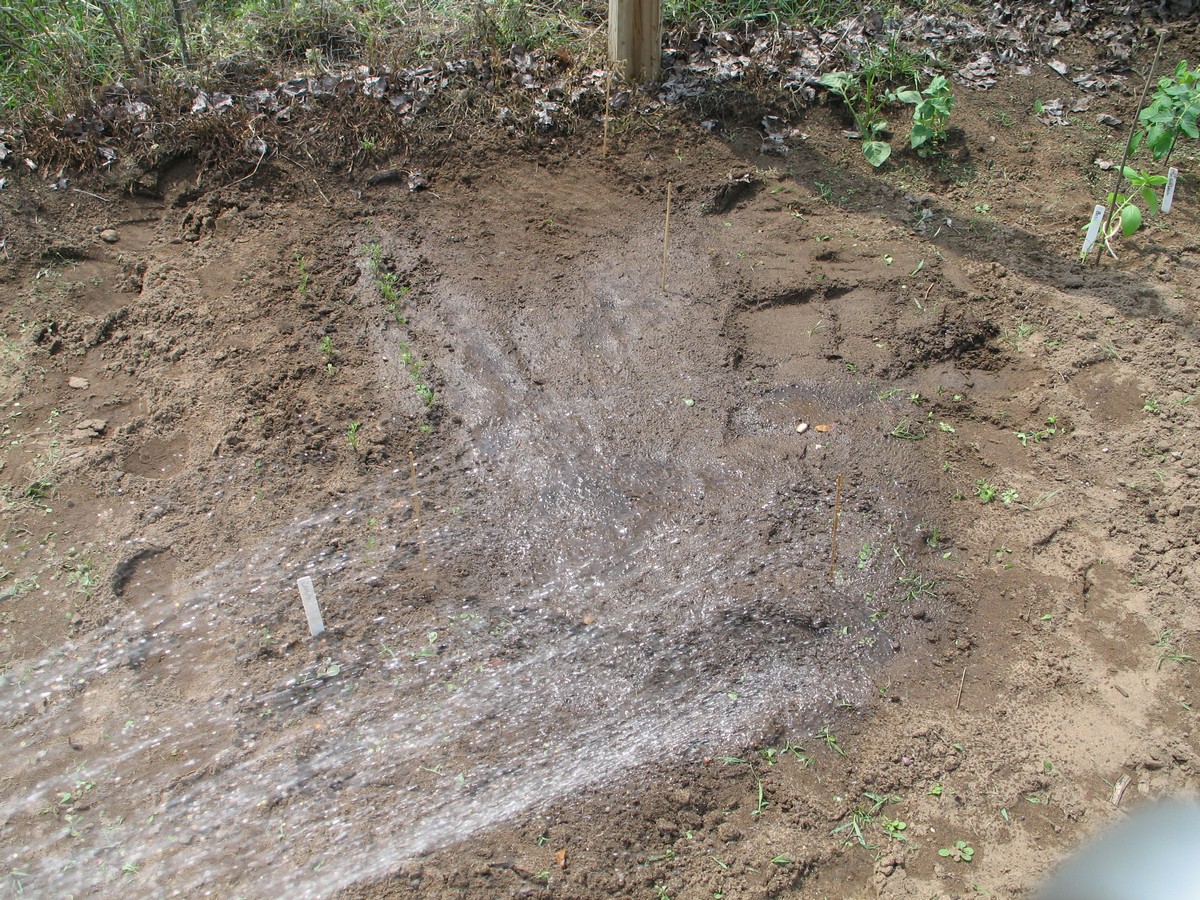
Then I water; a gentle shower works well. I never squirt with only the hose, I always use some type of sprayer to help distribute the water gently and evenly. It is important to not disturb the seeds or disrupt the tiny little plants as they emerge.
In the next picture you can see more seedlings alongside little sticks, added to make them easier for you to see. This is what they look like in the very beginning. Some of the weeds look similar as well.
Spacing and Care
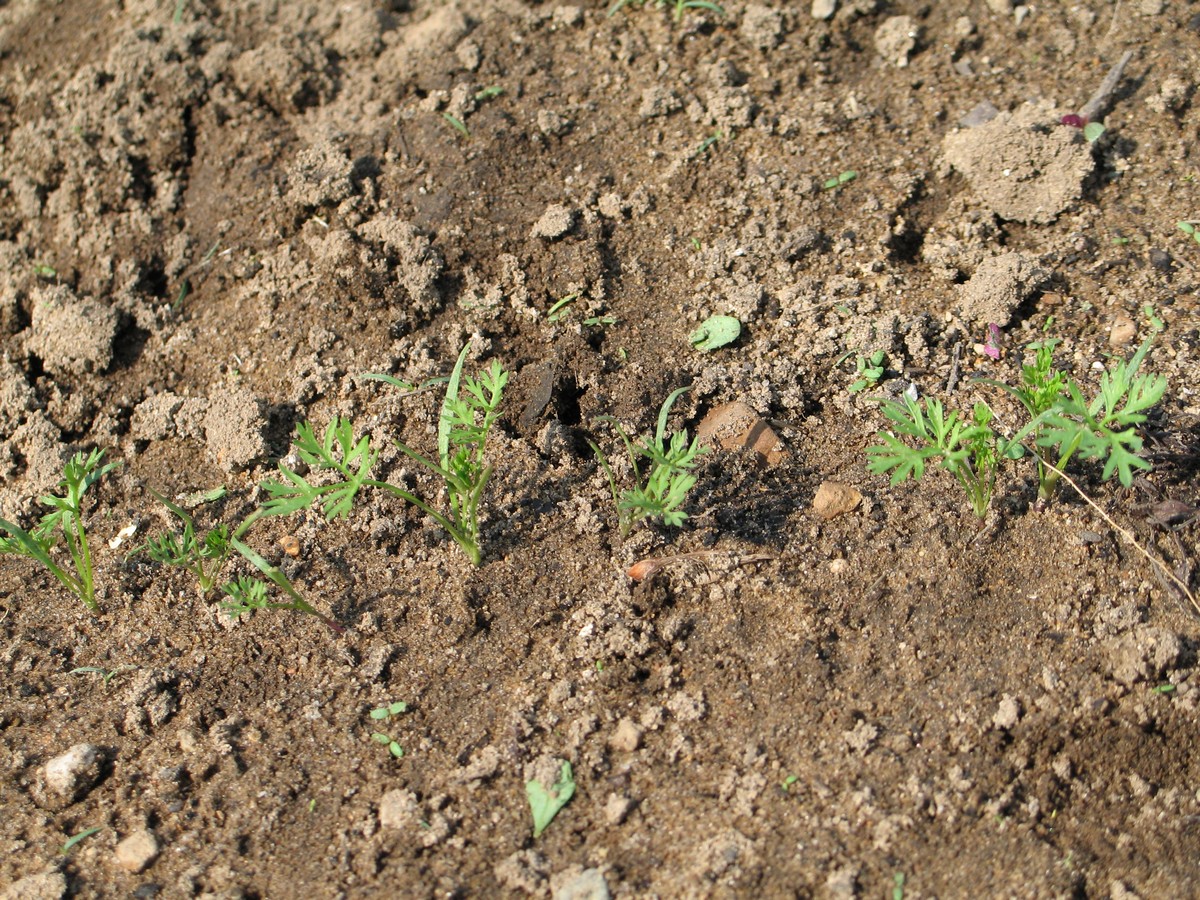
As you can see in the picture above, some are growing very close together. They can be thinned to about an inch apart as soon as they have emerged or within the first week or two thereafter. You’ll thin more later to give them room as they grow. I’ll get back to that.
To thin, be very careful not to disturb the surrounding carrot roots. So do NOT just pull them out at this stage or you’ll be disrupting the other roots close by and they won’t grow well. Instead, simply snip the unwanted stems off with your finger nails or use a small pair of scissors. Leave the remaining roots alone, they’ll be gone in no-time.
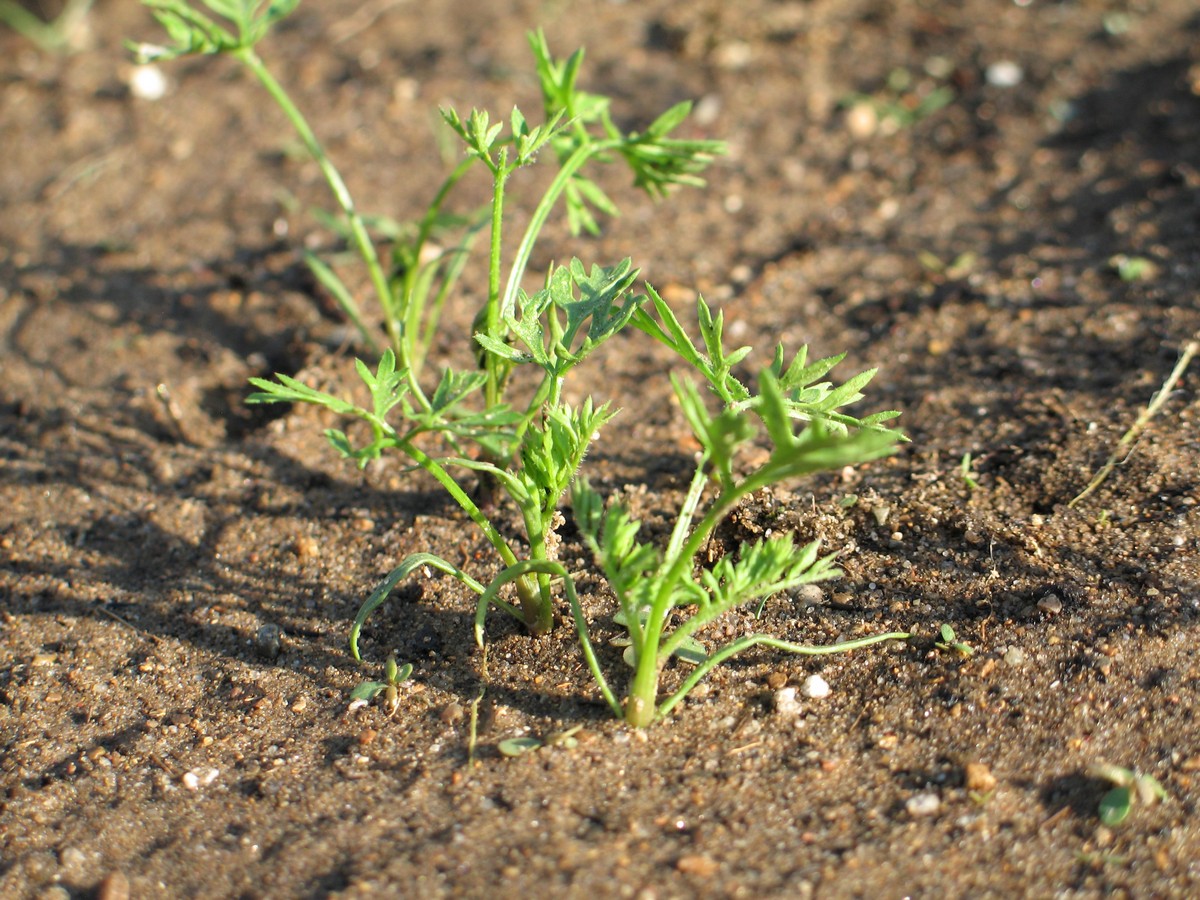
The next picture shows them developing their first true leaves (the second set, not what first comes up), which look much more irregular and like real carrot leaves. Even this early, if you snip one off a bit low down and crush the little root with your finger nail, you’ll notice it already smells like a carrot! Amazing, isn’t it? This test can help you determine whether a seedling is a carrot or a weed, if you’re unsure.
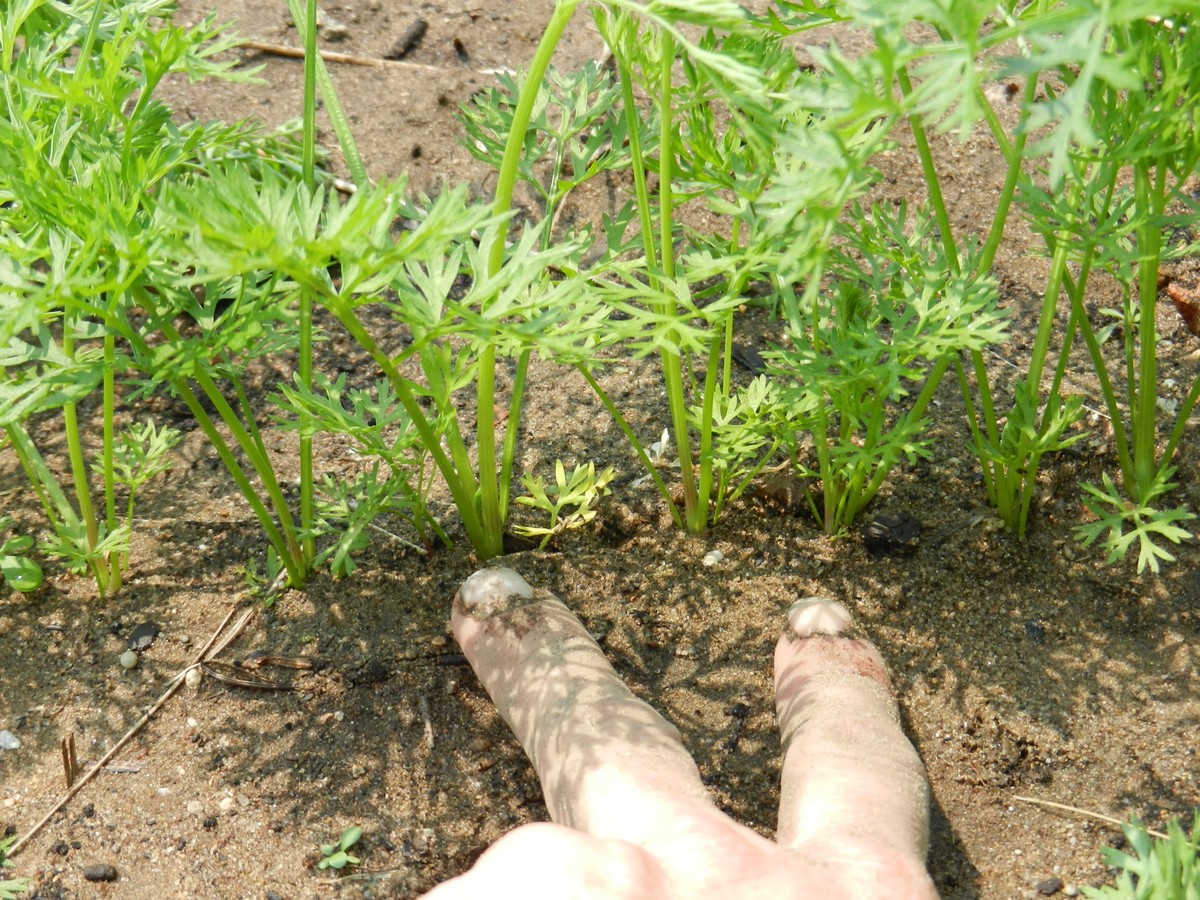
Still only about 2 inches tall. Keep up on weeding so they don’t get crowded out. Be careful to not disturb the carrot roots while weeding.
When the seedlings are around 3 inches tall I go over them to make sure they are about 1 inch apart or a bit more, depending on how the rows look and how the seeds sprouted. At this point they are usually able to handle a little bit more since they are already somewhat spaced. So now I often gently pull them out instead of snipping them, unless some are very close together, in which case I still snip. I thin yet again when they grow big enough to develop some flavor and sweetness, so that we can actually eat the “thinnings”. So I thin and harvest at the same time by pulling from where they’re the closest together, generally trying to space them to be three inches apart.
I’ll pull these two, and about every other in this row:
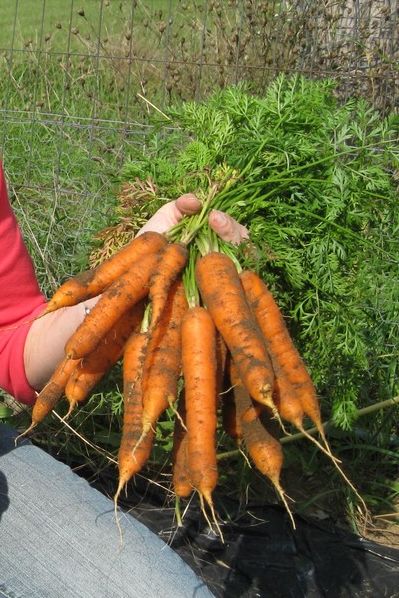
A small bunch of sweetness!
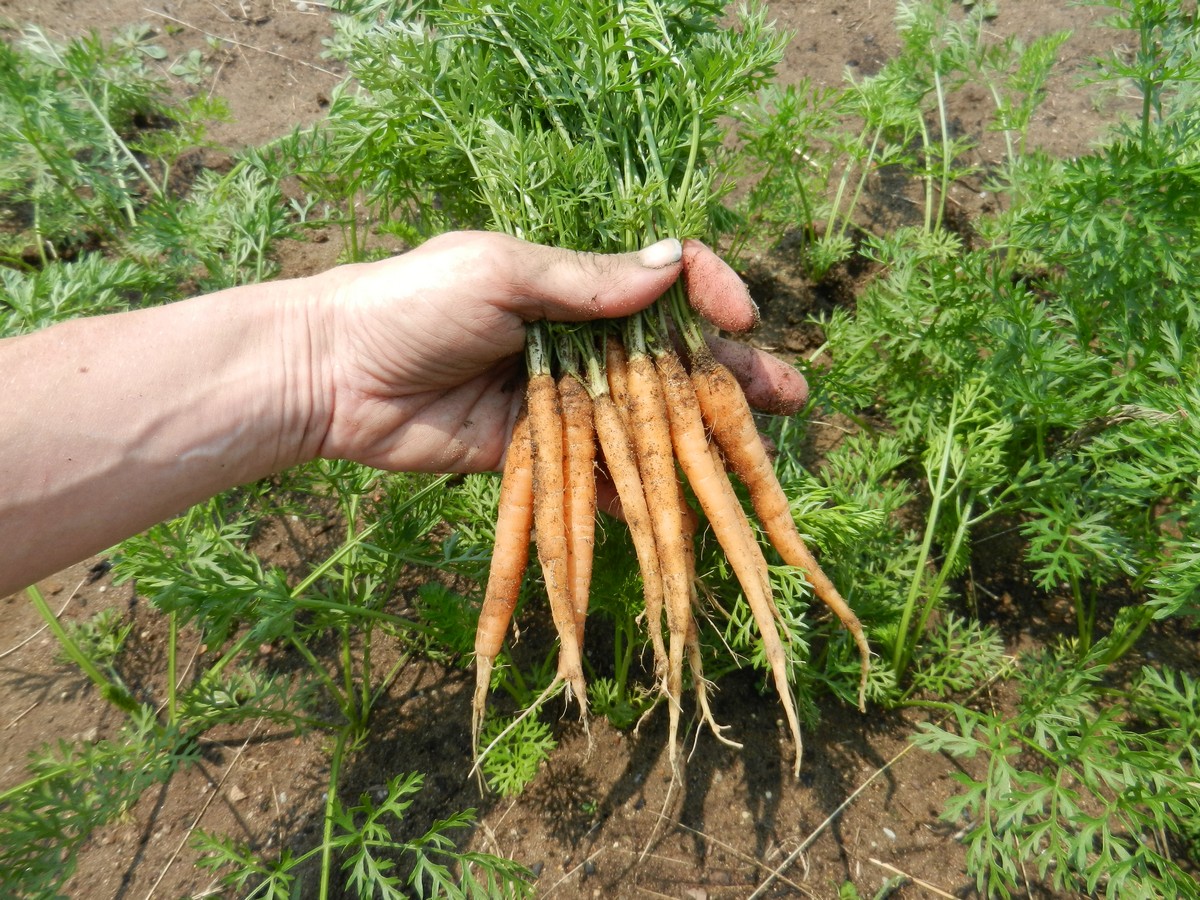
Eventually, when the carrots are spaced sufficiently to about three inches apart and growing larger, I choose the biggest ones to harvest so the others can continue to grow.
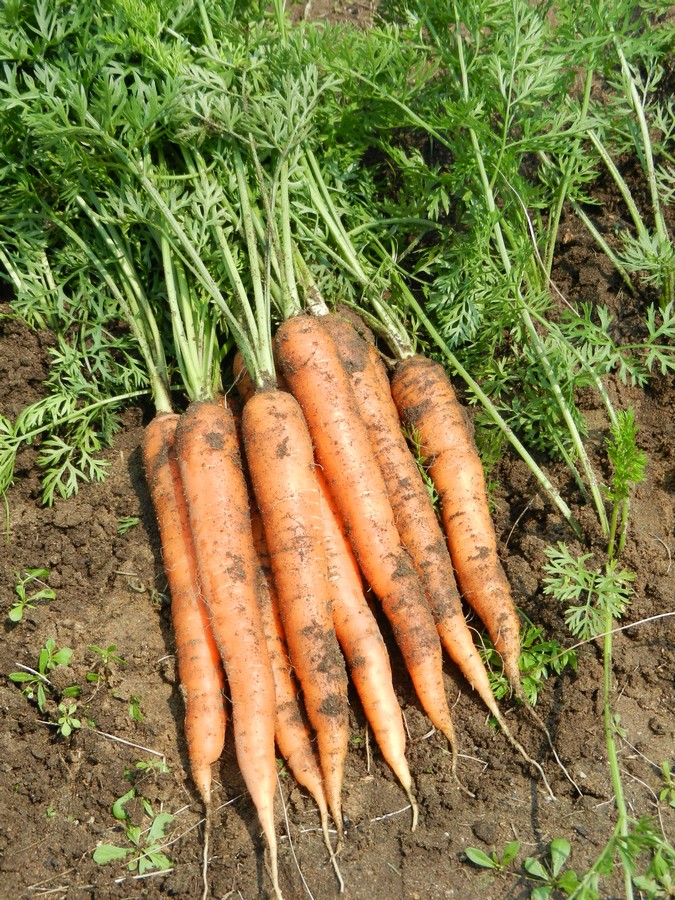
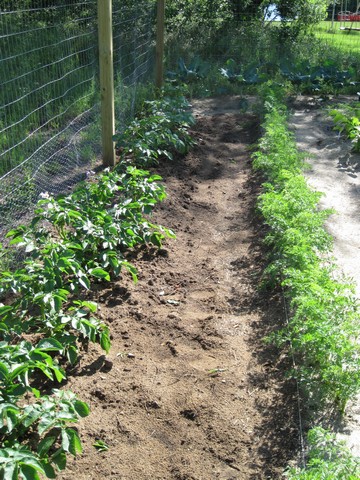
The next two pictures show rows from two different years and using different types of mulch; I definitely prefer grass clippings over black plastic, but it was worth the experiment.
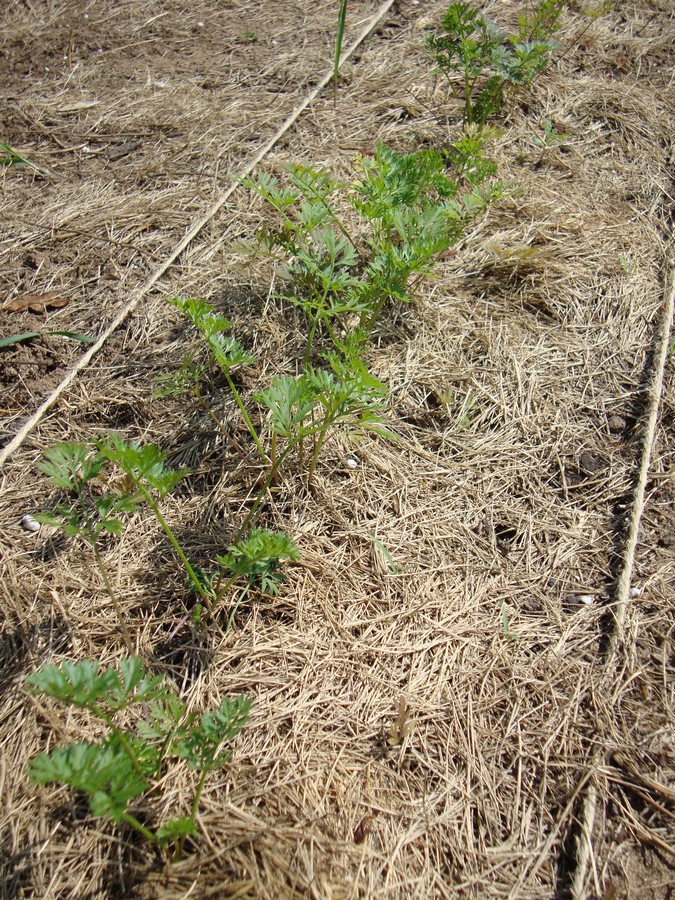
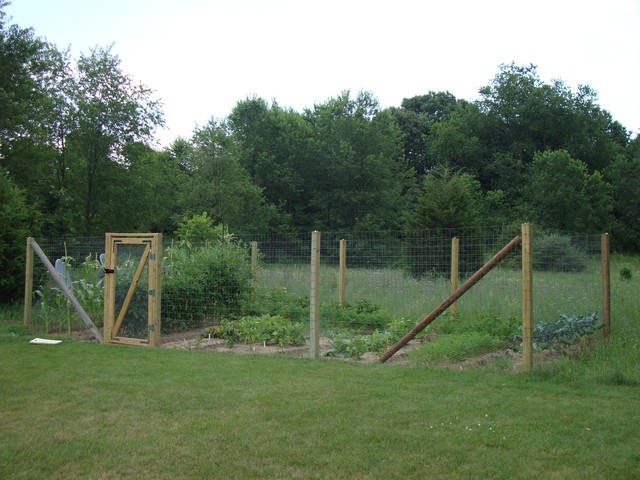
In the picture below you can see two succession plantings of probably a good month apart; the first two rows to the left, which look like one row, and a second double row to the right that’s barely visible. Mulch is helpful to lock in moisture and keep weeds at bay, but I have since learned not to use black plastic around cold weather crops such as carrots or broccoli as it heats the soil too much.

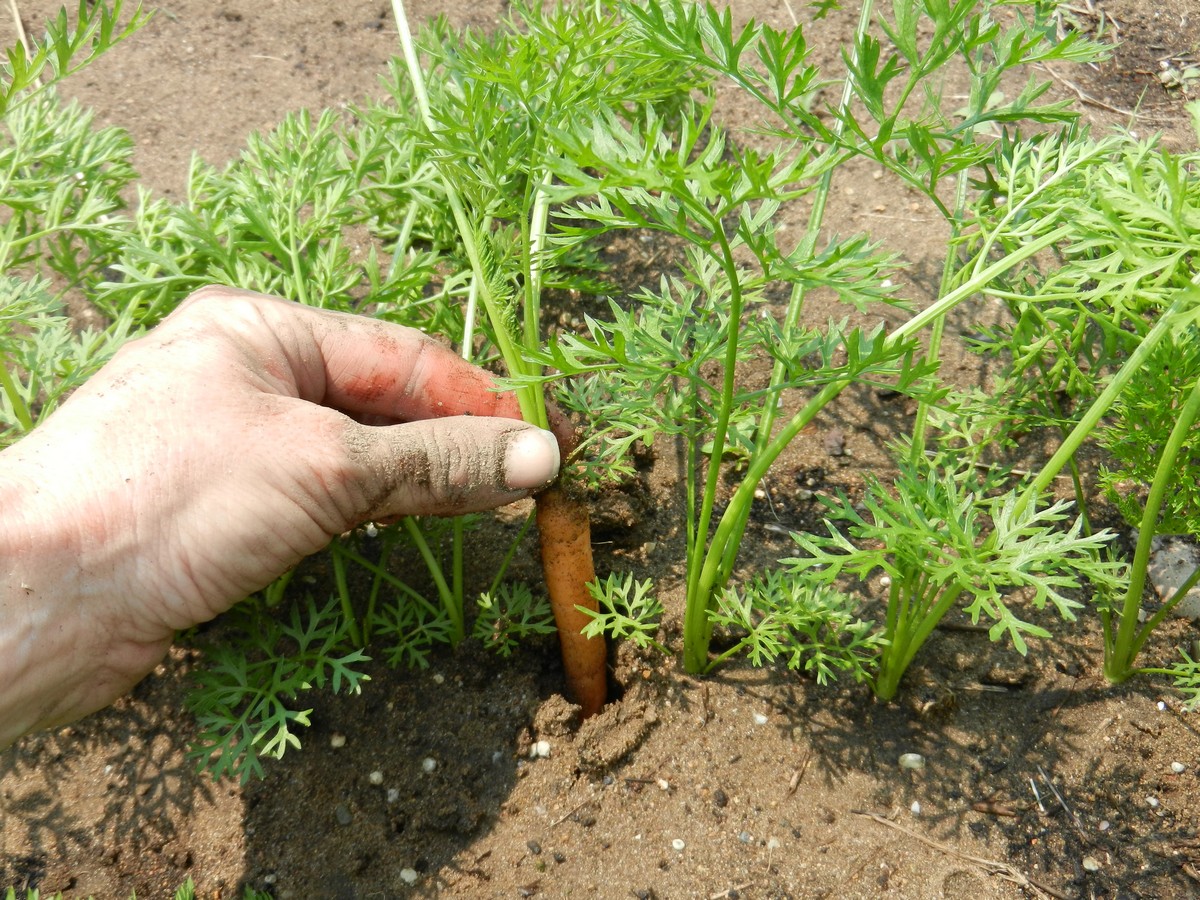
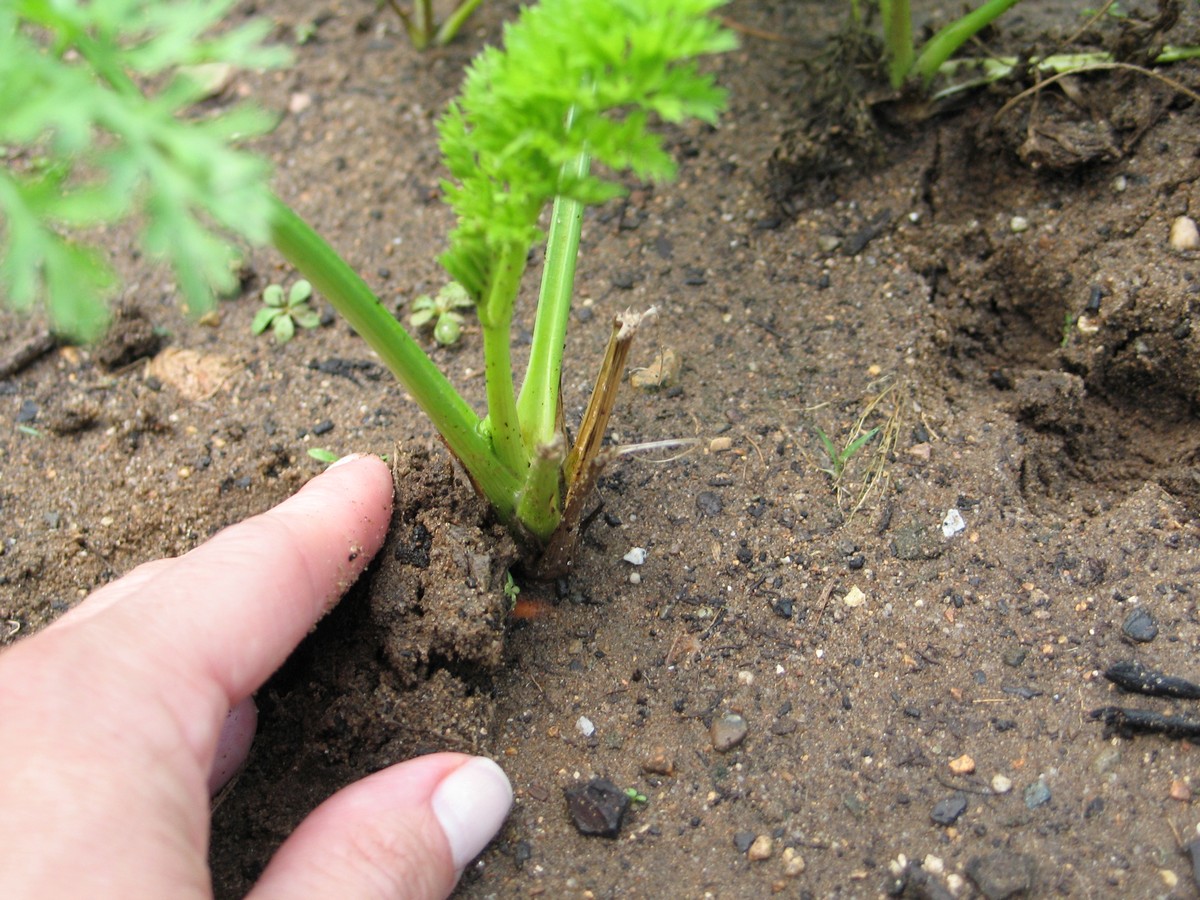
As the carrots grow, you’ll start seeing some of the tops grow up and out of the soil just a little bit.
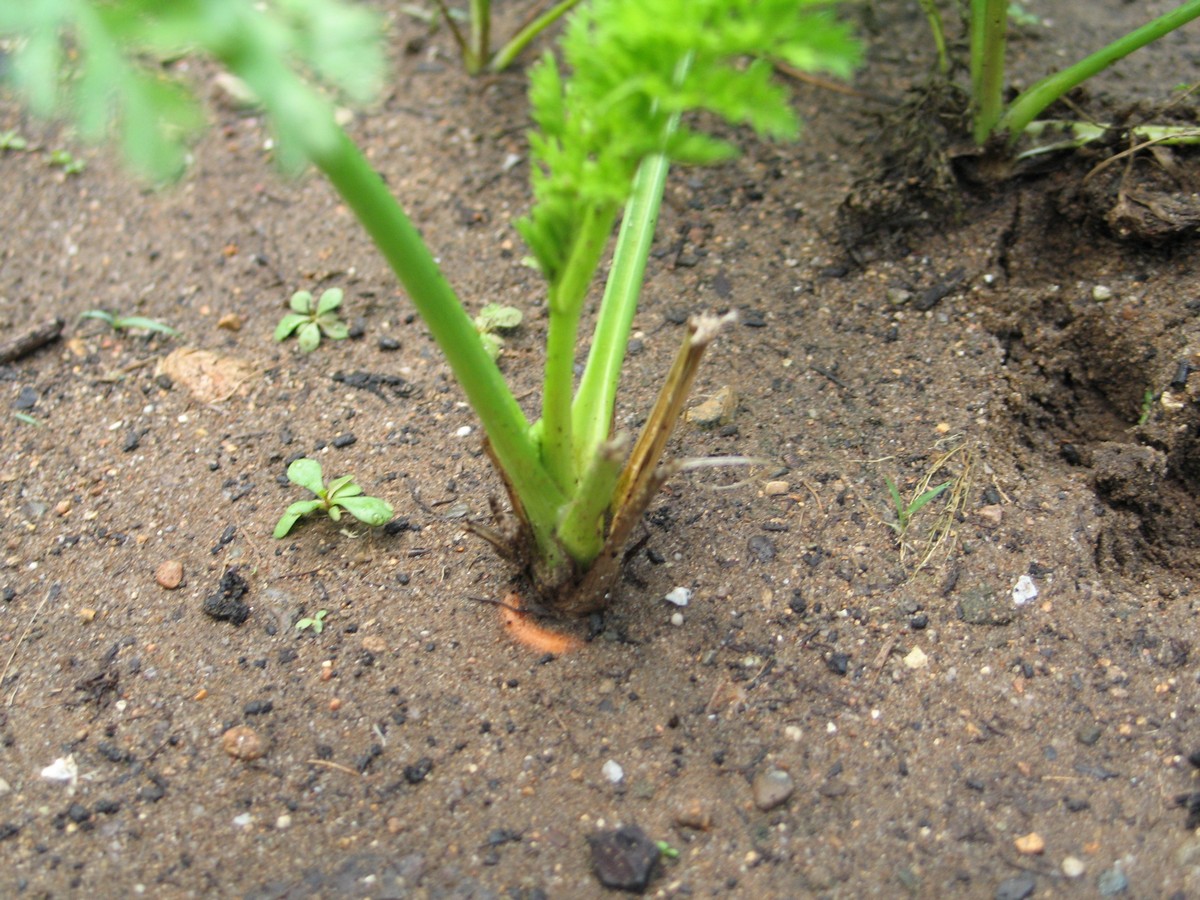
Make sure to push some dirt up around the tops and cover them well, as the uncovered areas tend to turn green and bitter when exposed to the sun.
It’s a fun stage when you can start to eat the thinnings! The carrot below is not full size yet, but big enough to pull for a tasty treat! As you can see in the picture, I feel the circumference of the top of the carrot to determine its size.
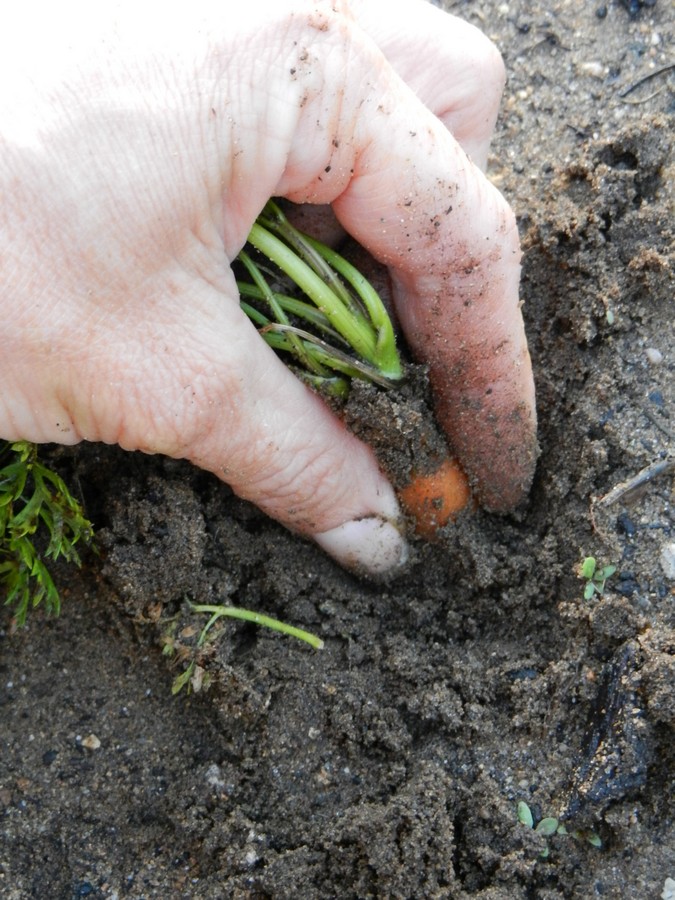
If I want to leave it to grow some more, I just push soil up against it again, making sure the top is completely covered.

Harvesting
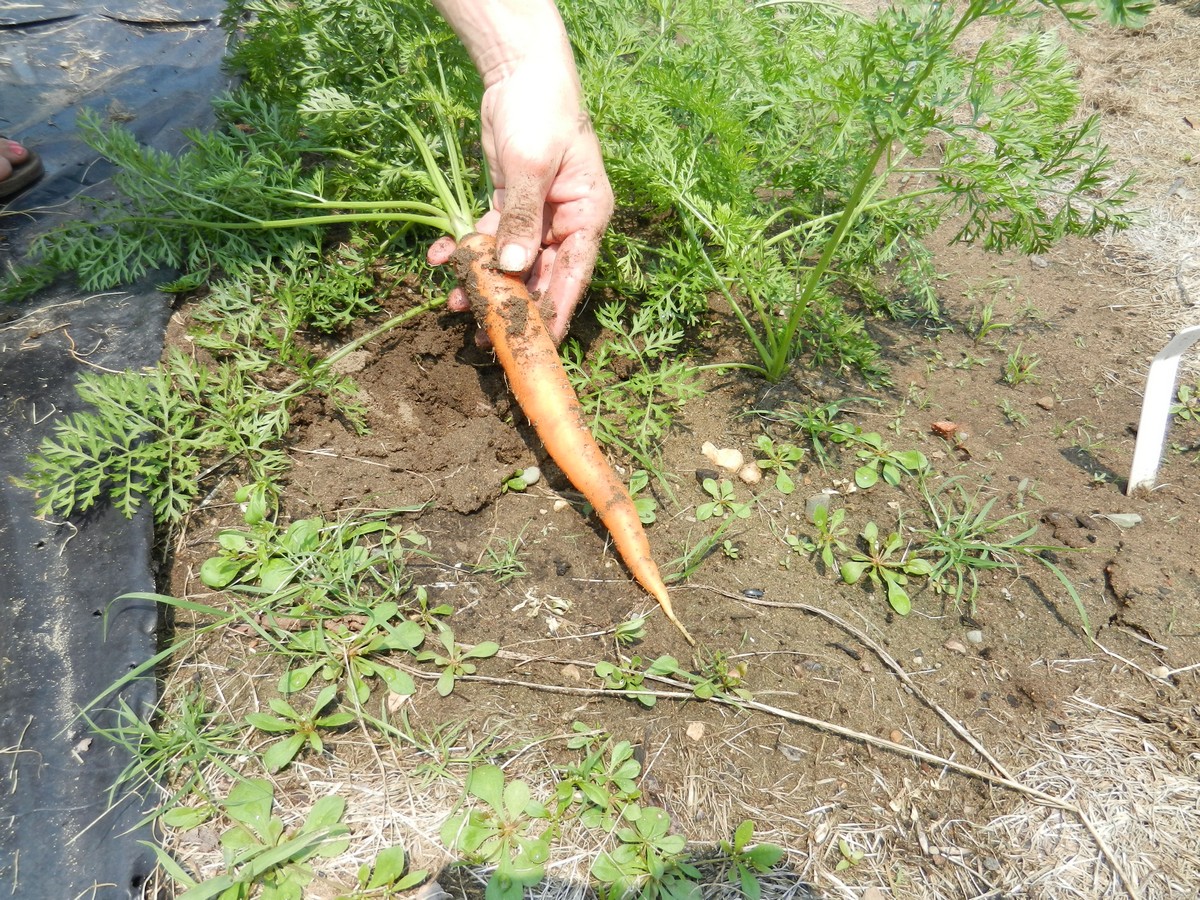
You can harvest carrots anytime you like, but they will need some time to develop flavor and sweetness. I like them when they are close to full size. Don’t let them grow too large and thick around or they become very woody and tough. For sweetest flavor and better storage, try to harvest in the morning before the soil heats up too much.
When pulling full sized carrots, take a firm grip at the base of the leaves and the top of the carrot to keep the leaves from breaking off, then wiggle firmly side to side while pulling up:
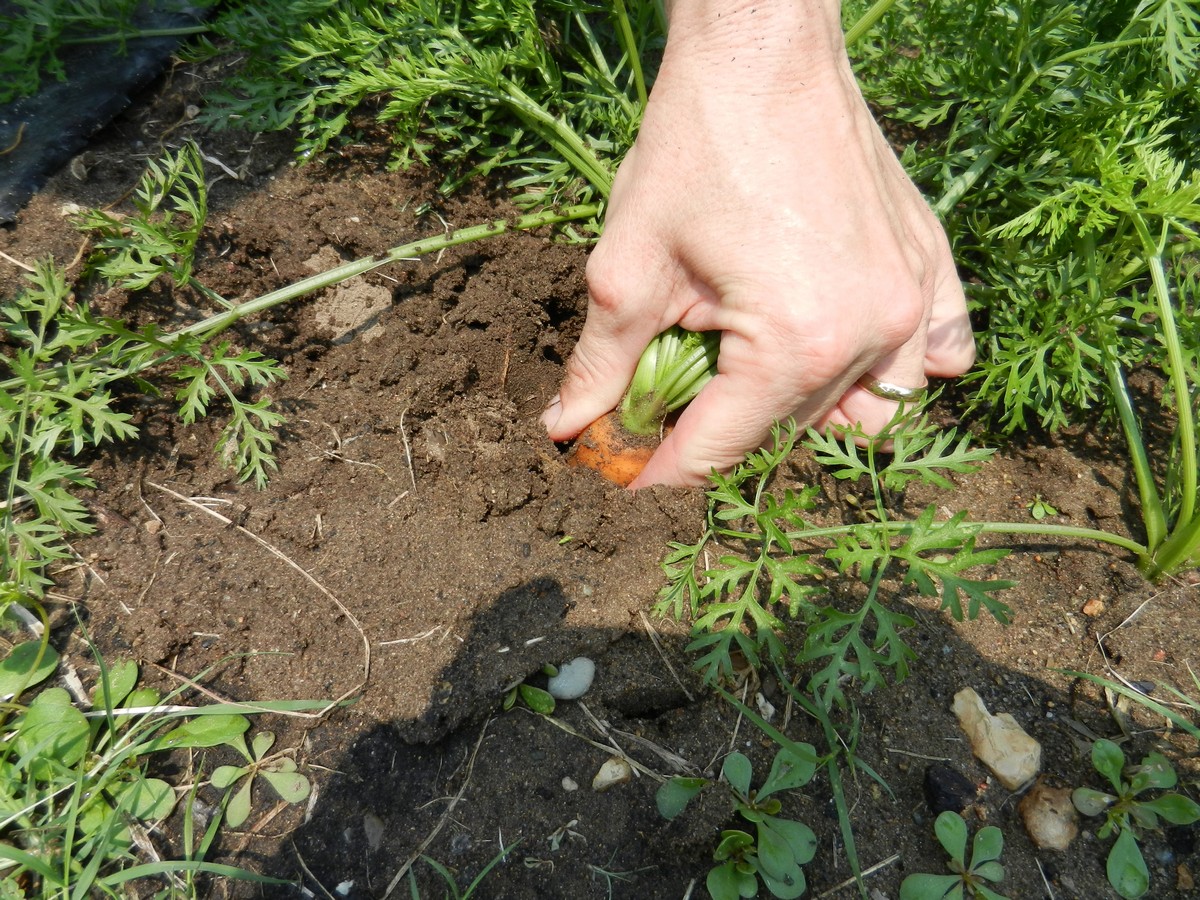
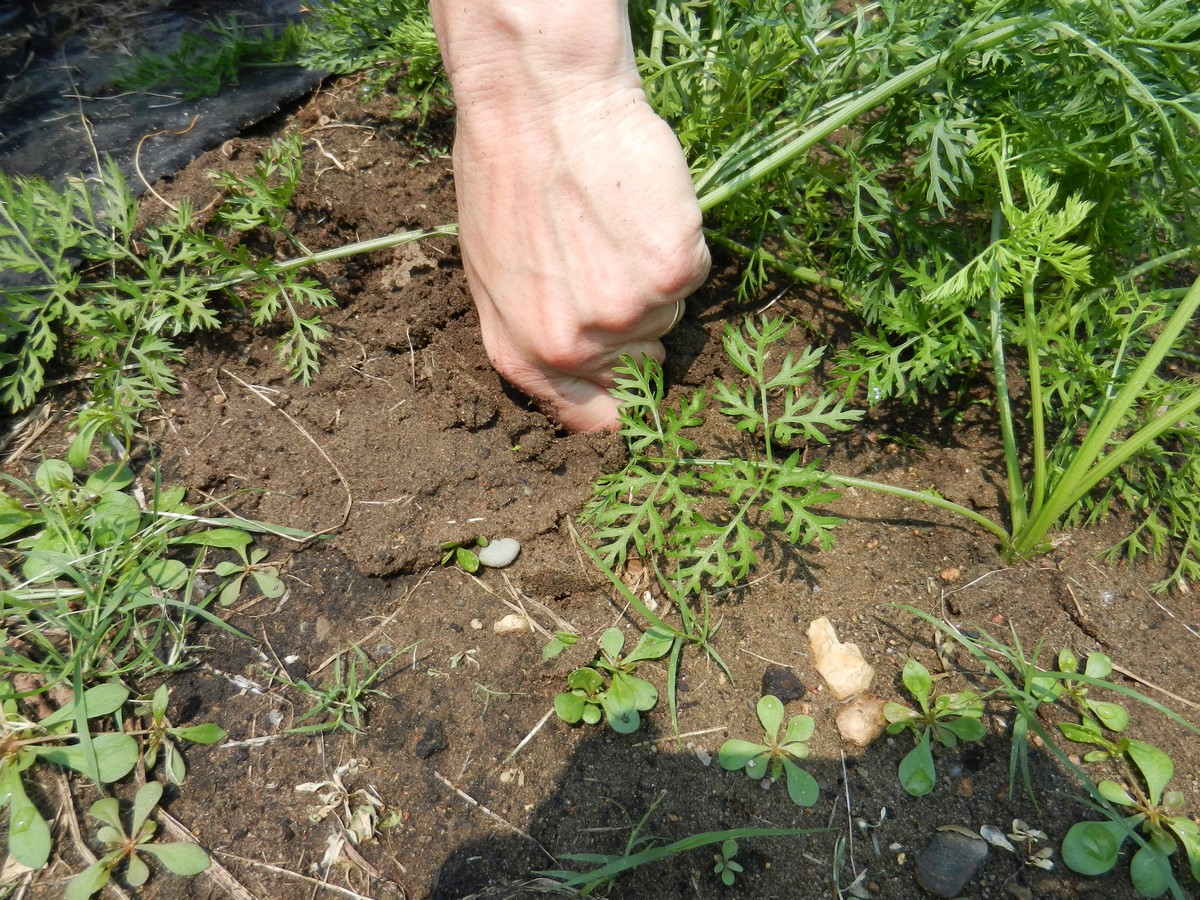
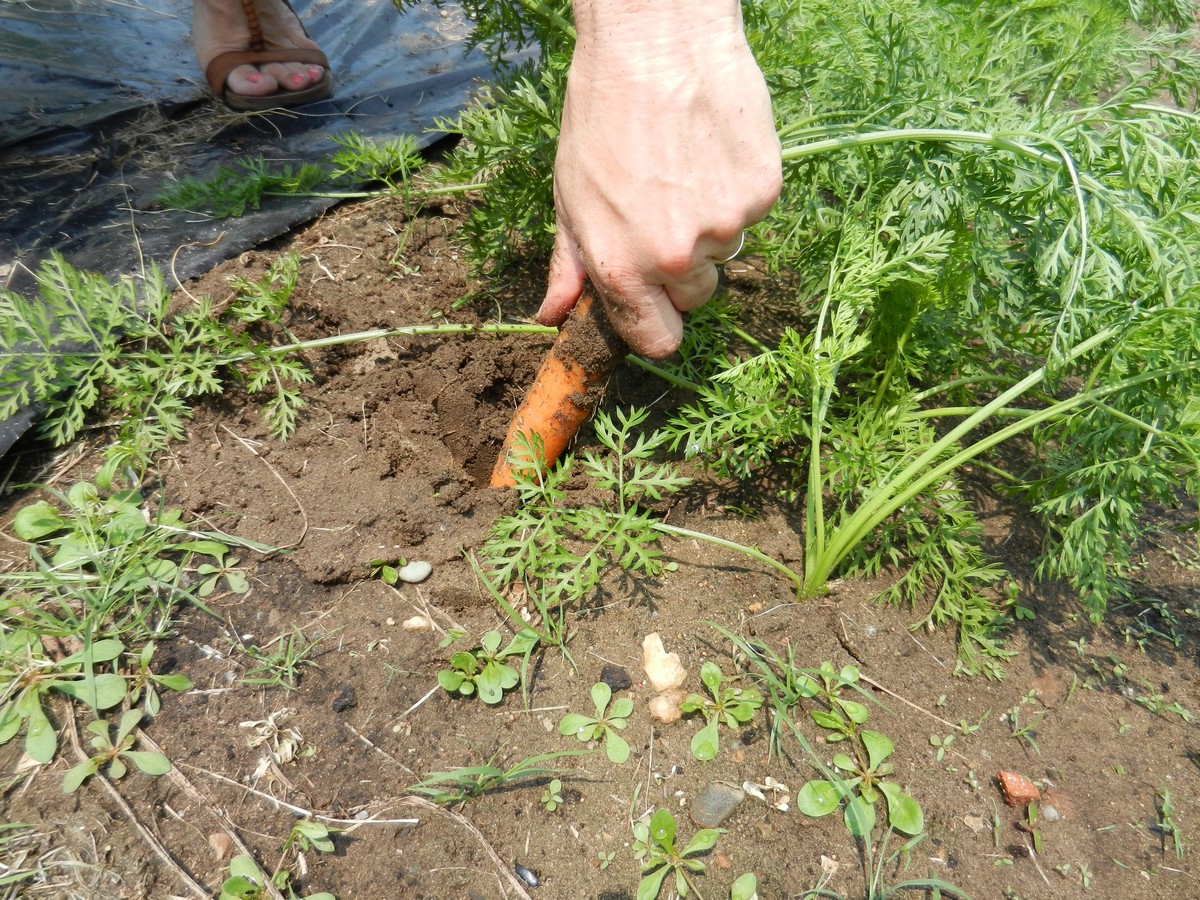
Otherwise I often like to use my weeding tool again for harvesting, both to loosen the soil around the carrots and to give them a lift before I pull them. It makes the job of pulling large or long carrots much easier and helps prevent them from breaking when you pull. They’re such a pain to get out when they break in the middle! I stick the tool down under the carrot on a slight slant, then push the tool down to lift the carrot.
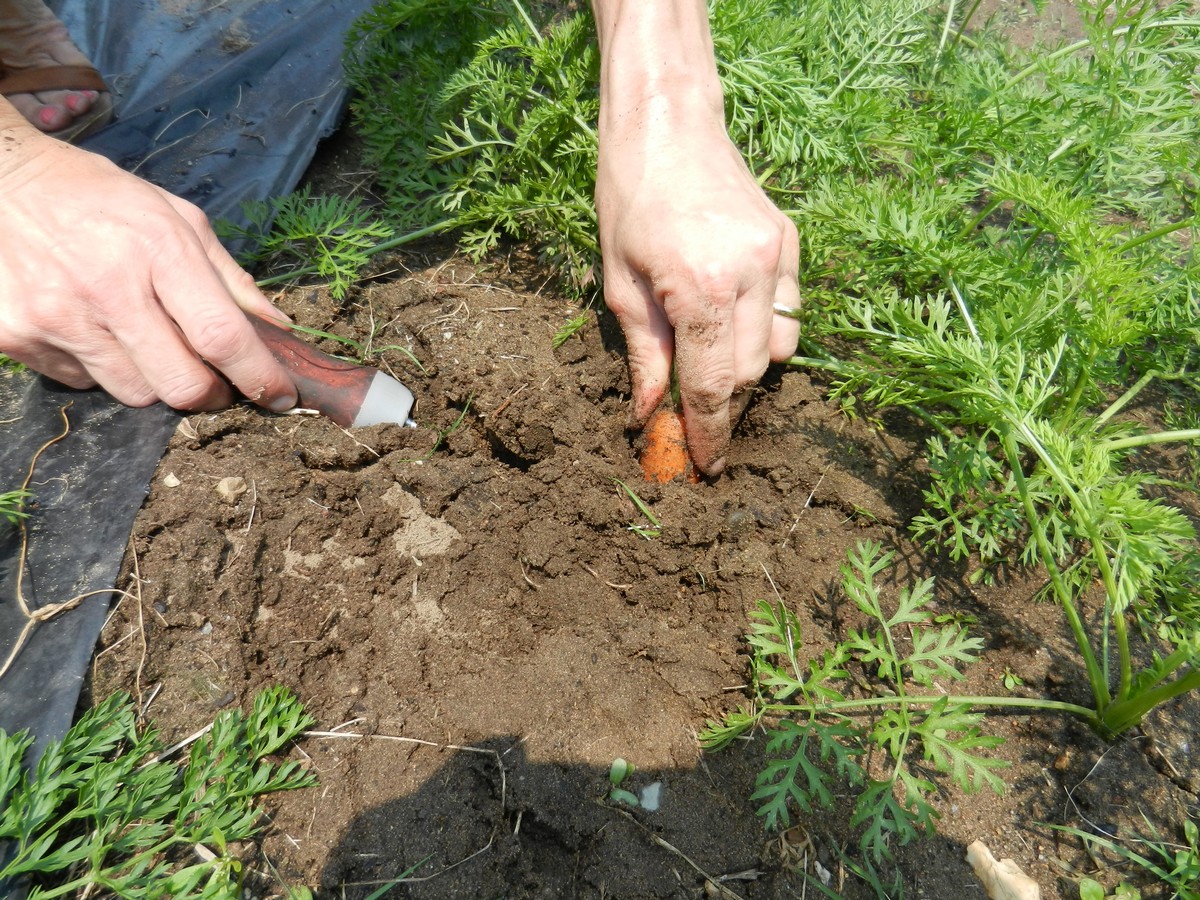
A hand held garden fork or any small hand shovel can also be useful, otherwise a pitchfork is great for those who have a lot to dig all at once. You would dig down a little bit away from the row to avoid stabbing into the carrots themselves. You just want to break up the soil a bit so you can pull them without effort.
Should I start the carrot seeds inside to get them a head start, then transplant?
NO, you should not!!! It does not work, just look at the pictures below!
Carrots should ALWAYS be seeded directly into their growing area, and here’s the reason: Right after sprouting, the seedlings will send down one really skinny, loooong tap root that will later grow into a carrot. If this tap root is disturbed in any way, such as meeting the bottom of a shallow container, or if it is simply bent or moved a little bit as you try to transplant it, it will grow in very funky ways and often want to shoot out new arms and legs from here and there, and they will end up looking like the ones on the following picture. This can also happen when carrots grow in very junky, debris filled soil. The carrots below were from my very first set of seeds that I had started inside and transplanted, because I didn’t realize at that point that this shouldn’t be done:
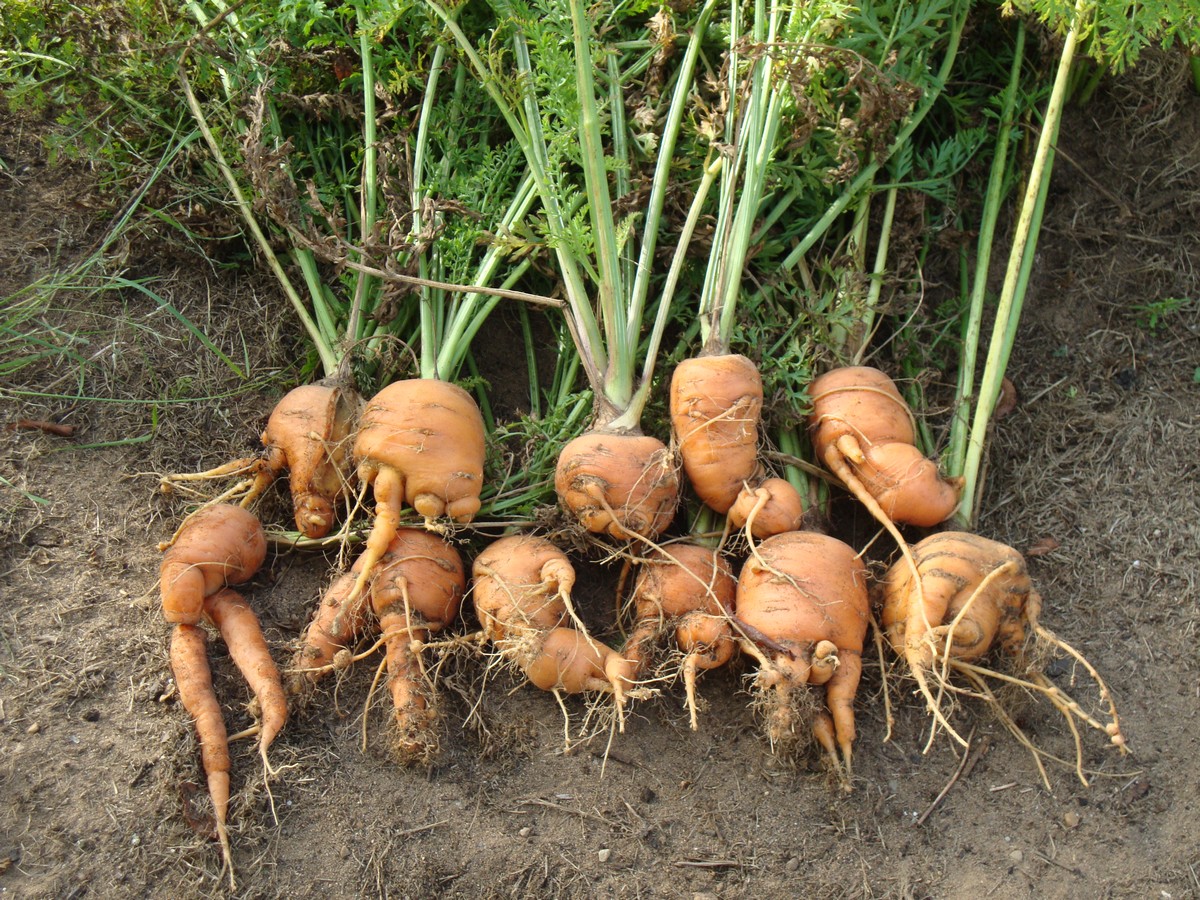
So, yeah, not too cool! Some were pretty funny looking though, like the one below, so we did get a few laughs at least!
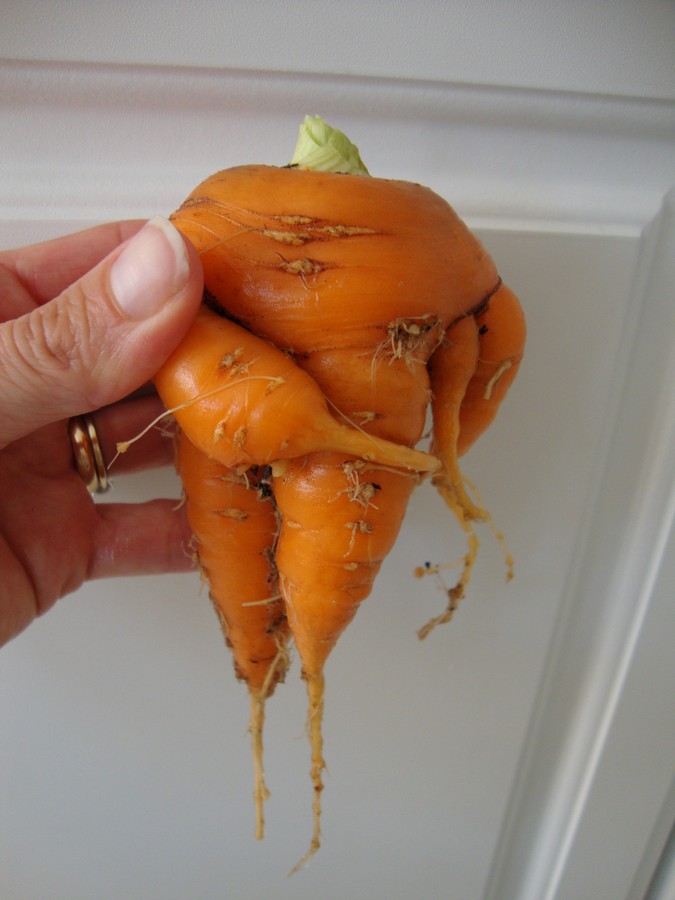
And though they are definitely edible, they are a royal pain to clean! You just can’t get to all the crevices to brush the soil off!
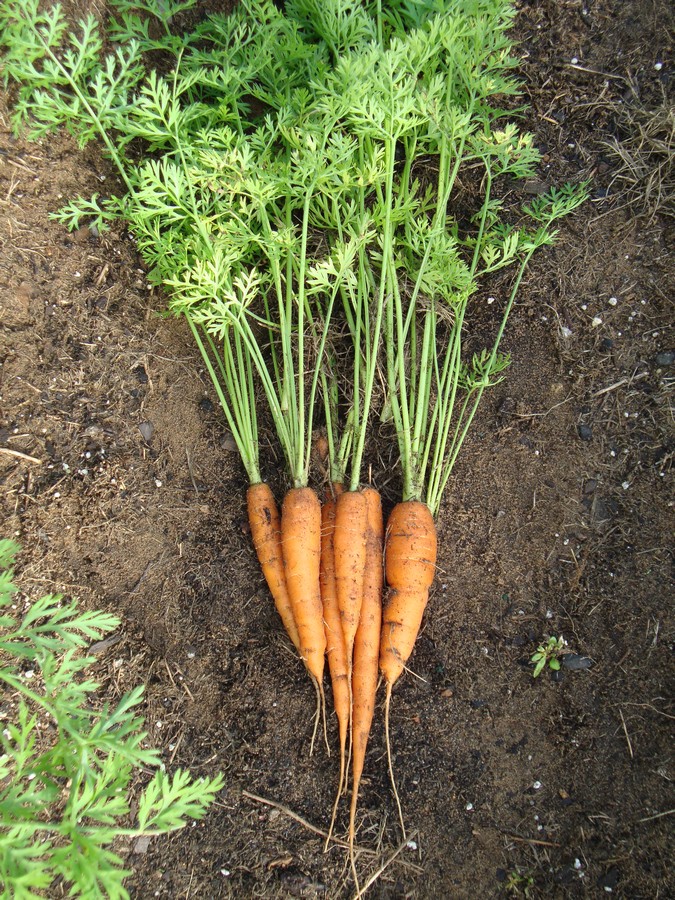
I started a new row of carrot seeds a few weeks later that same summer, and those carrots (below) ended up looking much better. Same seed variety, same soil and conditions, but these were direct seeded and never transplanted. The difference was remarkable!
After harvesting, instead of leaving the green tops on, like you see at the farmer’s market (it’s what people like to see), cut the greens off ASAP as the leaves will absorb sweetness and moisture from the roots just like other plants do. So I always cut them off immediately before bringing the carrots inside. It’s best to do the cutting a bit away from the garden, as the scent can attract pest insects.
Storage
To store, I gently rub off most off the soil in the grass before I take them in, then I place them in a plastic bag and store in a very cold spare refrigerator. My carrots typically last me all winter this way and stay sweet and crisp. Storage temperatures should be just above freezing, and the carrots should be kept moist. If they dry out, they’ll go limp and soft very quickly and will not last long. I have had some that developed a little bit of ice on the outside but not frozen through, and they kept very well. But do not let them freeze solid!
I hope this post has helped you know what to do in order to grow carrots successfully! If you can get them to germinate and live past the first week or so after sprouting, you should be all set as long as they get watered regularly. It isn’t that difficult, and it feels so good to be able to harvest your own, tasty, home grown carrots!


Thanks Therese. That is a good no nonsense tutorial on growing carrots.
Your storage technique (very cold fridge) is very interesting. Unfortunately I don’t have a second fridge nor the space to keep one. I do find my own home grown carrots go limp quite quickly – unlike the store bought ones which stay crisp stored the same way. Any ideas on this?
Thank you for the compliments! I’m glad you liked my post!
I don’t know why you have experienced store bought carrots to last better than home grown, but here’s one idea: Could it be that you have harvested at the heat of the day, or in the early evening while the carrots are still warm from the heated soil? If so, they will not last as long because they will have lost moisture, and it takes a while before they cool down. Harvest in the morning if possible. It is also said that you can store carrots immersed in water, which was news to me so I haven’t tried it, but that might help extend their shelf life. Cold is important though, so find the coldest spot you can for them if you don’t have access to a refrigerator.
I planted potatoes (in a grow bag) and carrots (in a container) last weekend. I wondered when I should expect to see them sprouting – so I know im on the right track! 🙂 This is the first time..
Usually it takes carrots a week or a little bit more, sometimes a little bit less than a week. The seedlings are tiny and skinny in the very beginning, so it can be hard to see them unless you really look. At least for me who needs glasses more and more these days! Haha! For the potatoes, it really depends on whether they have sprouts on them at planting time or not. I would give those a couple of weeks before assuming anything. Mine often sprout out of the ground after about a week or two. You’ll see the soil starting to crack when they emerge, and these shoots will be large and robust looking, nothing tiny about them. Happy growing!! 🙂
Thank you so much for this tutorial on growing carrots. I planted some seeds I got from Baker Creek Heirloom Seed Co. I did not have the proper soil conditions that you showed, since I am a newbie, and know no better(until now, anyway). I see them growing, though, and I keep their area weed free. I hope mine at least look like the weirdly shaped ones you had. Next year, thanks to you, I will do better. I have never seen a down to earth lesson on growing anything that is like yours. Our son is turning out to be somewhat of a prepper, and thinks growing things you can eat without going to the grocery store is really neat. We planted peach trees last year, and got quite a few peaches on them, and I made them peach cobbler the other day. He thought that was so exciting to be able to get food from your own land.
I hope you have other tutorials as well, maybe one on tomatoes or cabbage or beans. I appreciate this one, and you are very good at it.
It’s great to hear how much your son appreciates growing your own food, and what a blessing that is! It is such a wonderful thing, and I think he will benefit from this knowledge and experience for the rest of his life! I’m happy for you!
I’m glad to hear your carrots sprouted, there is always a chance they will be just fine, or at least fully usable.
Thank you for the compliments on my post, that’s always so nice to hear! And I do have tutorials on tomatoes http://thecountrybasket.com/growing-tomatoes-part-1-seeding-transplanting-seedlings/ and potatoes http://thecountrybasket.com/growing-potatoes-part-1-getting-started/ in addition, and some day when I have more time, I’m sure I will work on other vegetable tutorials as well. I’m glad you found my carrot post helpful!
Thank you for the carrot information. Easy to understand and very do able.
I can’t wait to read your tutorial on tomatoes!!! If it’s anything like this one on carrots, I’m sure I will love it. Thank you so much for sharing all this wonderful information. I loved the photos and the dos and don’ts. I only wish I had this before I planted my carrots, but as you shared, it is a learning process and this is my first real garden. Thank you again, so much.
Happy Gardening!
Yvette
Thank you for your comment! I love getting feedback on my posts, and with all the time and effort that goes into my tutorials, it always makes my day to know that others found them helpful! Thanks again! Hope to “see you” visit my tomato posts! 🙂
Hi! I am new at gardening. I planted my seeds 2 weeks ago. The seeds sprouted then died off not sure what went wrong. I live in Texas and it has been in the high 90’s and I water first thing in the morning, not watering anymore till the next day. Is that the problem? Should I be watering more? Thanks
Yes, I’m thinking lack of water is what killed them. In the Texas heat, it won’t take long for the water to evaporate. I water gently but well, two to three times a day when it’s hot out, until they are good and established. So even if they have sprouted, I continue to keep them moist for another week or two.
Really nice page here. We have also grown carrots and a ton of other stuff each year (we fill three freezers each autumn with plenty as well to donate to the local food bank.) I figure ten days for carrot seeds to sprout. I did something this morning — love to experiment — to see what would happen. I sparingly sowed a mixture of carrot and lettuce seeds in a cleaned-up raised tomato bed. Then I just disturbed the top of the soil, section by section, damped it down and sprinkled it. Sprinkled it this evening, too. We are in southern Oregon and our summer heat seems to be over. So twice a day should be fine. Carrot seeds I planted a couple of weeks ago in another area and up and doing quite well. I’m figuring the lettuce will be harvestable just about the time the carrots need the space, so I won’t let the lettuce get too big. It will be fun to see what happens.
Sounds like a good idea, and of course both carrots and lettuces love cool weather. Seems like they would do well together. Some people grow radishes together with carrots; radishes are ready to be harvested much before carrots, so that works well.
hi! Mrs Terese, i plant my carrot seed for
over 8 days now i drilled the seed like 1inch
they did not germinate up till now
Carrot seeds should barely have any soil on top of them; if you are saying that you planted them 1 inch deep, then that might be a problem. They still could end up sprouting, but probably not nearly as well. At any rate, it is also common for them to take a while to sprout, 8 days is nothing unusual. I’ve seen some of them sprout after about two weeks or longer. But I would not plant that deep. Just 1/4 or 1/8 inch deep is enough, and 8-10 days is to be expected if you keep them moist.
Hi
I planted my carrots seed about two months ago and nothing has sprouted yet same thing happened with my onions so should I plant more seeds or just keep waiting
Thanks
It is hard for me to answer this question as I don’t know which zone you live in. It is the beginning of winter where I live, so naturally nothing would sprout at this time. If you live in an area where people are actively planting and growing things, then I would say that for carrots, something probably went wrong. They should not take an entire month with no sprouting at all. I would reseed. I don’t have experience with onions, but you may want to look at factors that would affect both, such as season, temperature, watering etc.
hello!
i discovered your blog while searching for DIY soaps and lotions, and then stumbled over this carrot post! i’m one of those “brown thumb” (or “you did WHAT?”, as my girlfriend tends to say), and can’t even keep our dividing FENCE upright! i’m also what’s known as an “invisably disabled”, so i don’t really get down and dig in the dirt much (getting DOWN is the easy part, because (let’s face it) gravity works! i have a gardner/ landscaper who comes 2X/ month, and she actually planted a teeny tiny section of carrots for me one year, and only a very small handful grew.
here’s the part where you get to really start laughing: see my screen name? well, i’m a house rabbit advocate and educator, (in the past, i was bunnyhugger, evilbunny, etc.) until my second or third joint replacent when my girlfriend decided i needed something more descriptive. having explained THAT, you’ll hate me, but we buy what amounts to a bunch of carrots per day (i only have five bunnies these days, i’m afraid they will be the last in a long line of well loved friends), and the actual carrot isn’t that good for bunnies. the green leafy tops, however, are almost a miracle food. they can’t get enough, and those few we were able to grow smelled SO wonderful, i don’t blame the kids one bit for accidentally getting some pieces of finger along with their snack! i have a couple of bits of dirt, one about 100 square feet, the other a bit more, to each side of my house, but we live in southern california in the high desert: over the hundrend degree mark easily in the summer, and below freezing (and drought conditions) the past few years… this year was finally wet enough that the grass has come back, and the roses have gone crazy! so, what time would i plant, what would have to be done to the soil, and if i don’t really care how the carrot itself looks, is there a way i can produce more GREENS? i always have a hard time finding them at the market, and most of the carrots themselves go to wasted (have tried making deals with horse owners, but they must think i’m kidding or something). it does sound crazy, but if you’ve ever heard a bunny so happy with it’s food that it snorts and growls, you’d understand!
btw, over the past 15 years or so, i’ve had about 18 buns. i’m not a shelter, or a non-profit, or even a fosterer. once they come in my door, i’m their forever “mom”. a few years ago, after losing my first (he was almost 12) i had to draw a line somewhere, so i decided i’d only take in “broken” ones. so of course they are more spoiled that most, but i also have to keep them healthy, as their tolerance for excercise isn’t always as high as a 100% “whole” bunny’s would be. none of us mind the laughter, we all know we’re a silly bunch, but i AM seriousl about the carrots.
any thoughts???
thanks,
-bunny
(if it helps, i don’t know my zone, but zip code is 93550)
That’s too funny, them growling and snorting and all! I didn’t know they could make much of a sound at all! You must make them feel very loved with how you care so well for them!
Regarding growing more greens, that’s simple enough; you just add a lot of nitrogen. You definitely will have less carrot if you do, but since you want as much greens as possible, that’s what you would do. Nitrogen causes plant growth but not much fruiting or root growth. I don’t know how to grow carrots in your climate, but in general carrots like a sandier soil, which you probably have. But they do need water and some nutrition overall. Check with a local plant center to see if you need to add anything other than fertilizer to your soil, such as manure, humus, compost or other organic matter. You want your soil to be able to hold onto water better, which also helps retain nutrients. I hope you’ll be able to grow your own wonder-food for your little fur babies!
I believe growing beans fixes the nitrogen in the soil.
Hello- Your instruction is wonderful, thank you for writing it. I am new to gardening and I can’t get anything to grow, despite over a year of research, reading, planning, and daily watching, studying and caring for my plants. Finally this year, I resorted to getting some straw bales as I’ve read that levels the playing field – no concerns about bad soil, etc.
So, I planted carrots in soil (just for the heck of it) and in the stray bales in April. It is now been 60 days and when I pull back the hay (it is easy to separate), there is a root that is maybe 1/4 the size of a pencil. I can’t believe that is all that has grown in 2 full months.
Every site I visit says carrots are easy to grow and produce a reliable crop, but as is always the case with my garden, it just won’t work. Any tips on getting past this very initial stage? Thanks for your help.
I’m sorry you’ve had such trouble with growing carrots! In my experience it can take a good while for carrots to really take off. They will spout and grow a skinny root, while working on the greens, for a long time. Then all of a sudden they focus more on the roots and can suddenly grow pretty quickly. I still think that two months is too long to only be 1/4 of a pencil in thickness. What comes to mind is nutrition or other soil conditions, or watering. Carrots do not like to be over fertilized, but they definitely do need some. So you may possibly need to add nutrition?
For watering, water slow and deep so the water actually gets down to the roots.
Also, do you happen to live on clay? Root vegetables do not like clay, but there are ways to improve clay soil. Adding gypsum is very helpful. I think that the first thing you need to do is to bring a soil sample (about two cups worth) to a garden center and have it analyzed. That way you will better know what to add and how much, to improve the soil conditions for carrot growing. I hope this helps and that your carrots will grow happily for you eventually!
I’m disappointed that my comment was removed. I thought it was a reasonable question and I was really hoping for help.
Just to quickly respond to you before I take the time to respond to your original question, I wanted to let you know that your question was never removed! 🙂 I have the comments section set up so that it must go through me first, before being approved, in order to cut back on spam or offensive comments. That’s all that was going on. Sometimes I see comments right away and can get them approved quickly, but more often there will be a day or two before I find time to get to comments as I live a busy life outside of blogging. Your comment is just fine and I will look at it more closely in just a minute. 🙂 There is no problem at all. Have a great day!
Hello
I live in Kentucky and planted carrots about a week ago but the soil is very rocky. Most of the stones are about 1-2 inches long and an inch wide. I have two rows of carrots and I was wondering if it would be wise to redo a row and take out most of the rocks. I didn’t know they could mess them up that much! I also don’t like to use fertilizer as I’m more of a nature man and like to see my plants grow without anything that might effect my general health, as a lot of fertilizers these days have things in them that can harm humans (it’s the government) but I was just wondering if I should redo one row, take most of the rocks out, and see how that would turn out. What do you think?
It probably would be wise to clean up one of the areas, then you can compare the two and see if it’s worth it to clean up the other area for next time. I also understand your concerns regarding fertilizers, but there are organic fertilizers available if that’s an option for you. The first year you grow a crop you may just be OK without it, but later on after a few years of harvesting the soil tends to get depleted and harvest may not be all that great. Maybe do a search on how to grow vegetables without adding fertilizers? Varying the crops beneficial on many levels, and adding compost would be extremely helpful. I wish you well and hope you’ll have a wonderful, bountiful harvest!
I’m new to your site and devouring all the excellent information you have provided. thank you for your details and pictures and thorough explanations. This is only my third season ever gardening and i haven’t been super successful yet – so reading what you have explained has been enlightening. Thank you.
Well, that is certainly a nice comment to get, thank you very much! I’m so glad you found my posts helpful, it just makes my day to know that I was able to help!
Was having problems getting some of the seedlings to live, now I see that I likely wasn’t watering them enough (getting too much sun too, perhaps). I really appreciate your post!
I’m glad to know you found my post helpful! Hopefully you will succeed next time you seed. Watering could very well be the issue, as carrots like to be in full sun. They tolerate part shade, but they do love the sun.
I think your wonderful for taking the time to do this,and show us the “how to”. Just wanted to let you know. Hubby and I planted carrots last year, didn’t do well. Planted again this year, so far so good? if at first you don’t succeed, try try again.
That’s right, just try again. I’m glad to hear it seems to be going better this time, and it’s nice to know that you liked my post. Thank you for leaving a comment!
Carrot leaves grow quite high in two months. Say about 10 inches.
Is that a problem?
What can I do?
That’s perfectly normal, no cause for concern. Just don’t add fertilizer that is very high in nitrogen, as that will cause a lot of leaf growth and not much of a root. But the 10 inch height sounds perfect.
One tip when you harvest that:
If you want your carrots to last for a longer time, you have to know the best procedure for harvesting carrots. If you grab it by the foliage and yank upwards, you’ll probably separate the foliage from the carrot. Instead, try to loosen the soil around the carrots first. A garden fork works great for this step. Then, gently pull upwards from the base of the foliage.
Once you harvest all of the carrots, you should cut off the green tops, ¼ to ½ inch from the top of the carrot. Then, rinse and dry the roots before you decide the best storage method for your carrots.
Thank you so much for this excellent article – very well explained 🙂
You’re welcome! Glad you liked it!
Very useful information..
I have a question when first sprout up are there 3 leaves with a sort of reddish stem?
Yes, actually two leaves but a third will come pretty quickly. The stems are often red, like you’re observing.
This article was AMAZING!! Your dedication to taking the COMPLETE series of pictures from beginning to end is the best I’ve ever seen! And now, I’m completely comfortable that I’ll be able to plant, and successfully grow my own carrots. THANK YOU, and so very, VERY well done!! Brilliant!
Oh wow, that is a fantastic comment to receive! Thank you so much, I really appreciate you taking the time to let me know! I sure do try to present useful pictures and information. I just know that when I am trying to learn or searching for information, this is what I am hoping to find and I am so thankful when I do. Again, thank you for telling me, you just made my day!