When serving cookies of different kinds, I am often asked the question “Did YOU make these cookies?” Um… yeah… “How do you get them so round???” Well, that part is easy enough. Here’s what I do to ensure even, just about perfectly round cookies, making them look like they were baked by a professional, and certainly not by me: I use an ice cream scoop, similar to this one (click to buy on Amazon). (Mine is slightly larger; 45mm) I have three different sizes that I use for different recipes:
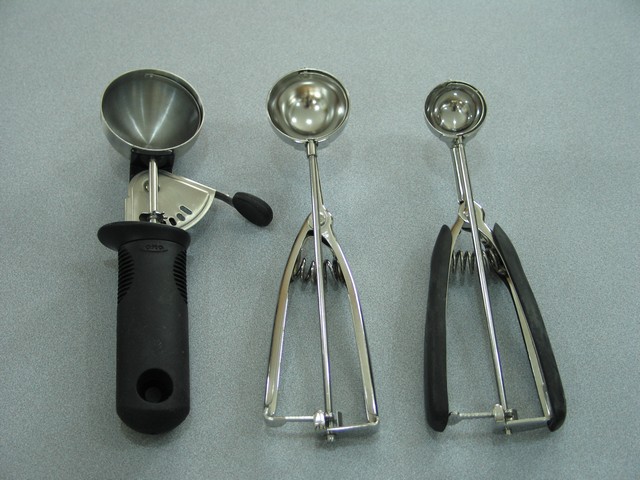
I prefer the middle one (45mm) for most of my cookies. The cookies end up nice and large, but not overly so. They end up anywhere from 2 1/2 – 4 in. in diameter, depending on the type of dough used, and how much the cookies spread out. The larger scoop (55mm) would make jumbo sized cookies. The smaller scoop (35mm), gives cookies approximately the size of an Oreo. I think that’s generally much too small!! (Although there’s a time and a place for that size, too.) I love cookies, and I want a big one, not a little one! And it looks much more generous when you serve others. When being served, I would feel greedy if I helped myself to more than two cookies, and I would imagine others feeling the same way. Taking one cookie is expected. Taking a second shows you really love them! Compliments to the chef! Taking three….. that’s difficult. You don’t want to be rude… It helps if the host urges you to, though! If you get large cookies to begin with, you may very well feel satisfied after only one or two and won’t have to stare down your host for a third!
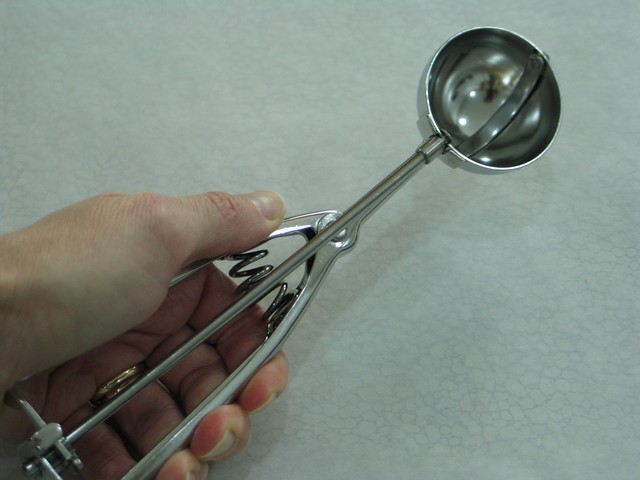
Notice that the handle of the scoop compresses to release the cookie dough, by turning the moving metal bar inside the scoop. It makes it much quicker and easier to scoop them out and drop them on the tray, than to use spoons or roll into balls. And they end up looking much rounder.
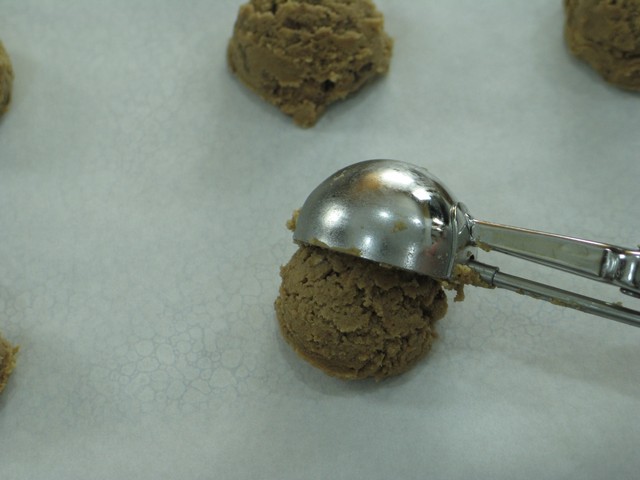
The cookie dough drops right onto the tray; easy as pie! (Strange expression, really; pie is not necessarily easy! For one thing, I think making a proper pie dough is an art form in itself. Not having had an American mother or grandmother to show me how, made it all the harder. But I did learn eventually. The key is to keep on trying and not give up.)
However, I digress:
I also drop them onto a sheet of parchment paper instead of directly onto the cookie sheet. There are a lot of non-stick cookie sheets you can get a hold of these days, so technically you don’t necessarily need parchment paper. There are a couple of reasons why I choose to still use them, however. One reason is to cut back on dish washing when cleaning up. Here’s the bigger reason:
If the cookies are on a sheet of parchment paper when I take them out of the oven, I can slide the whole sheet off, directly from the cookie sheet onto the counter top without waiting for them to cool enough to be handled. I have found that they often will loose some of their shape if I try to take them off using a spatula, which defeats the purpose of using a scoop to make perfectly round cookies. Also, they still can stick to the cookie sheet at times, even if using non-stick or buttering beforehand, depending on the cookie sheet and the dough. When I use parchment paper, I just slide the whole sheet right off, then let the cookies cool on the counter top.
Be aware that parchment paper is different from wax paper; they are not interchangeable. If you put wax paper into a hot oven, it will smoke and might catch on fire; wax paper does not tolerate the heat from an oven. Parchment paper is also somewhat slippery and prevents baked goods from sticking. It comes in a roll and can be found along with plastic bags, foil etc. at the grocery store.
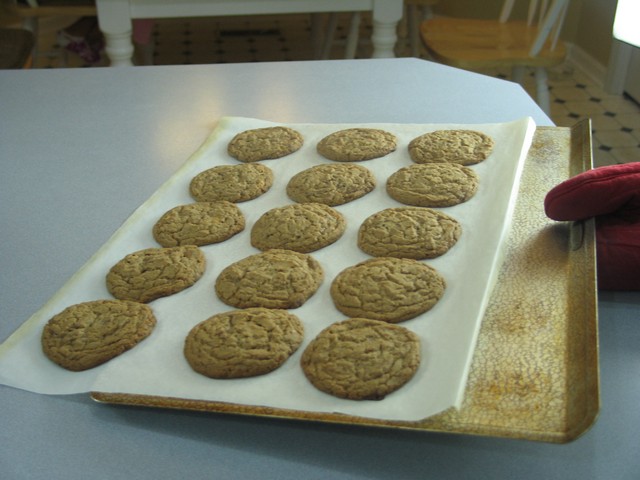
After a minute or two, I’ll slide them over to a cooler part of the counter top, and if I have the time and space, I’ll do that a couple times more. They cool off very quickly this way, and keep their shape beautifully! Also, the cookie sheet itself can be used again immediately, since there are no cookies on it to cool.
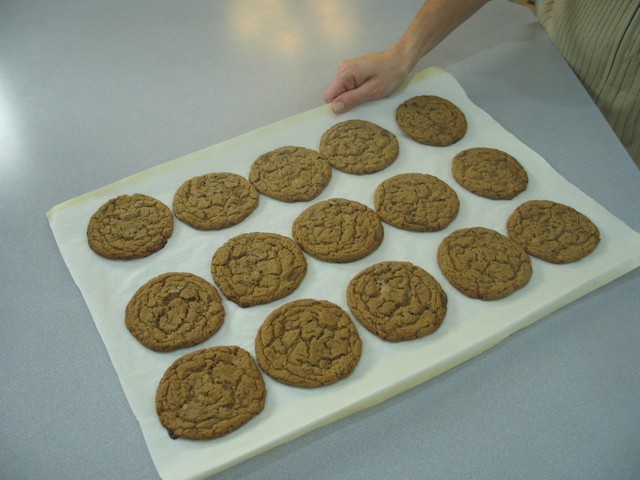
What I usually do when the first tray is in the oven, is to scoop up more cookie batter and start the new sheet, ready to slide onto the cookie sheet as soon as the first batch is done.
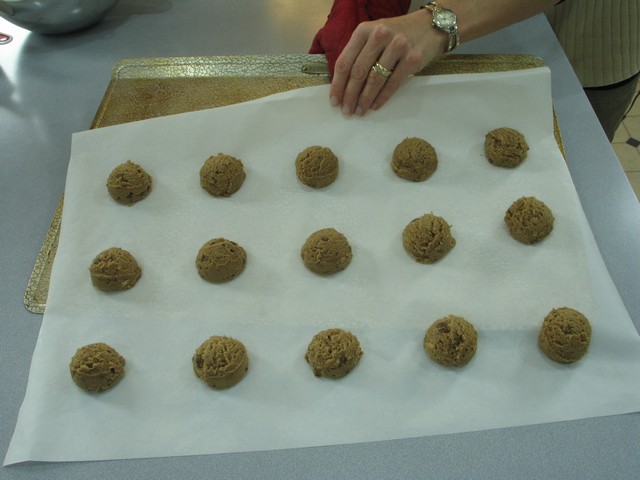
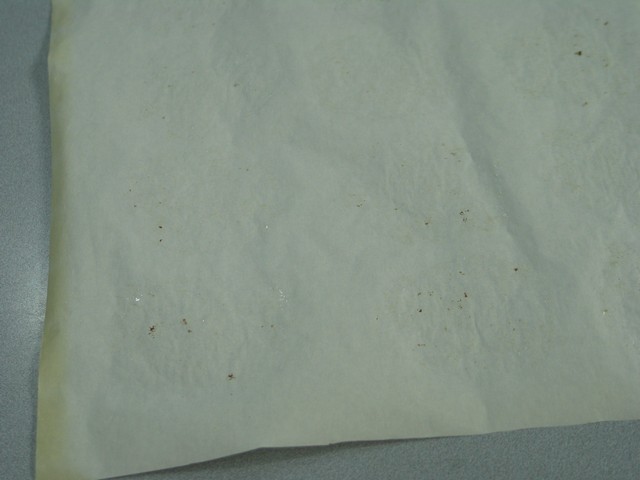
Another thing to keep in mind, is that the parchment paper can be used over and over again multiple times. I fold mine up after use, and store until next time. I use them until they are either very brown and brittle, or until they look gross. If I bake snicker-doodle cookies or anything with cinnamon, or otherwise messy, I throw them out so it won’t ruin my next cookie batch, if that’s a different type of cookie.
This sheet has been used only once. I’ll fold it up to use again later. I accidentally threw away my old, gross looking one. I’ll post a picture when this new one is in throw-away-condition to show you what it looks like at that point.
As you can see on my above pictures, I completely fill up my cookie sheets, though trying to keep the cookies far enough apart to keep them from spreading into each other, while baking, otherwise they would loose their nice, round shape. Today, it was a close one!
Some people choose to bake only six (or so) cookies at a time, with lots of room between them, and will rotate the sheet half way through the baking time in order for the cookies to bake and brown as evenly as can be done. This would be another step in baking cookies to look as perfect as absolutely possible. I’m sure there are other ways, too. Although the tips I already touched on in this post are the ones I have found to be the most helpful and time saving, which is important in my daily life. Perhaps some day I will bake only six at a time, too; but for now, that’s only going to happen in my dreams. I have found what I am currently doing to be quite sufficient in accomplishing impressive results, and I try not to be too nitpicky about it.
I hope this gave you some ideas on how to shape and bake your cookies beautifully and easily, while saving time and effort in the process.
Thanks for the blog. Love those scoops! A must have.