There are many different ways to make yourself a cup of coffee; some ways are more primitive, such as the way my father used to make it when hiking in the Norwegian mountains; he’d fill a pot with water from one of the many clear, clean streams, then pour in coarse coffee until it looked about right. He’d put a long stick through the handle and hold it over the fire. The grounds would stay on top of the water until hot, and would then sink to the bottom of the pot. The coffee was ready. There was a certain charm to it, most definitely. (Just not the time when he used snow for water, only to find sheep “pebbles” in the pot afterwards…… If you know what I mean by “pepples”…….) But, I regressssss!
More traditional ways include the good-‘ol drip coffee maker (this is the one I own, and I love it!), then you can get more fancy and use a Keurig
(I love this one as well, but it’s more expensive to use), French press
or espresso maker
. There are many ways, and real coffee lovers often feel strongly about their preferred method. My father is OK with his electric drip maker these days.
Personally, I love cold brewed coffee when I want an extra treat. It’s comforting, smooth, flavorful, and gives me the feel of luxury without the cost. After this discovery, I can get myself a cup of “Starbucks” latte right from my own refrigerator anytime I want one. For people who feel they need their specialty coffee every day, cold-brewing can mean bye-bye to high bills and the guilt that plagues some folks after purchasing the “real thing”. I’ll make it myself these days, thank-you-very-much, and at the same time I can adjust what I put into it, for the sake of my health. Sometimes I’ll use brown sugar for sweetener, add a little vanilla perhaps, or I will add a couple of pumps of DaVinci Syrup, or Torani Syrp. I have noticed that these are the syrups a lot of coffee shops will use in their coffee drinks. So you really can re-create some of these wonderful comfort drinks at home, for the fraction of the price. There are a wide variety of different flavors to be found, of either brand, and there may be other great brands out there as well. (Here are flavor examples of DaVinci and Torani syrups at Amazon)
I first heard about it through my favorite message board. While researching, I found that many others are raving about this method of making coffee, and there are many recipes on the internet that are roughly the same. In short, cold brewed coffee is coffee brewed over several hours, using only cold water; no electricity or heating needed. Some people even throw out their coffee makers, not needing it anymore after they learn about cold brewing. The result is a concentrate that you mix with hot water or milk later. The reason you’d brew it cold, is to avoid bitter flavors beyond the certain bitterness that marks any coffee. It is believed by many, that coffee turns bitter when the grounds are heated. Without the heat, no bitterness. Also, the concentrate will keep in the refrigerator for up to a month, so if you make a good portion of it you may be all set for a good while.
If you do try this recipe, I would really appreciate a quick comment with a star rating (option found immediately under each recipe). It helps me out tremendously! Thanks in advance!
Here’s what you do:
Note: Recipe at the end of the post. Norwegians or others using the Metric system, take a look at Conversions to Metric to help you with measurements.
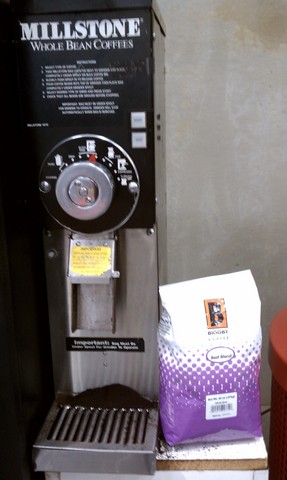
Purchase a pound (500g) of percolator ground coffee; personally I have had trouble finding percolator ground, so I buy the whole beans and grind it at the store, where I can choose “percolator”. It is coarser than the standard drip coffee grind. You can use regular as well, but you’ll have a lot more trouble when draining it later. I tried it, and will not attempt it again. It was too messy for me to want to deal with it. Some believe that finer coffee will bring out more flavor; I don’t know, coarse works for me.
Here’s my bag by the grinder at the store. I dumped the whole bag into the grinder, into the slot at the top of the machine.
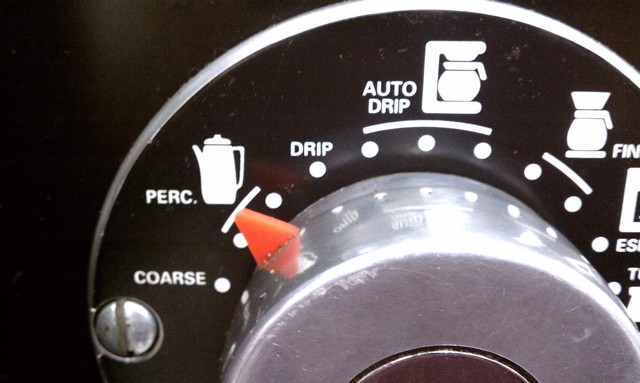
Then I selected the “percolator” setting, placed the bag underneath to catch the grounds, then hit “Start”:
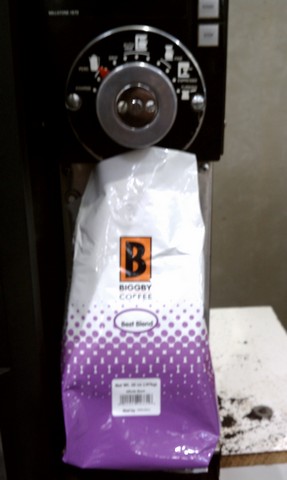
Here it is, grinding away. This machine took about a minute to grind up my 2 Lb bag.
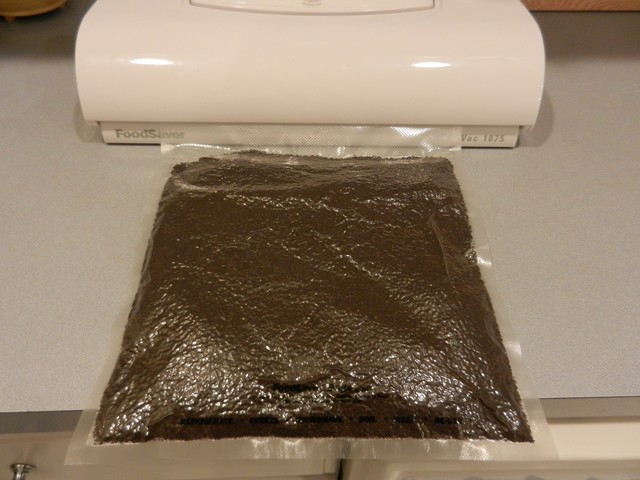
When I came home, I divided up my bag into two portions, vacuum sealing one to use later:
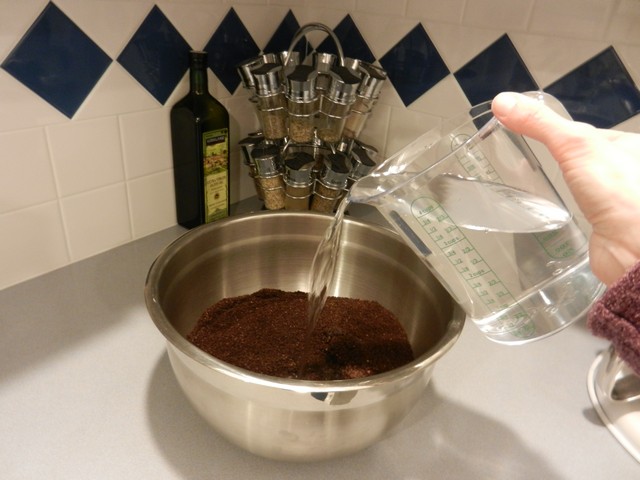
The rest of it, empty into a large bowl. Oooo, it smells heavenly!!! Even as a child, I remember loving the scent of fresh coffee! Add 10-12 c cold water, then stir a bit to mix together…
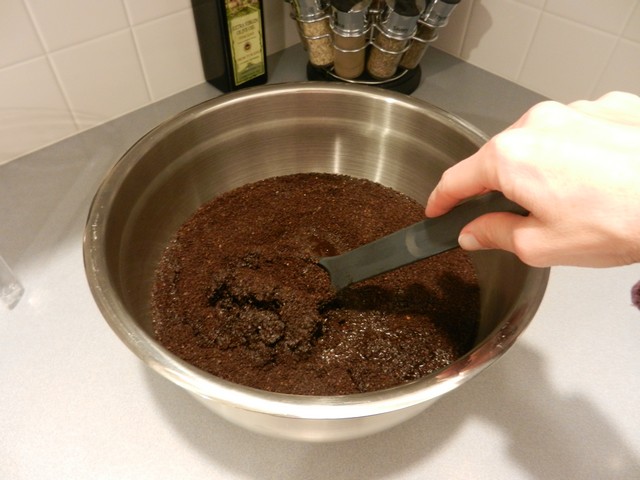
…until the coffee grounds are good and moist.

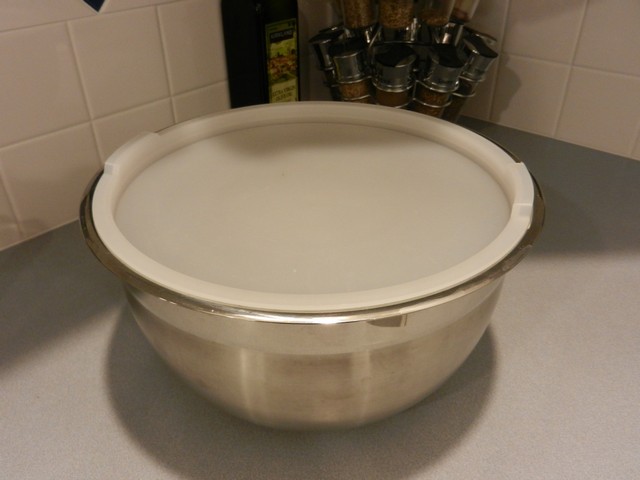
Then put a lid on.
After several minutes, or even an hour or two, stir again. You will find that the coffee grounds are still floating on top. However, since they will have absorbed some water at this point, they will sink to the bottom once you stir again.

Put the cover back on, and let sit 12-18 hours altogether.
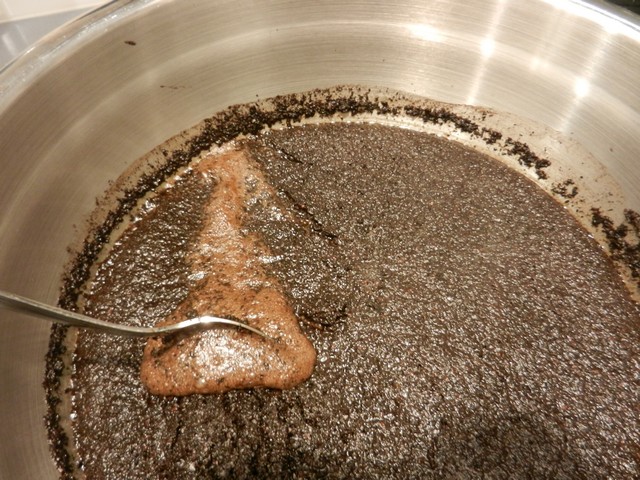
Give it another good stir. The grounds are on the bottom of the bowl.
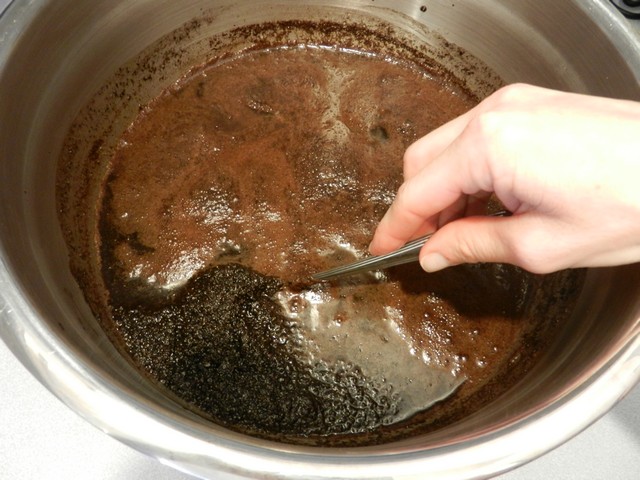

Then drain. I use a regular, stainless steel colander first time through. Let it sit in the colander or draining from the bowl, or a combination of the two, like I did:
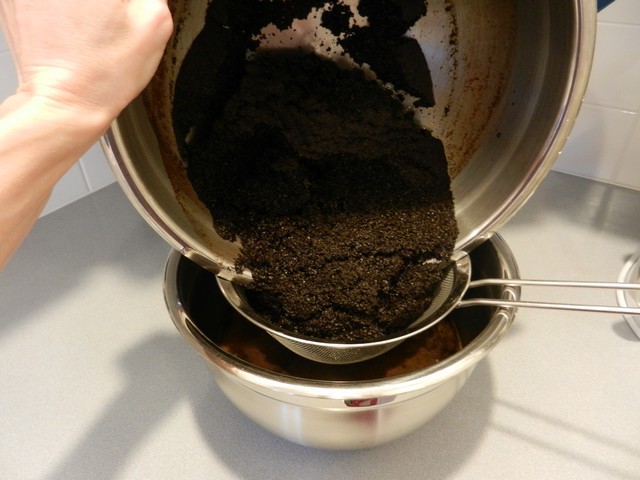
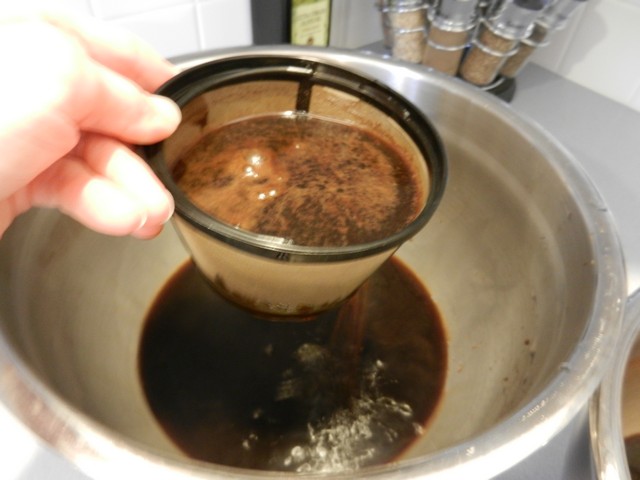
This is the coffee concentrate, though it needs to drain one more time through something a bit finer.
If you use it as is, you’ll find that there will be some grittiness to it. The concentrate will be more smooth if you let it go through a super fine strainer of some kind. I use a reusable coffee maker basket. In the beginning, it goes right through, nice and easy. And the coarser you grind the coffee, the easier it will be to drain it now.
After a little bit, the fine solids that are still in the concentrate starts to gather and will slow the draining.
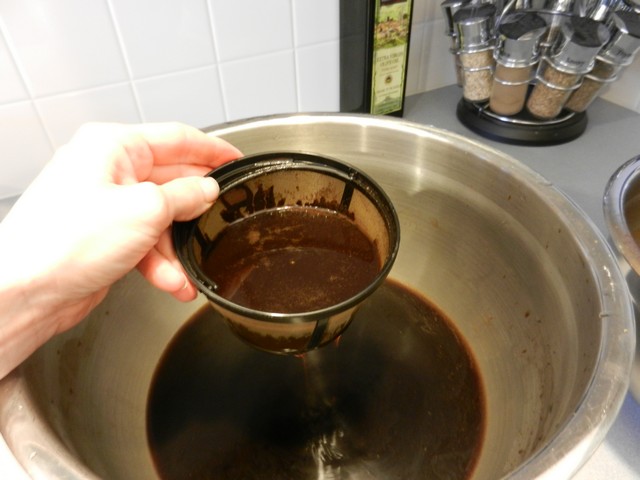
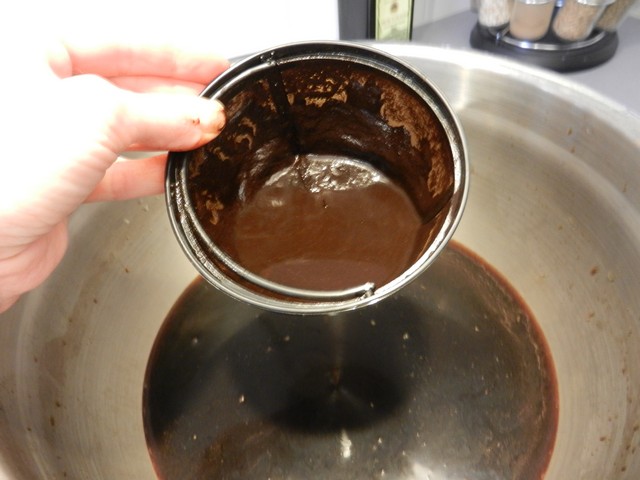
You can see it caking up in the basket. I use a spoon to push it around to get the coffee to continue to drain. When it looks like the picture below, the leftover is getting thick and pudding-like. It barely drips and this is when I decide I’m done. I dump it with the rest of the used coffee grounds.
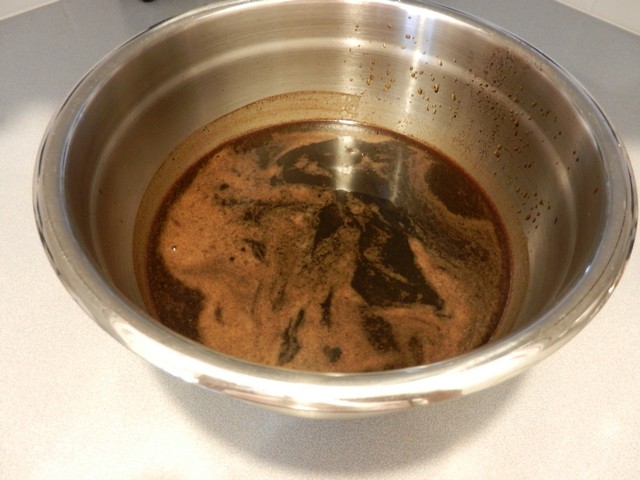
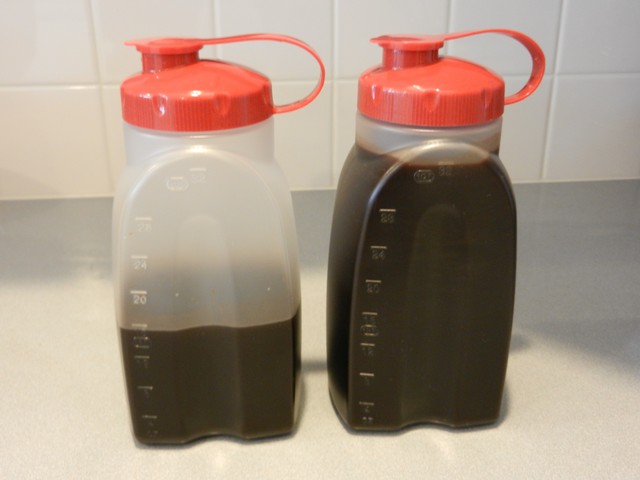
I pour my concentrate into two quart-size pitchers with lids for easy pouring.
I ended up with about 1 1/2 quart of concentrate out of my 1 Lb of coffee grounds and 10 c (2 1/2 qt.) water.
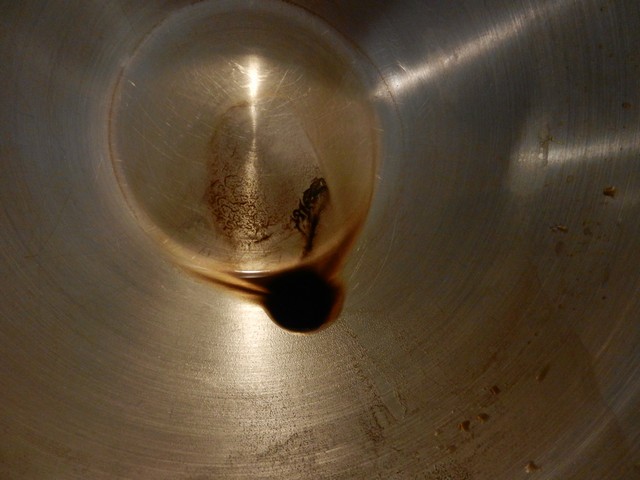
After having emptied the bowl into the pitchers, this is what’s left in the bowl: (As you can see, this is strong, powerful stuff.)
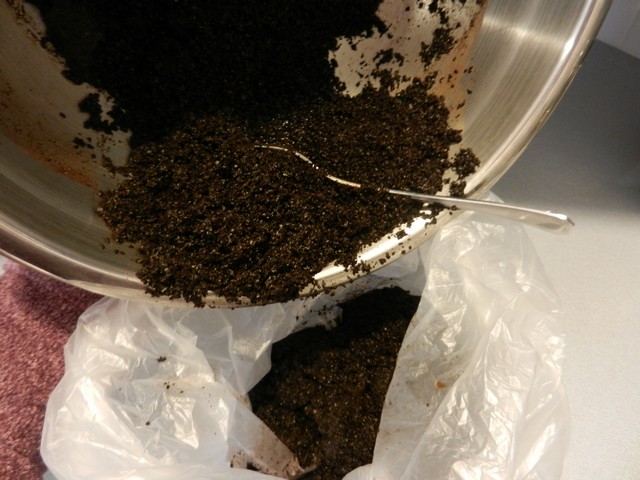
The used coffee grounds go into a bag, then into my compost. I wouldn’t dream of throwing it out, as it makes excellent fertilizer! Still lots of nutrition left, plus it gives some acidity to the soil, which most plants like. The mild acidity helps them absorb nutrition more easily.
Ready for composting:
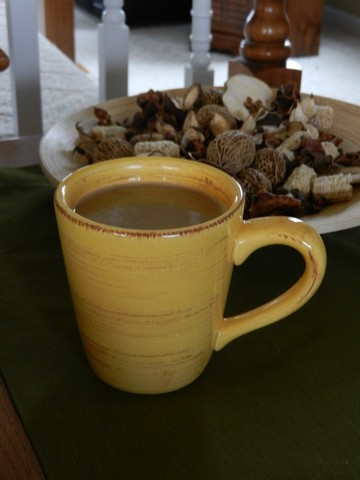
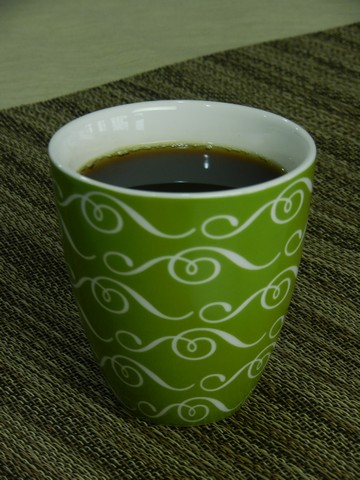
Generally you’ll use about 1 part of concentrate to 3 or 4 parts of water for regular coffee. It can be heated it in the microwave, or you can use it for iced coffee. Isn’t this a cute looking mug? It was given to me as a gift. Thank you, Lisa!!
You can also use this concentrate to make a variety of lattes or other coffee drinks. This is one of my favorites:
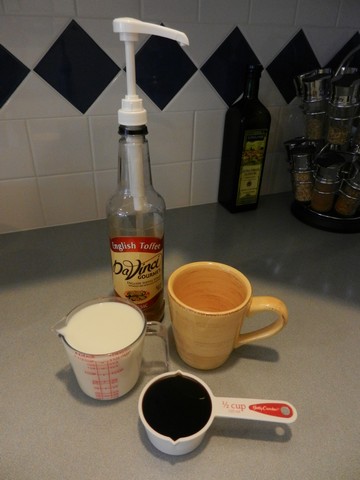
1/3 c of cold-brewed coffee concentrate, 2/3 c of milk, 2 pumps of DaVinci Syrup or Torani Syrup (although in this picture I made an extra large portion). Microwave until hot.

Other times I use honey, brown sugar, coconut extract or other flavors. Sometimes I’ll use half milk, half water. You can also add cocoa or cinnamon, or even flavored coffee creamers. There’s lot of room for variation! Making cold brewed coffee concentrate is very easy and fun to do, and tastes wonderful without the bitterness from over heating. It also gives you endless opportunities in making your own specialty coffee drinks while saving you a lot of money at the same time! Please comment and rate this recipe if you try it; option is found immediately under the recipe. Thank you!!
- Cold Brewed Coffee Concentrate
- 1 Lb coffee grounds, percolator grind
- 10-12 c cold water
- Directions:
- Mix up in a stainless steel bowl.
- Cover, let sit for 12-18 hours altogether.
- Stir, drain through a stainless steel colander, then through a fine filter or sieve.
- A French press may be used as well.
- Refrigerate for up to a month.
- To prepare basic coffee, mix together ¼ c of coffee concentrate with ¾ c hot or cold water.
- Or use equal parts of coffee and water, then pour over ice for iced coffee.
- To use for coffee drinks:
- Mix together ⅓ c of coffee concentrate with ⅔ c milk, or part cream or water.
- Add 2 tsp white or brown sugar, flavored syrup, or other flavors such as cinnamon, coconut extract or vanilla.
- Heat in the microwave oven for 1½ minutes.
Thanks for sharing this! It’s wonderfully delicious!
This sounds absolutely delicious and it’s the first recipe I’ve found for cold brewed coffee. Thanks for sharing!
Mary
Thanks for your comment! I’m so glad you found it interesting, and I hope you’ll love it as much as I do!
Hi Terese-
I’m going to try this today! I’ve made cold brew coffee but it wasn’t a concentrate & made way too much….making it into a concentrate makes sense for storage purposes! I like your blog 🙂 – Heidi
Thank you, Heidi! So nice to see you here! And yes, the concentrate is very nice, I use it almost every day for my morning coffee.
If you find your self only having regular coffee I found straining through a fresh nylon works …sounds strange but is very cost effective and works like a charm
Cool! Never heard of that, but hey, if it works, then that’s great! 🙂
Hi,
I’d like to try your recipe but I’m working with metric measurements and don’t know what “c” represents. Is it cups?
Thank you,
Yes, c is the same as cups. If you look at the page called “Conversions to Metric” at the top of my page, you will find translations and conversion help. Hope that helps!
I’ve been making cold brew for about a year but use a French Press to simplify the process of separating the grounds from the concentrate. The concentrate is then transfered a large, sealed, pouring jar which I store in the fridge.
To stay ahead of the game, I then pour a the following days requirements into a few 1 cup measuring cups and also store them in the fridge until needed. The handy premeasuried portions makes for quick preparations for busy mornings but the process of transfering from one container to another, also adds a benefit in that the solution goes through a couple of decanting processes, if one is careful to gently transfer without stirring up the bottoms of the solution too much.
The French Press method combined with the double decanting process, insures a coffee ground residue free cup of coffee.
Wow! What great ideas! Thank you so much for sharing with the rest of us!
Thanks Terese,
Most people who like cold brewing seem to like simplicity, so here’s another idea for making a simple ‘latte style’ coffee from your cold brew concentrate:
Get yourself a “Manual Self Turning Stainless Steel Miracle Push Magic Whisk”. I got mine at my local kitchen supply store but this link will at least give you a picture of the device:
http://www.ebay.com/itm/Manual-Self-Turning-Stainless-Steel-Miracle-Push-Magic-Whisk-Mixer-Egg-beater/161550521875?rt=nc
My manual whisker fit’s into a standard size coffee mug. I put just 5 teaspoons of table cream (& 1 tsp. of maple syrup), into a mug and refrigerate till chilled (chilling the mug and contents for 1/2 hour or so beforehand, yields a more frothy result). Remove the chilled mug from fridge and insert the wiping tool and push down about 40 strokes to yield quite a nice froth from just simple table cream. Top up the mug with some preheated coffee concentrate and you’ve got yourself a half decent latte.
Thanks again; another great idea!
My day won’t start without a cup of good coffee and you should get the good coffee maker for that! One of my favortites is that OXO On Barista Brain Coffee Maker that copies the pour over method of brewing. It is programmable and easy to contol along with a freshness indicator. How cool is that? See more reviews bout it on topproducts.com. It’s the best website to read unbiased reviews from.
Thank you, I’ve been wanting understand cold coffee brewing for a year or two. Your method makes the most sense to me.
Thank you, that’s nice to hear! I’m glad you found this information helpful!